Lexmark S415 Support Question
Lexmark S415 Support Question
Find answers below for this question about Lexmark S415.Need a Lexmark S415 manual? We have 2 online manuals for this item!
Question posted by henrymhar on October 4th, 2014
How To Scan Wireless With Lexmark S415 On Mac
Current Answers
Answer #1: Posted by BusterDoogen on October 4th, 2014 6:52 AM

Member since:
October 30th, 2011 Points: 28,565,407

I hope this is helpful to you!
Please respond to my effort to provide you with the best possible solution by using the "Acceptable Solution" and/or the "Helpful" buttons when the answer has proven to be helpful. Please feel free to submit further info for your question, if a solution was not provided. I appreciate the opportunity to serve you!
Answer #2: Posted by marklega on October 4th, 2014 6:59 AM

Member since:
September 27th, 2014 Points: 33,490
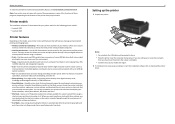
2-Connect the printer locally via USB when prompted during the installation and proceed to Step 4. If you want to connect via wireless or ethernet, proceed to Step 3.
3-
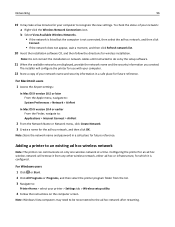
Connect the printer to your network, either wireless or ethernet. Once your printer is connected to your network, a Network Setup Page will be printed automatically. Get the printer IP address. The IP address should have four octets in this format xxx.xxx.xxx.xxx; where xxx is any number and one octet is separated by a period (.). Get the first three octets of your printer IP address followed by an asterisk (*) as the fourth octet. You need to add this to the proxy settings. The value you will enter will be in this format: xxx.xxx.xxx.* .
Go to System Preferences and click the Network icon. This should launch the Network window. Go to the Proxies tab. You should see a textbox for Bypass proxy settings for these Hosts & Domains. Enter the first three octets of your printer IP address followed by an asterisk (*) as the fourth octet, and enter this on the textbox.
Example:
If your printer IP is 5.16.81.6, add 5.16.81.* on the textbox under Bypass proxy settings for these Hosts & Domains.
Proceed to Step 4.
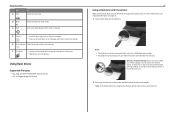
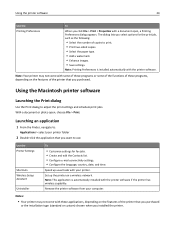
4-Open Image Capture from the Applications folder.
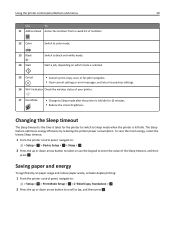
5-Enable the option Allow scanning to this Mac
6-From printer panel, select Scan.
7-Select Computer under Choose Scan Destination.
8-Go to Choose Computer and select the computer to where you want the scanned output saved.
9-Choose the file type for the document you want to scan.
10-Select the Start button on the panel to scan from the printer.
11-Once the scan job is completed from the printer, a Finder window will be launched on the computer where the scanned document is saved. The scan output must either be a document in tiff format, or a PDF document in pdfformat, or a photo in jpg format depending on the Scan settings
Related Lexmark S415 Manual Pages