Get support for Lenovo G580

Lenovo G580 Support Question

Lenovo G580 Support Question

Find answers below for this question about Lenovo G580.
Need a Lenovo G580 manual? We have 1 online manual for this item!
Question posted by Anonymous-103081 on March 15th, 2013

Wifi On And Off Switch Where Is It On My Lenovo G580

location of wifi on and off switch on lenovo g580

Current Answers

There are currently no answers that have been posted for this question.
Be the first to post an answer!

Remember that you can earn up to 1,100 points for every answer you submit. The better the quality of your answer, the better chance it has to be accepted.

Related Lenovo G580 Manual Pages

User Guide - Page 1

Lenovo G480/G485/ G580/G585/G780 User Guide V1.0 Read the safety notices and important tips in the included manuals before using your computer.
User Guide - Page 2

...operations may not apply to you. • The features described in this guide are for Lenovo G580 unless otherwise stated. • The illustrations in this manual are common to most models. ... using Windows® 7. Please refer to the actual product. • To learn more about Lenovo Applications, go to restrictions set forth in Contract No. If you are using other operating systems...
User Guide - Page 6

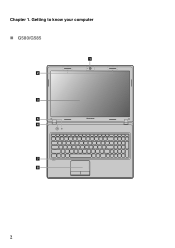
Getting to know your computer „ G580/G585 1 2 3 5 4 7 8 2 Chapter 1.
User Guide - Page 9

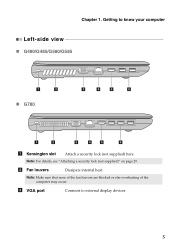
... fan louvers are blocked or else overheating of the computer may occur. c VGA port Connects to know your computer Left-side view „ G480/G485/G580/G585 1 2 „ G780 3 4 5 6 1 2 3 4 5 6 a Kensington slot Attach a security lock (not supplied) here. Getting to external display devices. 5 b Fan louvers Dissipate internal heat. Note: For details, see...
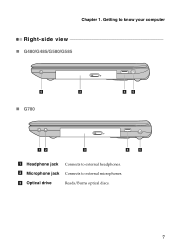
User Guide - Page 11

c Optical drive Reads/Burns optical discs. 7 Getting to know your computer Right-side view „ G480/G485/G580/G585 6 3 „ G780 45 12 3 4 5 a Headphone jack Connects to external microphones. b Microphone jack Connects to external headphones. Chapter 1.
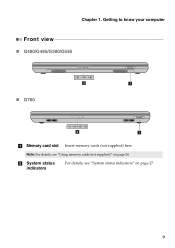
User Guide - Page 13

Note: For details, see "System status indicators" on page 24. Getting to know your computer Front view „ G480/G485/G580/G585 „ G780 2 1 2 1 a Memory card slot Insert memory cards (not supplied) here. Chapter 1. b System status indicators For details, see "Using memory cards (not supplied)" on page 27. 9
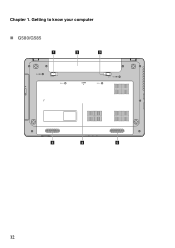
User Guide - Page 16

Chapter 1. Getting to know your computer „ G580/G585 1 2 3 5 4 5 12
User Guide - Page 23

... standards. 19 The battery pack contains a small amount of time, or if you need to Lenovo for an extended period of harmful substances. To avoid possible injury and detriment to the environment, ...pay attention to the following points: • Replace only with a battery of the type recommended by Lenovo. • Keep the battery pack away from fire. • Do not expose the battery pack to...
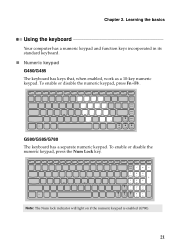
User Guide - Page 25

... that, when enabled, work as a 10-key numeric keypad. Note: The Num lock indicator will light on if the numeric keypad is enabled (G780). 21 G580/G585/G780 The keyboard has a separate numeric keypad. Chapter 2. To enable or disable the numeric keypad, press the Num Lock key. To enable or disable...
User Guide - Page 26

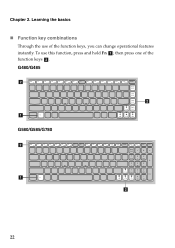
Chapter 2. To use of the function keys b . G480/G485 b b a G580/G585/G780 b a b 22 Learning the basics „ Function key combinations Through the use this function, press and hold Fn a ; then press one of the function keys, you can change operational features instantly.
User Guide - Page 27

... F8 (G480/G485): Enable/Disable the numeric keypad. Fn Increase/Decrease display brightness. Fn + Insert (G580/G585/ G780): Enable/Disable the scroll lock. Fn + F1: Enter sleep mode. Fn + F5:...(G480/G485): Activate the insert function. Fn + F4: Open the interface for the display device switch to select this notebook or an external display. Fn + End: Activate the break function. Fn ...
User Guide - Page 31

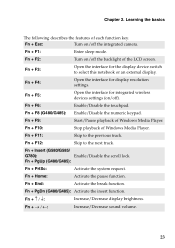
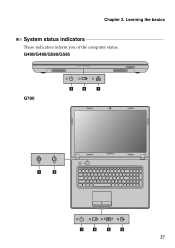
Chapter 2. Learning the basics System status indicators These indicators inform you of the computer status. G480/G485/G580/G585 G780 3 4 1 1 2 3 4 5 6 27
User Guide - Page 33

...Attaching a security lock (not supplied) You can attach a security lock to your facial image. Lenovo offers no comment judgement or warranty regarding the function, quality or performance of locking devices and ...the instructions shipped with this function when you want to activate VeriFace for the location of your permission. If you log on VeriFace, see the software help protect...
User Guide - Page 34

...-definition movie playback or a 3D game, the image-rendering task is a GPU switching mechanism which automatically switches the active GPU to seven alphanumeric characters in the BIOS setup utility. Chapter 2. Learning...perform image-rendering tasks. Note: To enter BIOS setup utility, press F2 when the Lenovo logo appears on the computer. Note: This password can be used by Optimus to the...
User Guide - Page 39

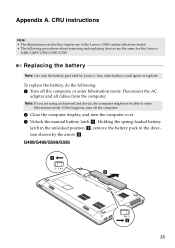
... following procedures about removing and replacing devices are the same for the Lenovo G480/G485/G580/G585/G780. If this chapter are using an ExpressCard device, the computer ...provided by the arrow c . Any other battery could ignite or explode. Note: If you are of the Lenovo G580, unless otherwise stated. • The following : 1 Turn off the computer. 2 Close the computer display,...
User Guide - Page 41

... mode, or in hibernation mode. 37 Appendix A. CRU instructions Replacing the hard disk drive You can cause damage and permanent loss of your reseller or Lenovo marketing representative. Note: • Replace the hard disk drive only if you upgrade it or have it to the cover of the hard disk drive...
User Guide - Page 44

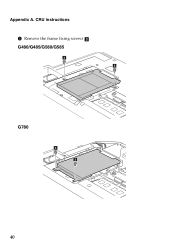
G480/G485/G580/G585 3 3 G780 3 3 40 Appendix A. CRU instructions 5 Remove the frame fixing screws c .
User Guide - Page 45

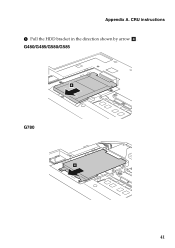
Appendix A. G480/G485/G580/G585 4 G780 4 41 CRU instructions 6 Pull the HDD bracket in the direction shown by arrow d.
User Guide - Page 46

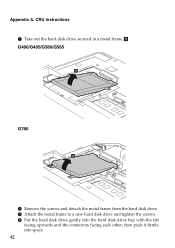
then push it firmly into the hard disk drive bay with the tab facing upwards and the connectors facing each other; Appendix A. G480/G485/G580/G585 5 G780 5 8 Remove the screws and detach the metal frame from the hard disk drive. 9 Attach the metal frame to a new hard disk drive and ...
User Guide - Page 54

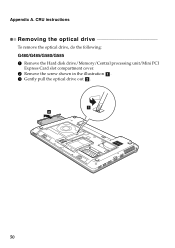
Appendix A. CRU instructions Removing the optical drive To remove the optical drive, do the following: G480/G485/G580/G585 1 Remove the Hard disk drive/Memory/Central processing unit/Mini PCI Express Card slot compartment cover. 2 Remove the screw shown in the illustration a . 3 Gently pull the optical drive out b . 1 2 50

Similar Questions

Lenovo Ideapad P400 Touch Wifi Switch
How yo turn on wifi from my keyboard because it got turned off accidentally
(Posted by saminyasar321 9 years ago)
Ask a New Question
Use the box below to post a new question about this Lenovo product .
Points & Prizes
  • You can earn points for nearly everything you do on HelpOwl.com
  • You can trade in those points for gift cards at leading retailers such as Amazon.com and Walmart
  • It's that simple!
See How it Works
Create a Free Account

Lenovo Manuals

Find free Lenovo G580 manuals and user guides available at ManualOwl.com. Try out our unique manual viewer allowing you to interact with manuals from directly within your browser!

Lenovo Reviews

View thousands of Lenovo user reviews and customer ratings available at ReviewOwl.com.

Contact Information

Complete Lenovo customer service contact information including steps to reach representatives, hours of operation, customer support links and more from ContactHelp.com.

Scoreboard Ratings

See detailed Lenovo customer service rankings, employee comments and much more from our sister site.

Lenovo Recalls

Find comprehensive Lenovo recall information updated hourly on RecallOwl.com.