Kyocera TASKalfa 250ci Support Question
Kyocera TASKalfa 250ci Support Question
Find answers below for this question about Kyocera TASKalfa 250ci.Need a Kyocera TASKalfa 250ci manual? We have 24 online manuals for this item!
Question posted by CollinsEngr on July 27th, 2011
How To Setup Scanning On Taskalfa 300ci Change Email From Scan Subject Line
The person who posted this question about this Kyocera product did not include a detailed explanation. Please use the "Request More Information" button to the right if more details would help you to answer this question.
Current Answers
Related Kyocera TASKalfa 250ci Manual Pages
KM-NET ADMIN Operation Guide for Ver 2.0 - Page 31
... name.
The following items: Add/Replace Background Add a map background or change the current one.
Map View is unavailable for groups with more than 250 devices, the initial map view displays all the devices in that group as label properties. Device Icon Setup Sets icon sizes as well as icons against a white background. KMnet Admin...
KM-NET ADMIN Operation Guide for Ver 2.0 - Page 33
...case, a dialog box appears, and you can change the list order. Popup Properties Descriptive text that appears as the background image view size changes. Note: The Hide icons for all icons ...move an icon into the map viewer, the printing device icons appear in the other group.
Depending on the toolbar.
2 In the Device Icon Setup dialog box, Icon Size list, select the desired ...
KM-NET ADMIN Operation Guide for Ver 2.0 - Page 53
... add the items to the Selected Alerts list.You can also change the list order.
4 Click Submit.
Device Manager
4 Select items in the Available Alerts list and use ...properties in the subject line of pages printed.
Removing Custom Properties
You can select custom printing device properties to set the intervals for unresponsive devices, or disconnected devices.
Intervals are ...
KM-NET ADMIN Operation Guide for Ver 2.0 - Page 64
... the following methods:
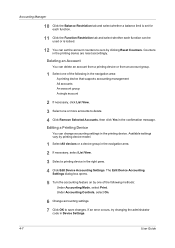
Under Accounting Mode, select Print. Available settings vary by printing device model.
1 Select All devices or a device group in the navigation area. 2 If necessary, select List View. 3 Select a printing device in Device Settings.
4-7
User Guide Under Accounting Controls, select On.
6 Change accounting settings. 7 Click OK to zero by one or more accounts to...
KM-NET Viewer Operation Guide Rev-5.2-2010.10 - Page 45
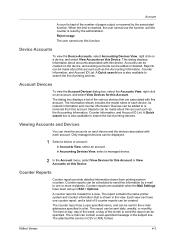
...of printing devices. Viewing Accounts and Devices
You can be specified. A counter report is kept of the number of pages output or scanned by e-mail to send this Device. The...mail can be created on this device.
Reports can contain a user-specified message in the subject line. KMnet Viewer
4-3 Account Devices
To view the Account Devices dialog box, select the Accounts View...
Kyocera Command Center Operation Guide Rev 6.3 - Page 25
...2 (Medium), and 3 (High).
When turned On, the encryption algorithm that is 100%. The string will be scanned. The default setting is selected by Advanced > Security > Secure Protocols on the FTP page. Original Orientation Switches between... the file quality mode (1 [Low] to 5 [High]) in the subject line as follows: Enter one of the items displayed on page 3-51 is set to be used .
Kyocera Command Center Operation Guide Rev 6.3 - Page 56
... strings starting with the printing system. Recipient Address
The E-mail address of maintenance information reports. Subject You can confirm the groups to use . The string will be checked.
3 Click Delete....
4 Click Delete when the desired groups are used when FeliCa is selected in the subject line as follows: Enter one recipient then the addresses should be separated by which the machine...
Kyocera Command Center Operation Guide Rev 6.3 - Page 57
... Number • %etheraddr = MAC Address
SSFC Job Log Subject Defines the Job Log Notification information reports only when you log in the subject line as above. (This menu available when an optional IC-card...clicking the Send button to immediately send a report. COMMAND CENTER
3-50 Job Log Subject You can include the same information as follows: Enter one recipient then the addresses ...
250ci/300ci/400ci/500ci/552ci Operation Guide Rev-1 - Page 31
... for reference.
Press the Start key. For more information refer to Sleep and Auto Sleep on the touch panel.
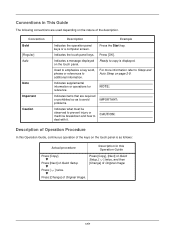
Press [Copy], [Next] of Quick Setup, [ ] twice, and then [Change] of the description. Convention Bold [Regular] Italic
Note Important Caution
Description
Example
Indicates the operation panel keys or a computer screen.
Conventions in this...
250ci/300ci/400ci/500ci/552ci Operation Guide Rev-1 - Page 118
...Next] of Quick Setup Registration,
and then [Change] of Original Image.
3-44
Preview
Auto
Paper Selection
2-sided >>2-sided
Duplex
100% Zoom
2 in 1 Combine
Quick Setup Status
Org./Paper...; Original Orientation • Original Image • Original Size • Zoom • Continuous Scan • Storing Size
Sending From Box
Printing From Box
1: File Format 2: Delete after Transmitted...
250ci/300ci/400ci/500ci/552ci Operation Guide Rev-1 - Page 271
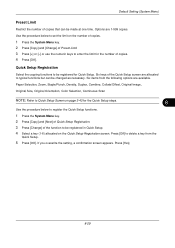
... copies that can be changed as necessary. If you overwrite the setting, a confirmation screen appears. Use the procedure below to be made at one time. Paper Selection, Zoom, Staple/Punch, Density, Duplex, Combine, Collate/Offset, Original Image, Original Size, Original Orientation, Color Selection, Continuous Scan
NOTE: Refer to Quick Setup Screen on the...
250ci/300ci/400ci/500ci/552ci Operation Guide Rev-1 - Page 272

... Resolution, Color Selection, Zoom, Continuous Scan
Use the procedure below shows the available settings. Press [Off] to Confirmation Screen of destinations. The table below to register the Quick Setup functions.
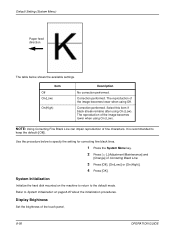
1 Press the System Menu key. 2 Press [Send] and [Next] of Quick Setup Registration. 3 Press [Change] of the Quick Setup screen are available.
Six keys of...
250ci/300ci/400ci/500ci/552ci Operation Guide Rev-1 - Page 288
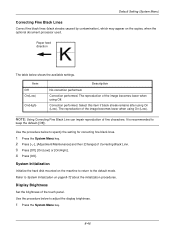
Paper feed direction
The table below to the default mode.
It is recommended to specify the setting for correcting fine black lines.
1 Press the System Menu key. 2 Press [ ], [Adjustment/Maintenance] and then [Change] of the image becomes lower when using On (Low). System Initialization
Initialize the hard disk mounted on page 8-72 about...
250ci/300ci/400ci/500ci/552ci Operation Guide Rev-1 - Page 435
Search key 1-3, 3-3 Quick Setup Screen 3-43
Changing Registration 3-44, 8-29, 8-30, 8-33
R
RA (Stateless) Appendix-30 Raw Port
Protocol ...Reserve Next Priority 8-28 Resolution Appendix-21 Restarting the System 8-72
S
Safety Conventions i SAFETY OF LASER BEAM (USA) xv Scan Resolution 5-18
Default settings 8-17 Scanner Cleaning 8-53, 8-54 Secure Protocol 8-77 Send
File Format 5-12 Image Quality 5-16...
500ci/400ci/300ci/250ci Operation Guide Rev-1 - Page 32

... Press [Copy], [Next] of Quick Setup, [ ] twice, and then [Change] of Original Image.
Description of Operation Procedure
In this Operation Guide, continuous operation of the keys on the touch panel is as follows:
Actual procedure
Description in this Operation Guide
Press [Copy].
Press [Next] of Quick Setup.
Press [ ] twice.
Press...
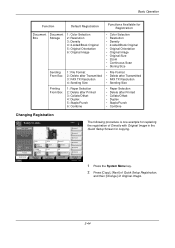
500ci/400ci/300ci/250ci Operation Guide Rev-1 - Page 123
...Basic Operation
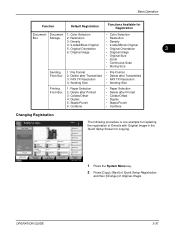
Function
Default Registration
Functions Available for copying.
1 Press the System Menu key. 2 Press [Copy], [Next] of Quick Setup Registration,
and then [Change] of Density with Original Image in the Quick Setup Screen for Registration
Document Document 1: Color Selection
• Color Selection
Box
Storage 2: Resolution
• Resolution
3: Density
• Density...
500ci/400ci/300ci/250ci Operation Guide Rev-1 - Page 302

...; File Format • Density • Original Image • Scan Resolution • FAX TX Resolution • Color Selection • Zoom • Continuous Scan
Use the procedure below to register the Quick Setup functions.
1 Press the System Menu key. 2 Press [Send] and [Next] of Quick Setup
Registration.
3 Press [Change] of the function to be registered for Quick...
500ci/400ci/300ci/250ci Operation Guide Rev-1 - Page 320
... impair reproduction of the image becomes lower when using On (Low).
Refer to specify the setting for correcting fine black lines.
1 Press the System Menu key. 2 Press [ ], [Adjustment/Maintenance] and
[Change] of the touch panel.
8-56
OPERATION GUIDE System Initialization
Initialize the hard disk mounted on page 8-87 about the initialization procedures...
500ci/400ci/300ci/250ci Operation Guide Rev-1 - Page 483
Search key 1-3, 3-9 Quick Setup Screen 3-50
Changing Registration 3-51, 8-36, 8-38, 8-42
R
RA (Stateless) Appendix-31 Raw Port
Protocol Detail ... 8-34 Resolution Appendix-21, Appendix-22 Restarting the System 8-88
S
Safety Conventions i SAFETY OF LASER BEAM (USA) xvi Scan Resolution 5-21
Default settings 8-21 Scanner Cleaning 8-64, 8-65 Secure Protocol 8-96 Send
File Format 5-14 Image Quality 5-19...
500ci/400ci/300ci/250ci Printer Driver User Guide Rev 12.23.2010.9 - Page 2

... in this guide may differ depending on your printing device. Models supported by the KX printer driver
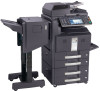
TASKalfa 250ci TASKalfa 300ci TASKalfa 400ci TASKalfa 500ci
© 2010 KYOCERA MITA Corporation Regarding Trademarks
... be held liable for any problems arising from the use of this guide is subject to change for improvement without notice. and/or other brand and product names herein are used...
Similar Questions

How To Setup Scan To Email On Kyocera Taskalfa 6500i
(Posted by iceplrwdaw 9 years ago)

How To Setup Scan File For Kyocera Taskalfa 300ci
(Posted by bheitco 10 years ago)

How To Setup Scanning On A Kyocera Taskalfa 250ci Kx
(Posted by roBre 10 years ago)
How To Setup Scanning On Taskalfa 620
How to setup scanning on TaskAlfa 620
How to setup scanning on TaskAlfa 620
(Posted by RichardLeszcz 12 years ago)