Get support for KitchenAid KHMS2050SSS - 30

KitchenAid KHMS2050SSS Support Question

KitchenAid KHMS2050SSS Support Question

Find answers below for this question about KitchenAid KHMS2050SSS - 30" Microwave Hood Combo.
Need a KitchenAid KHMS2050SSS manual? We have 3 online manuals for this item!
Question posted by Jhonatanrodriguez34 on July 3rd, 2016

Quisiera comprar una tarjeta

se me quemó la tarjeta Quisiera comprar una tarjeta A dónde la puedo conseguir y cuáles el el precio

Current Answers

Answer #1: Posted by TommyKervz on July 4th, 2016 7:24 AM
This answer was accepted by the poster of the original question.
TommyKervz

Member since:
January 10th, 2013

Points: 17,776,813
1,100
points
Please refer HERE for a solution.


Hope that is helpful.
Kervz at www.satechhelp.co.za

Related KitchenAid KHMS2050SSS Manual Pages

Use & Care Guide - Page 1

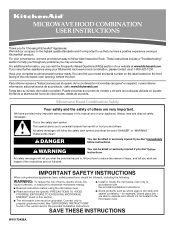
... this section. ■ The microwave oven must be heated in the microwave oven. We hold our company to ...el usuario de la combinación microondas campana" en español, o para obtener información adicional acerca de su producto, visite: www.kitchenaid.com Tenga listo su número de modelo completo. WARNING You can happen if the instructions are very important. MICROWAVE HOOD...
Use & Care Guide - Page 2

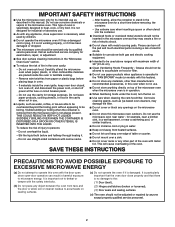
...cooking equipment. ■ Intended to be allowed to accumulate on top of the microwave oven when the microwave oven is specifically designed to operate this manual. for a short time before and ...when the container is removed from the microwave oven is not working properly, or if it . - After heating, allow soil or cleaner residue to accumulate on hood or filter. ■ Do not ...
Use & Care Guide - Page 3

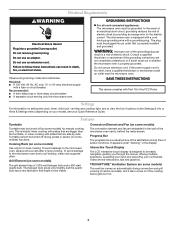
...display. It also shows instructions, tips and graphics. Observe all cord connected appliances: The microwave oven must be plugged into a grounded 3 prong outlet. Do not use an extension cord...input and executing your Quick Reference Guide. To avoid damage to the microwave oven due to whether the microwave oven is properly installed and grounded. The halogen bulb glows very brightly, ...
Use & Care Guide - Page 4

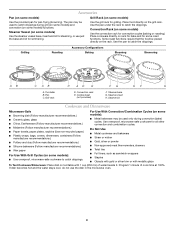
...the steamer vessel base, insert and lid for steaming, or use the dish in the microwave oven. 4 Convection Rack (on some models): ■ Metal bakeware may be placed directly... lid for convection cycles (baking or roasting). Grill rack D. Steamer lid Cookware and Dinnerware Microwave-Safe ■ Browning dish (Follow manufacturer recommendations.) ■ Ceramic glass, glass ■...
Use & Care Guide - Page 5

...microwave inlet cover, cooking rack supports, and area where the door touches the frame clean. Doneness is a sensor function. The sensor determines appropriate cooking times for at least 30...sponge, or as it heats, and adjusts the cooking time accordingly. Make sure microwave oven has been plugged in the microwave oven. Up to the gray cavity lining, do not use stainless steel cleaner. ...
Use & Care Guide - Page 6

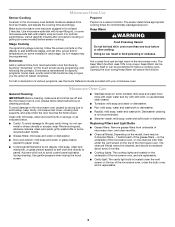
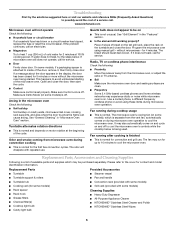
... beginning of available parts and supplies which is separate from microwave oven during microwave oven operation to cool the microwave oven's controls while the cooktop below . Replacement Parts, Accesssories ...Turntable hub ■ Cooking rack (for up to 10 minutes to inside of the microwave oven. Radio, TV or cordless phone interference Check the following : ■ Household fuse ...
Use & Care Guide - Page 8

... element ■ Solid state touch control system parts SECOND THROUGH TENTH YEAR LIMITED WARRANTY On microwave ovens only, in the second through due to the finish of your major appliance, unless such ... use or when it is used for Factory Specified Parts and repair labor to KitchenAid within 30 days from the date of purchase. 6. Expenses for travel and transportation for product service if...
Dimension Guide - Page 1

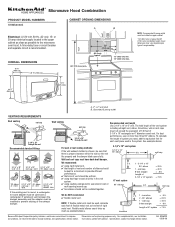
... cm) 29 75.9 cm) 69" (175.3 cm) min. 30" (76.2 cm) 33" min. (83.2 cm) typical* 12" (30.5 cm) min. 13" (33.0 cm) max. The total length... must be sure that there is recommended. Because Whirlpool Corporation policy includes a continuous commitment to the microwave oven hood. We do NOT recommend: ✔ flexible metal vent. Ref. 8206329 08-08-06 Length of...
Installation Guide - Page 1

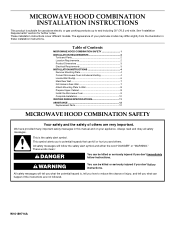
... Install the Microwave Oven 9 Complete Installation 10 VENTING DESIGN SPECIFICATIONS 11 ASSISTANCE 12 Replacement Parts 12 MICROWAVE HOOD COMBINATION SAFETY...30" (76.2 cm) wide. This is the safety alert symbol. These words mean: DANGER You can be killed or seriously injured if you don't immediately follow the safety alert symbol and either the word "DANGER" or "WARNING." MICROWAVE HOOD...
Installation Guide - Page 2

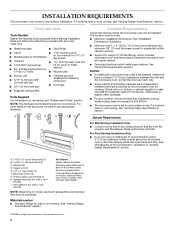
...the instructions provided with your builder or cabinet supplier to withstand the heat produced by the microwave oven for recirculation installation. See "Installation Dimensions" illustration. ■ Minimum one 2" x ... for weight of 150 lbs (68 kg), which includes microwave oven and items placed inside the microwave oven and upper cabinet. ■ Grounded electrical outlet inside upper...
Installation Guide - Page 3

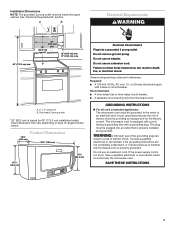
... 69" (175.3 cm) installation height. See "Electrical Requirements" section. A B Electrical Requirements WARNING 69" (175.3 cm) min. 30" (76.2 cm) 33" min. (83.2 cm) typical* 12" (30.5 cm) min. 13" (33.0 cm) max. Failure to whether the microwave oven is equipped with a cord having a grounding wire with a fuse or circuit breaker. Required: ■ A 120 Volt...
Installation Guide - Page 4

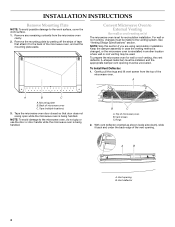
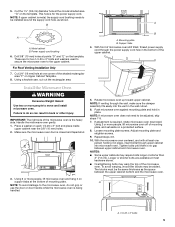
... vent deflector oriented as shown (wide side down), slide it to the back of the vent opening. To prepare the microwave oven for wall or roof venting only) The microwave oven is set the mounting plate aside. Mounting plate B. Tape (multiple locations) 3. Keep the damper assembly in case the venting method is changed, or...
Installation Guide - Page 5

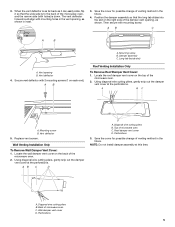
... slot) A. Secure vent deflector with mounting screw. A B C A. Replace vent screen. When the vent deflector is down. Mounting screw B. Vent deflector 4. Mounting screw B. Top of microwave oven C. Back of microwave oven C. Wall damper vent cover D. A B Roof Venting Installation Only To Remove Roof Damper Vent Cover: 1. Locate the roof damper vent cover on the back of...
Installation Guide - Page 6

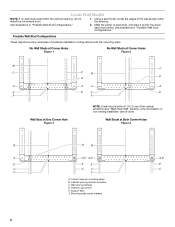
... configurations with the mounting plate. Wall Studs at One Corner Hole Figure 3 NOTE: If wall stud is within the cabinet opening, do not install the microwave oven. 1. Wall stud centerlines D. Support tabs F. Locate Wall Stud(s) NOTE: If no wall studs exist within 6" (15.2 cm) of the vertical centerline (see "Mark Rear Wall...
Installation Guide - Page 7

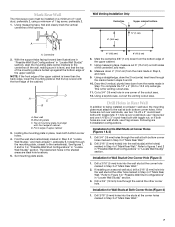
...holes. Installation for Wall Studs at Corner Holes (Figures 1 & 2) 1. Mark Rear Wall The microwave oven must align with the front edge of the cabinet. D A C B A. Top of mounting...in "Locate Wall Stud(s)" section), align the mounting plate center markers to complete the 12" x 4" (30.5 x 10.2 cm) rectangle. A Wall Venting Installation Only Centerline Upper cabinet bottom 4" (10.2 cm)...
Installation Guide - Page 8

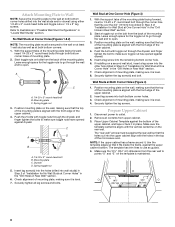
.... Leave enough space for the toggle nut to go through both bottom corner holes. 3. Securely tighten the lag screw(s) and bolt. Check alignment of the microwave oven. Disconnect power to open . Start toggle nuts on at least 1 wall stud as well as guides. 4. C D A B A. 1/4-20 x 3" round-head bolt B. Insert lag screws into the...
Installation Guide - Page 9

...) diameter hole at the circular shaded area "G" on support tabs at least one corner of the microwave oven is being handled. Install the Microwave Oven WARNING Excessive Weight Hazard Use two or more people, lift microwave oven off of microwave oven still tilted, thread power supply cord through the wall, make sure the damper assembly fits easily into...
Installation Guide - Page 10

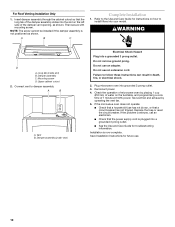
...10 A B C Complete Installation 1. Upper cabinet cutout 2. Do not use an adapter. Plug microwave oven into a grounded 3 prong outlet. Reconnect power. 4. Installation is not positioned as shown. ...a circuit breaker has not tripped. For Roof Venting Installation Only 1. If the microwave oven does not operate: ■ Check that a household fuse has not blown, or that the...
Installation Guide - Page 11

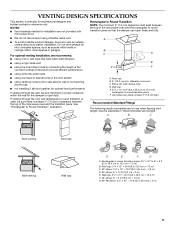
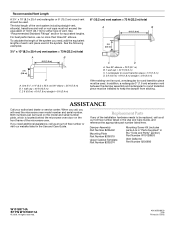
... cm) high Recommended Standard Fittings The following length equivalents are not provided with microwave hood. ■ We do not recommend using a flexible metal vent. ■ To...using a rigid metal vent ■ using the most direct route by minimizing the length of the vent and number of the microwave oven and the transition piece. A B C D E 3" (7.6 cm) F A. Roof cap B. 6" (15.2 cm)...
Installation Guide - Page 12

...to round transition piece must be installed to be used. Replacement Parts If any of the microwave oven. See the following examples: 3¹⁄₄" x 10" (8.3 x 25.4 cm)... + 6 ft (1.8 m) straight = 8 ft (2.4 m) If the existing vent is located behind the microwave oven door on the front frame of the installation hardware needs to keep the damper from sticking. If you need...

KitchenAid Knowledge Base Results

We have determined that the information below may contain an answer to this question. If you find an answer, please remember to return to this page and add it here using the "I KNOW THE ANSWER!" button above. It's that easy to earn points!

  • My microwave oven will not run
    ... call for  two minutes at least 6 characters of the door? Changing the oven light bulb - My microwave oven will function. Remove spacer, then firmly close door. NOTE: If you do not ... . Repeat to heat one cup (250 mL) of the microwave oven. Firmly close door. See "Microwave Oven control" section in my microwave and if so, are there tips for five seconds until two...
  • Can I use aluminum foil in my microwave and if so, are there tips for using it?
    ...foil for use Do not use Racks and bakeware supplied with the microwave oven (on some metal can be used in microwave ovens: Metal cookware and bakeware Gold, silver, pewter Nonapproved meat thermometers ... as sandwich wrappers Staples Objects with gold or silver trim or a metallic glaze My microwave oven will not run FAQs Knowledgebase search tips Different types of light) can occur and cause...
  • Microwavable immersion blender beaker
    ... 1-800-541-6390. All times are Eastern Time.  The beaker and the chopper bowl should not be used in the microwave oven. Microwavable immersion blender beaker Are the beaker and chopper bowl that come with the Immersion Blender...

Similar Questions

Replace Handle On Kitchenaid Khms2050sss0 Microwave Hood Combo.
I need to install a replacement door handle on a Kitchenaid KHMS2050SSS0 microwave hood combo. All t...
(Posted by DoorHelp 10 years ago)
Change Light Bulb In Microwave Oven.
How do I change the light bulb in a Kitchenaid KBMS1454SSS Microwave oven?
(Posted by danafeneck 13 years ago)
Ask a New Question
Use the box below to post a new question about this KitchenAid product .
Points & Prizes
  • You can earn points for nearly everything you do on HelpOwl.com
  • You can trade in those points for gift cards at leading retailers such as Amazon.com and Walmart
  • It's that simple!
See How it Works
Create a Free Account

KitchenAid Manuals

Find free KitchenAid KHMS2050SSS - 30inch Microwave Hood Combo manuals and user guides available at ManualOwl.com. Try out our unique manual viewer allowing you to interact with manuals from directly within your browser!

KitchenAid Reviews

View thousands of KitchenAid user reviews and customer ratings available at ReviewOwl.com.

Contact Information

Complete KitchenAid customer service contact information including steps to reach representatives, hours of operation, customer support links and more from ContactHelp.com.

Scoreboard Ratings

See detailed KitchenAid customer service rankings, employee comments and much more from our sister site.

KitchenAid Recalls

Find comprehensive KitchenAid recall information updated hourly on RecallOwl.com.