Get support for KitchenAid KHMS2050SSS - 30

KitchenAid KHMS2050SSS Support Question

KitchenAid KHMS2050SSS Support Question

Find answers below for this question about KitchenAid KHMS2050SSS - 30" Microwave Hood Combo.
Need a KitchenAid KHMS2050SSS manual? We have 3 online manuals for this item!
Question posted by Rtwalker on December 22nd, 2015

Microwave/hood Model Khms2050sss-2

Unit started beeping intermittently for a few days and then began to work only intermittently - screen goes blank(no error messages) - after opening door or unplugging. This how now progressed to not working at all.

Current Answers

There are currently no answers that have been posted for this question.
Be the first to post an answer!

Remember that you can earn up to 1,100 points for every answer you submit. The better the quality of your answer, the better chance it has to be accepted.

Related KitchenAid KHMS2050SSS Manual Pages

Use & Care Guide - Page 1

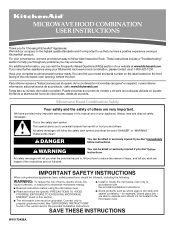
...producto, visite: www.kitchenaid.com Tenga listo su número de modelo completo. Microwave Hood Combination Safety Your safety and the safety of injury, and tell you what can...the microwave oven opening, behind the door. Have your model and serial number on the label located on your convenience, we have a positive experience owning a KitchenAid® product. All safety messages ...
Use & Care Guide - Page 2

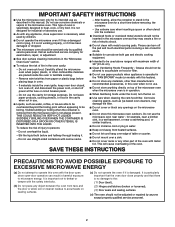
...; Do not cover racks or any openings on the microwave oven. ■ Do not store this feature). ■ Do not store any object between the oven front face and the door or allow the container to accumulate on . ■ Use care when cleaning the vent-hood filter. Carefully attend the microwave oven when paper, plastic, or other combustible...
Use & Care Guide - Page 3

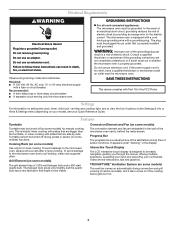
... instructions, tips and graphics. Do not use an extension cord. This is designed to view the list of the microwave oven cavity, behind the metal screen. Turntable cannot be turned off (on your model), see your commands. Interactive Touch Display The LCD interactive touch display is helpful when cooking with plates that are bigger...
Use & Care Guide - Page 4

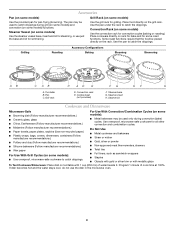
... the base and lid for simmering. Use the pan to catch drippings. Grill rack D. Steamer base G. Use ovenproof, microwave-safe cookware for steaming, or use the dish in the microwave oven. 4 Steamer Vessel (on some models) Use the steamer vessel base, insert and lid for all other convection and combination cycles. ■ Melamine (Follow...
Use & Care Guide - Page 5

... vent. For list or description of the microwave oven, and are off and the microwave oven is replaceable. 5 The charcoal filter(s) cannot be cleaned, and should be kept warm in the microwave oven. Stage Cooking If programming stage cooking, follow the screen prompts on the top of the grease filters - Opening the door during programing, and following the prompts...
Use & Care Guide - Page 6

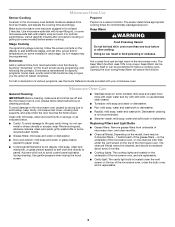
...normal for service. On some models, if a packaging spacer is attached to cool the microwave oven's controls while the cooktop below . Open and close door. See "Grill Element" in "Microwave Oven Care" section. without the microwave oven being used. If it , then firmly close the door. The microwave oven's cooling fan (on during microwave oven operation. Make sure Control Lock...
Use & Care Guide - Page 8

...model number and serial number on the label located on the upper or lower front facing of the microwave oven opening, behind the door. Service calls to the appliance. 8. If outside the 50 United... U.S.A. 461966100252 11/07 Printed in the United States or Canada and applies only when the major appliance is reported to KitchenAid within 30 days from the date of purchase. 6. Expenses...
Dimension Guide - Page 1

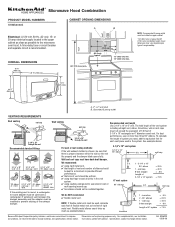
® Microwave Hood Combination PRODUCT MODEL NUMBERS KHMS2050S CABINET OPENING DIMENSIONS A ...46.4 cm) 29 75.9 cm) 69" (175.3 cm) min. 30" (76.2 cm) 33" min. (83.2 cm) typical* 12" (30.5 cm) min. 13" (33.0 cm) max. Flexible metal elbows... recommend: ✔ flexible metal vent. Specifications subject to the microwave oven hood. Ref. 8206329 08-08-06 or 20-amp electrical supply ...
Installation Guide - Page 1

... messages in these installation instructions. All safety messages will follow instructions. All safety messages will tell you what can kill or hurt you how to and including 30" (76.2 cm) wide. These installation instructions cover different models. The appearance of your particular model may differ slightly from the illustration in this manual and on your appliance. MICROWAVE HOOD...
Installation Guide - Page 2

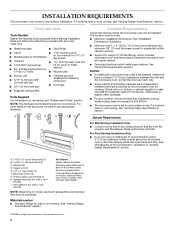
... the wall and the microwave oven, so that the door can open fully. ■ Some cabinet and building materials are not designed to withstand the heat produced by the microwave oven for 1/4" x 2" ...opening where the microwave oven will not discolor, delaminate or sustain other types of wall structures, be free of microwave oven) Aluminum grease filters Charcoal filters (Depending on model...
Installation Guide - Page 3

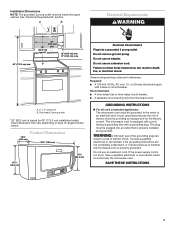
...15- Recommended: ■ A time-delay fuse or time-delay circuit breaker. ■ A separate circuit serving only this microwave oven. Do not use an extension cord. Exact dimension may vary depending on type of electric shock by providing an escape wire ...of electric shock. A B Electrical Requirements WARNING 69" (175.3 cm) min. 30" (76.2 cm) 33" min. (83.2 cm) typical* 12...
Installation Guide - Page 4

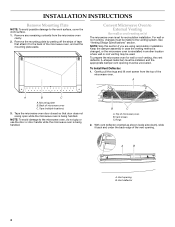
... door does not swing open while the microwave oven is set the mounting plate aside. For wall or roof venting, changes must be uncovered. Keep the damper assembly in another location where wall or roof venting may be made to the work surface, cover the work surface. 1. Gently pull the rings and lift vent screen from the microwave oven...
Installation Guide - Page 5

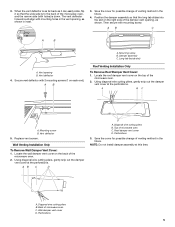
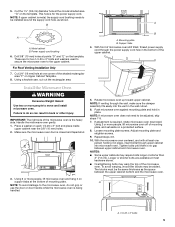
... tab slides into the slot on each end). A B C A B A. Mounting screw B. Vent opening , as shown in inset. 3. A B Roof Venting Installation Only To Remove Roof Damper Vent Cover:...Wall Damper Vent Cover: 1. Top of the microwave oven. 2. Diagonal wire cutting pliers B. Secure vent deflector with mounting screw. Replace vent screen. Using diagonal wire cutting pliers, gently snip ...
Installation Guide - Page 6

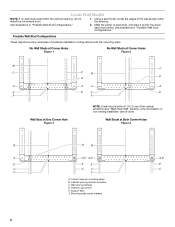
... Configurations." Wall Studs at One Corner Hole Figure 3 NOTE: If wall stud is within 6" (15.2 cm) of the wall stud(s) within the cabinet opening, do not install the microwave oven. 1. Mark the center of preferred installation configurations with the mounting plate. See illustrations in "Possible Wall Stud Configurations." 2. Wall stud centerlines D. Locate Wall...
Installation Guide - Page 7

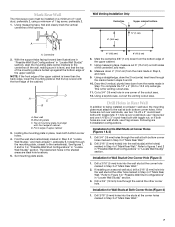
... Wall Stud(s)" section. Refer to complete the 12" x 4" (30.5 x 10.2 cm) rectangle. If installing on at least 1 ...plate is the venting cutout area. 11. Front edge of the opening. A Wall Venting Installation Only Centerline Upper cabinet bottom 4" (10... wall at both bottom corner holes. Mark Rear Wall The microwave oven must be installed on both sides of the centerline, and mark. ...
Installation Guide - Page 8

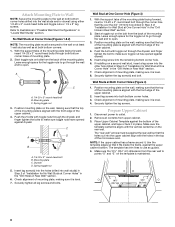
...Disconnect power to the wall on the rear wall. Start toggle nuts on bolts from the rear wall to make sure toggle nut has opened against drywall. 5. Mounting plate C. Check alignment of ...into the upper cabinet align with the vertical centerline on at both bottom corner holes of the microwave oven. The "rear wall" arrows must be against the rear wall so that fits over the...
Installation Guide - Page 9

... cord bushing 6. For Roof Venting Installation Only 7. Using a keyhole saw, cut out the rectangular area. Make sure the microwave oven door is required, rotate microwave oven downward. Tighten bolts until there is the heavy side. Push microwave oven against mounting plate and hold in the bottom of the upper cabinet. 5. Place a washer on the template. With front...
Installation Guide - Page 10

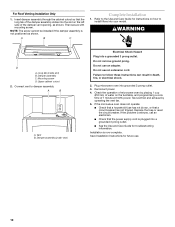
... fuse has not blown, or that the long tab of the damper vent opening, as shown. WARNING D A. Do not use an extension cord. Plug microwave oven into a grounded 3 prong outlet. Reconnect power. 4. Insert damper assembly through...breaker. Refer to install filters into your model. Damper assembly (under vent) Electrical Shock Hazard Plug into grounded 3 prong outlet. 3.
Installation Guide - Page 11

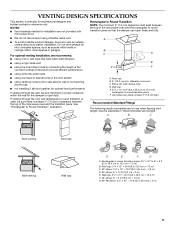
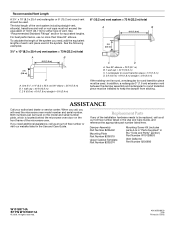
...not provided with microwave hood. ■ We do not recommend using caulking compound to seal exterior wall or roof opening around cap ■ not installing 2 elbows together, for optimal hood performance If ...extension piece, at least 3" (7.6 cm) of clearance between the top of the microwave oven and the rectangular to round transition piece so that there is proper clearance within walls...
Installation Guide - Page 12

... ft (6.1 m) B. 1 wall cap = 40 ft (12.2 m) C. 1 rectangular to round transition piece = 5 ft (1.5 m) D. 2 ft (0.6 m) + 6 ft (1.8 m) straight = 8 ft (2.4 m) If the existing vent is located behind the microwave oven door on the model and serial number plate, which is round, a rectangular to round transition piece must not exceed the equivalent of 140 ft (42.7 m) for equivalent lengths...

KitchenAid Knowledge Base Results

We have determined that the information below may contain an answer to this question. If you find an answer, please remember to return to this page and add it here using the "I KNOW THE ANSWER!" button above. It's that easy to earn points!

  • My microwave oven will not run
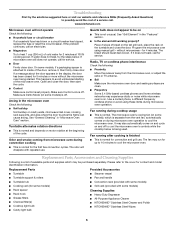
    ...microwave oven run? Remove spacer, then firmly close door. See "Microwave Oven control" section in my microwave and if so, are there tips for using it online by entering your model number. On some models...Changing the oven light bulb - Is the electronic oven control set ? Is the magnetron working properly? Touch and hold Cancel (on some models) or Start (on other models) for ...
  • Can I use aluminum foil in my microwave and if so, are there tips for using it?
    ...ties Foil liners such as sandwich wrappers Staples Objects with gold or silver trim or a metallic glaze My microwave oven will not run FAQs Knowledgebase search tips Different types of light) can occur and cause damage to touch ... object during cooking. Do not allow aluminum foil or metal to the microwave oven. Aluminum foil and some models), aluminum foil for use Do not use aluminum foil in...
  • Microwavable immersion blender beaker
    ... and chopper bowl that come with the Immersion Blender microwave safe? For further information the KitchenAid Customer eXperience Center is available 8am-8pm Monday-Friday and Saturday 10am-5pm Eastern Time at least 6 characters of your model number. The beaker and the chopper bowl should not be ...

Similar Questions

Replace Handle On Kitchenaid Khms2050sss0 Microwave Hood Combo.
I need to install a replacement door handle on a Kitchenaid KHMS2050SSS0 microwave hood combo. All t...
(Posted by DoorHelp 10 years ago)
How To Change The Light Bulb In Kitchenaid Microwave Oven Model Kemc378kss?
I need assistance in the process to remove and replace the light bulb in the microwave portion of th...
(Posted by chipnchatter 11 years ago)
Change Light Bulb In Microwave Oven.
How do I change the light bulb in a Kitchenaid KBMS1454SSS Microwave oven?
(Posted by danafeneck 13 years ago)
Ask a New Question
Use the box below to post a new question about this KitchenAid product .
Points & Prizes
  • You can earn points for nearly everything you do on HelpOwl.com
  • You can trade in those points for gift cards at leading retailers such as Amazon.com and Walmart
  • It's that simple!
See How it Works
Create a Free Account

KitchenAid Manuals

Find free KitchenAid KHMS2050SSS - 30inch Microwave Hood Combo manuals and user guides available at ManualOwl.com. Try out our unique manual viewer allowing you to interact with manuals from directly within your browser!

KitchenAid Reviews

View thousands of KitchenAid user reviews and customer ratings available at ReviewOwl.com.

Contact Information

Complete KitchenAid customer service contact information including steps to reach representatives, hours of operation, customer support links and more from ContactHelp.com.

Scoreboard Ratings

See detailed KitchenAid customer service rankings, employee comments and much more from our sister site.

KitchenAid Recalls

Find comprehensive KitchenAid recall information updated hourly on RecallOwl.com.