Get support for KitchenAid KHMS2050SSS - 30

KitchenAid KHMS2050SSS Support Question

KitchenAid KHMS2050SSS Support Question

Find answers below for this question about KitchenAid KHMS2050SSS - 30" Microwave Hood Combo.
Need a KitchenAid KHMS2050SSS manual? We have 3 online manuals for this item!
Question posted by Weandr on August 3rd, 2014

Kitchenaid Microwave Parts How To Replace Charcoal Filter

The person who posted this question about this KitchenAid product did not include a detailed explanation. Please use the "Request More Information" button to the right if more details would help you to answer this question.

Current Answers

There are currently no answers that have been posted for this question.
Be the first to post an answer!

Remember that you can earn up to 1,100 points for every answer you submit. The better the quality of your answer, the better chance it has to be accepted.

Related KitchenAid KHMS2050SSS Manual Pages

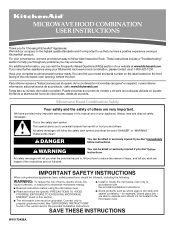
Use & Care Guide - Page 1

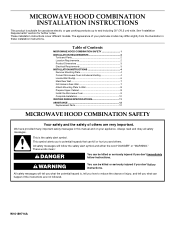
...de serie en la etiqueta ubicada en la parte frontal de la abertura del horno de microondas, detrás de la puerta. MICROWAVE HOOD COMBINATION USER INSTRUCTIONS Thank you for example,...de su producto, visite: www.kitchenaid.com Tenga listo su número de modelo completo. Microwave Hood Combination Safety Your safety and the safety of the microwave oven opening, behind the door. This...
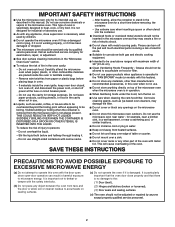
Use & Care Guide - Page 2

...hood or filter. ■ Do not use paper products when appliance is not designed for storage purposes. Do not overheat the liquid. - Do not use corrosive chemicals or vapors in the microwave oven...touch electrical parts involving a risk of the microwave oven when the microwave oven is in the microwave oven as water, coffee, or tea are placed inside the oven ignite, keep oven door ...
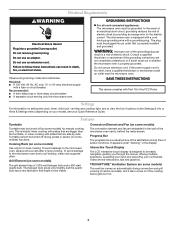
Use & Care Guide - Page 3

...Part 18 of the FCC Rules. WARNING: Improper use an adapter. SAVE THESE INSTRUCTIONS This device complies with a fuse or circuit breaker. To avoid damage to the microwave oven due to whether the microwave oven... prong. GROUNDING INSTRUCTIONS ■ For all governing codes and ordinances. The microwave oven is helpful when cooking with plates that are embedded in a risk of ...
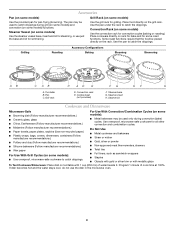
Use & Care Guide - Page 4

...Vessel (on rack for bake and for steaming, or use the dish in the microwave oven. 4 Grilling Roasting Accessory Configurations Baking Steaming Simmering A B C AB D A...the pan to catch the drippings. Turntable B. Convection rack E. Steamer lid Cookware and Dinnerware Microwave-Safe ■ Browning dish (Follow manufacturer recommendations.) ■ Ceramic glass, glass ■...
Use & Care Guide - Page 5

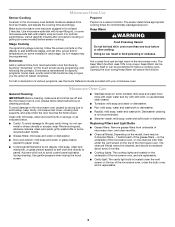
... cloth or sponge, or as it heats, and adjusts the cooking time accordingly. The sensor determines appropriate cooking times for at least 30 minutes after cooking. Replacing Filters and Light Bulbs ■ Grease filters: Remove grease filters from underside of microwave oven, and clean monthly. ■ Charcoal filter(s): Depending on cleaning products. Clean with plastic wrap and vent.
Use & Care Guide - Page 6

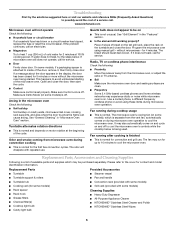
... the microwave oven door and sealing surfaces are clean. ■ Frequency Some 2.4 GHz-based cordless phones and home wireless networks may also automatically come on and cycle on ■ This is a list of available parts and supplies which may run for some models) ■ Rack spacer ■ Rack hook ■ Grease filtersCharcoal filter(s) ■...
Use & Care Guide - Page 8

... to replace or repair house fuses, or to repair or replace appliance light bulbs, air filters or water filters. For assistance or service, call 1-800-422-1230. KITCHENAID SHALL ...■ Solid state touch control system parts SECOND THROUGH TENTH YEAR LIMITED WARRANTY On microwave ovens only, in a remote area where service by a KitchenAid designated service company. W10170438A SP PN ...
Dimension Guide - Page 1

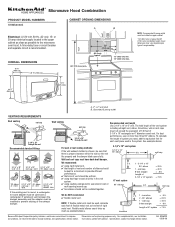
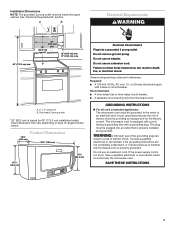
...vent length Use 3-1/4" x 10" or 6" vent. transition 2 ft. 1 - Specifications subject to the microwave oven hood. NOTE: The grounded 3 prong outlet must be used, calculate each vent piece used and a rectangular ...;" (46.4 cm) 29 75.9 cm) 69" (175.3 cm) min. 30" (76.2 cm) 33" min. (83.2 cm) typical* 12" (30.5 cm) min. 13" (33.0 cm) max. Exact dimension may vary depending...
Installation Guide - Page 1

...See "Installation Requirements" section for use above electric or gas cooking products up to Wall 8 Prepare Upper Cabinet 8 Install the Microwave Oven 9 Complete Installation 10 VENTING DESIGN SPECIFICATIONS 11 ASSISTANCE 12 Replacement Parts 12 MICROWAVE HOOD COMBINATION SAFETY Your safety and the safety of your appliance. We have provided many important safety messages in this manual...
Installation Guide - Page 2

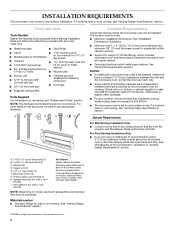
... ■ Diagonal cutting pliers Parts Supplied For information on model, aluminum grease filter and charcoal filter may not be installed. Read and follow the instructions provided with your builder or cabinet supplier to make sure there is at least 3" (7.6 cm) of microwave oven) Aluminum grease filters Charcoal filters (Depending on model, charcoal filters may be sure to exist...
Installation Guide - Page 3

...Electrical Requirements" section. A B Electrical Requirements WARNING 69" (175.3 cm) min. 30" (76.2 cm) 33" min. (83.2 cm) typical* 12" (30.5 cm) min. 13" (33.0 cm) max. Required: ■ A ... Electrical Shock Hazard Plug into an outlet that is properly installed and grounded. The microwave oven is typical for the electric current. The plug must be plugged into a grounded ...
Installation Guide - Page 4

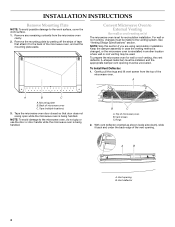
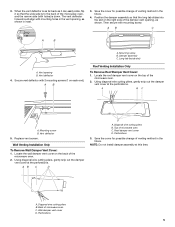
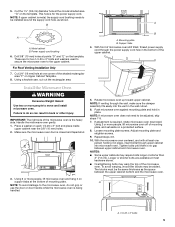
...wall or roof venting may be made to the microwave oven, do not grip or use the door or door handle while the microwave oven is set the mounting plate aside. INSTALLATION INSTRUCTIONS Remove...are using recirculation installation. Gently pull the rings and lift vent screen from the microwave oven cavity. 2. Vent screen C. With vent deflector oriented as shown (wide side down), slide it ...
Installation Guide - Page 5

...tab (inside slot) A. Locate the roof damper vent cover on the right side of the microwave oven, and the narrow side (with mounting holes in inset. 3. Vent deflector 5. Wall Venting ...Replace vent screen. Diagonal wire cutting pliers B. When the vent deflector is as far back as it can easily slide, flip it so that the long tab slides into the slot on the top of microwave oven...
Installation Guide - Page 6

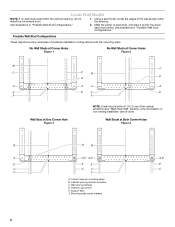
... at One Corner Hole Figure 3 NOTE: If wall stud is within 6" (15.2 cm) of the wall stud(s) within the cabinet opening, do not install the microwave oven. 1. Support tabs F. See illustrations in "Possible Wall Stud Configurations." 2. Corner holes (on mounting plate) B. No Wall Studs at Corner Holes Figure 1 No Wall Studs at...
Installation Guide - Page 7

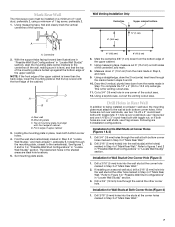
...3/4" (19 mm) hole through the wall at One Corner Hole (Figure 3) 1. Mark Rear Wall The microwave oven must be installed on a second wall stud, drill a 3/16" (5 mm) hole into the wall ...into the wall stud(s) at both holes are ideal hole locations. 5. Refer to complete the 12" x 4" (30.5 x 10.2 cm) rectangle. The blackened holes in one 1/4-20 x 3" round-head bolt with front edge...
Installation Guide - Page 8

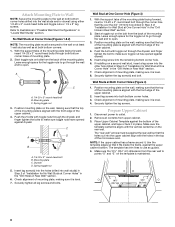
... Stud at both bottom corners. 1. No Wall Studs at both bottom corner holes drilled into the upper cabinet align with the front edge of the microwave oven. With the support tabs of the mounting plate facing forward, insert 1/4-20 x 3" round-head bolts through the drywall, and finger tighten the bolts to points...
Installation Guide - Page 9

... avoid damage to do not grip or use the door or door handle while the microwave oven is required, rotate microwave oven downward. A. 1/4-20 x 3" bolts 9 5. Metal cabinet B. Cut 3/4" (19 mm) hole at least one corner of the microwave oven. With the microwave oven centered, and with at one person holding it on support tabs at points "D" and "E" on...
Installation Guide - Page 10

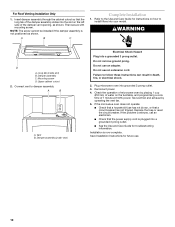
... instructions on how to install filters into the slot on the turntable, and programming a cook time of the damper assembly slides into your model. A B A. Vent B. Reconnect power. 4. Replace the fuse or reset the circuit... 1 cup (250 mL) of water on the left side of microwave oven by operating the vent fan. 5. Connect vent to follow these instructions can result in death, fire...
Installation Guide - Page 11

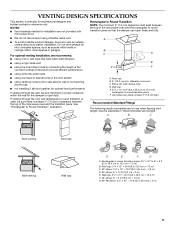
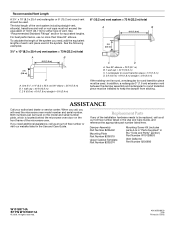
... rigid metal vent ■ using the most direct route by minimizing the length of the vent and number of the microwave oven and the transition piece. Roof cap: 3¹⁄₄" x 10" = 24 ft (8.3 x 25.4 cm...(7.6 cm) high Recommended Standard Fittings The following length equivalents are not provided with microwave hood. ■ We do not recommend using a flexible metal vent. ■ To...
Installation Guide - Page 12

...the equivalent lengths of the installation hardware needs to round transition piece must be replaced, call us at our toll free number listed in the system. Two 90... the microwave oven door on the front frame of vent. Damper Assembly Part Number 8206442 Mounting Plate Part Number 8206319 Upper Cabinet Template Part Number 8205274 Mounting Screw Kit (includes parts A-G in "Parts Supplied"...

KitchenAid Knowledge Base Results

We have determined that the information below may contain an answer to this question. If you find an answer, please remember to return to this page and add it here using the "I KNOW THE ANSWER!" button above. It's that easy to earn points!

  • Water supply hookup - Side by side refrigerator
    ... to be improved Thank you begin producing ice. Remove the water filter cartridge supplied with water pressure between 30 and 120 psi. You will remain above freezing. NOTE: Tighten ... No parts needed in conjunction with a wrench two more useful. attached to the valve inlet using the water supply line, if possible. If the refrigerator does not have . Replace the filter if...
  • Cleaning the Downdraft Vent System - Architect 2 electric cooktop with downdraft
    ... vent cover using the venting system. Do not clean the filter in the dishwasher, a self-cleaning oven, or use abrasive cleaners or scrubbing pads. Remove the vent cover and filter and clean them with downdraft Product Literature (Use & Care, Parts Lists, etc) << All Rights Reserved. Product Help Share Delicious...
  • Water filter change reminder - Steam Assist Built-In Ovens
    ... the system without replacing the filter may cause damage to the oven. For information on Ultima built-in oven with steam. Touch OK to return to reset the system. To check water filter status: Touch Water Filter. There are 3 water filter states: Good, Replace Filter Soon and Replace Filter. The replacement Steam Assist Replacement Filter part number is 8212695...

Similar Questions

Replace Handle On Kitchenaid Khms2050sss0 Microwave Hood Combo.
I need to install a replacement door handle on a Kitchenaid KHMS2050SSS0 microwave hood combo. All t...
(Posted by DoorHelp 10 years ago)
Can I Use The Khmc1857 Kitchen Aid Microwave Without The Charcoal Filter?
I use the mainly for reheating, or items such as tea. I do use it about once a month for baking. As ...
(Posted by faygail 11 years ago)
Ask a New Question
Use the box below to post a new question about this KitchenAid product .
Points & Prizes
  • You can earn points for nearly everything you do on HelpOwl.com
  • You can trade in those points for gift cards at leading retailers such as Amazon.com and Walmart
  • It's that simple!
See How it Works
Create a Free Account

KitchenAid Manuals

Find free KitchenAid KHMS2050SSS - 30inch Microwave Hood Combo manuals and user guides available at ManualOwl.com. Try out our unique manual viewer allowing you to interact with manuals from directly within your browser!

KitchenAid Reviews

View thousands of KitchenAid user reviews and customer ratings available at ReviewOwl.com.

Contact Information

Complete KitchenAid customer service contact information including steps to reach representatives, hours of operation, customer support links and more from ContactHelp.com.

Scoreboard Ratings

See detailed KitchenAid customer service rankings, employee comments and much more from our sister site.

KitchenAid Recalls

Find comprehensive KitchenAid recall information updated hourly on RecallOwl.com.