Get support for KitchenAid KHMS2040WSS

KitchenAid KHMS2040WSS Support Question

KitchenAid KHMS2040WSS Support Question

Find answers below for this question about KitchenAid KHMS2040WSS.
Need a KitchenAid KHMS2040WSS manual? We have 3 online manuals for this item!
Question posted by Arnoldo on September 28th, 2012

Kitchen Aid Khb100er1 - Engine Is Not Running.

I have it less than 6 months. I am the only one to use it at home and I have a degree in cooking, so, I didn'n misused it, but the engine stoped running. Before looking for a technician, anybody can help me? Thankd

Current Answers

There are currently no answers that have been posted for this question.
Be the first to post an answer!

Remember that you can earn up to 1,100 points for every answer you submit. The better the quality of your answer, the better chance it has to be accepted.

Related KitchenAid KHMS2040WSS Manual Pages

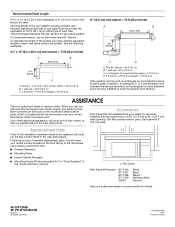
Dimension Guide - Page 1

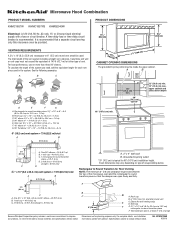
To calculate the length of the microwave oven and the rectangular to Round Transition for each vent piece used . Wall cap: 3 " x 10" = 40 ft (8.3 x 25.4 cm = 12.2 m) F. 45° elbow: 6" = 5 ft (15.2 cm = 1.5 m) G. 90° flat elbow: 3 " x 10" = 10 ft (8.3 x 25.4 cm = 3 m) 6" (15.2 cm) ...
Installation Guide - Page 1

.... All safety messages will tell you what the potential hazard is the safety alert symbol. See "Installation Requirements" section for use above electric or gas cooking products up to Wall 8 Prepare Upper Cabinet 8 Install Damper Assembly 9 Install the Microwave Oven 9 Complete Installation 10 VENTING DESIGN SPECIFICATIONS 11 ASSISTANCE 12 Replacement Parts 12 Accessories 12...
Installation Guide - Page 2

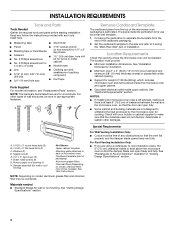
... Support for use appropriate fasteners. NOTES: ■ If installing the microwave oven near a left...cooking. Washers (2) D. The piece inside upper cabinet. The location must be combined. Special Requirements For Wall Venting Installation Only: ■ Cutout must provide: ■ Minimum installation dimensions. Cut along the perforation to withstand the heat produced by the microwave oven...
Installation Guide - Page 3

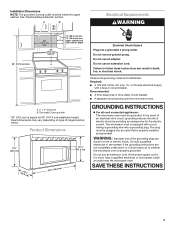
... the event of an electrical short circuit, grounding reduces the risk of range/cooktop below. WARNING: Improper use an extension cord. Do not remove ground prong. Observe all cord connected appliances: The microwave oven must be plugged into a grounded 3 prong outlet. Product Dimensions 17¹⁄₄" (43.8 cm) 16¹⁄₄...
Installation Guide - Page 4

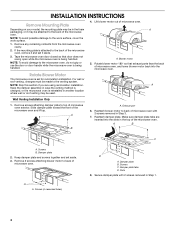
... to the work surface, cover the work surface. 1. Screws (in another location where wall or roof venting may be used. Tape the microwave oven door closed so that exhaust ports face the back of microwave oven, and lower blower motor back into the slots in the foam packaging, or it aside. 3. Rotate Blower Motor The...
Installation Guide - Page 5

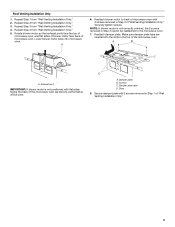
... Installation Only." 5. Secure damper plate with 2 screws removed in Step 3 cannot be poor. Repeat Step 1 from "Wall Venting Installation Only." 4. Reattach blower motor to the microwave oven. 7. Securely tighten screws. Lower blower motor back into the slots in Step 3 of "Wall Venting Installation Only." NOTE: If blower motor is not positioned with...
Installation Guide - Page 6

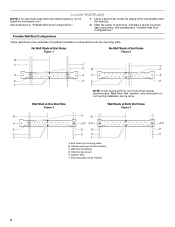
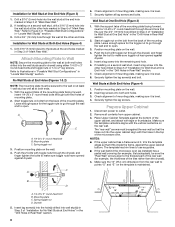
...E E E E F F NOTE: If wall stud is within the opening. Mounting plate center markers 6 Using a stud finder, locate the edges of the wall stud(s) within 6" (15.2 cm) of the vertical...E E E C C C C F F A. Cabinet opening , do not install the microwave oven. 1. See illustrations in "Possible Wall Stud Configurations." Mark the center of preferred installation configurations ...
Installation Guide - Page 7

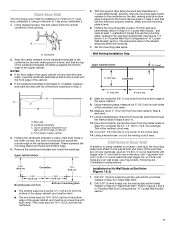
...Refer to the horizontal line drawn in steps 8 and 10. 12. Mark Rear Wall The microwave oven must align with front edge of cabinet. Remove the cardboard template and check the markings: ...;⁄₈" (1 cm) 4" (10.2 cm) Centerline 6" (15.2 cm) 6" (15.2 cm) 8. Using a straightedge, draw the 2 horizontal, level lines through the marks made in "Locate Wall Stud(s)" section), align ...
Installation Guide - Page 8

... Wall Stud Configurations" in "Locate Wall Stud(s)" section. Refer to use as guides. ■ If the wall behind the microwave oven (as at both end holes drilled into the wall stud at the... holes. 3. Securely tighten all contents from the back of mounting plate. 2. Check alignment of the microwave oven. NOTES: ■ If the upper cabinet has a frame around it is level. 7. Drill a...
Installation Guide - Page 9

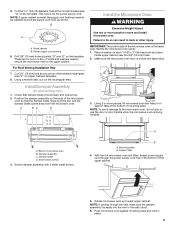
... cabinet is the heavy side. Drill 3/8" (10 mm) holes at the circular shaded area "G" on Upper Cabinet Template. 8. A B C D Install the Microwave Oven WARNING Excessive Weight Hazard Use two or more people, lift microwave oven and hang it on the back of mounting plate. Sheet metal screws 3. NOTE: If venting through the power supply cord hole...
Installation Guide - Page 10

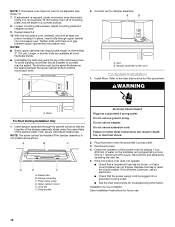
... has not blown, or that the power supply cord is not positioned as the space between upper cabinet and microwave oven. Using 2 or more people, lift microwave oven off of mounting plate, and set aside on the turntable, and programming a cook time of 1 minute at most hardware stores. ■ Overtightening bolts may warp the top of...
Installation Guide - Page 11

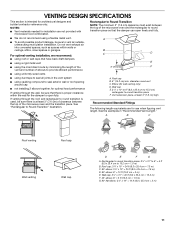
... of the vent and number of elbows to provide efficient performance ■ using uniformly sized vents ■ using duct tape to seal all joints in "Recommended Vent Length." Vent extension piece, at least 3" (7.6 cm) of clearance between the top of the microwave oven and the transition piece. If venting through the wall, be sure...
Installation Guide - Page 12

... either type of vent. W10247296B SP PN W10345003B © 2010. ASSISTANCE Call your model number located on the front frame of the microwave oven. For best performance, use when installing this microwave oven in a 36" (91.4 cm) or 42" (106.7 cm) wide opening , behind the door. ■ Damper Assembly ■ Mounting Plate ■ Upper Cabinet...
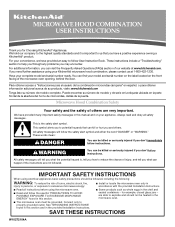
Use & Care Guide - Page 1

...model and serial number ready. IMPORTANT SAFETY INSTRUCTIONS When using the microwave oven. ■ Read and follow instructions. You can be...microwave oven only in this manual and on the front facing of others . are able to potential hazards that you have provided many important safety messages in this section and in the shell and sealed containers - Connect only to help...
Use & Care Guide - Page 2

..., allow soil or cleaner residue to heat, cook, or dry food. Use extreme care when inserting a spoon or other than manufacturer's recommended accessories, in this microwave oven outdoors. for example, near a kitchen sink, in a wet basement, or near water - IMPORTANT SAFETY INSTRUCTIONS ■ Use the microwave oven only for its intended use as they may damage the filter. ■...
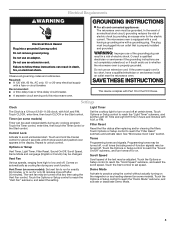
Use & Care Guide - Page 3

...). Light Timer Set the cooktop light to run for about 3 seconds until 2 tones sound and padlock icon appears in hours and minutes with A.M. or P.M. See "Microwave Oven Care" section. Scroll Speed Scroll speed of... are not completely understood, or if doubt exists as cooling fan during any cook function. Do not use of the grounding plug can result in death, fire, or electrical shock. ...
Use & Care Guide - Page 4

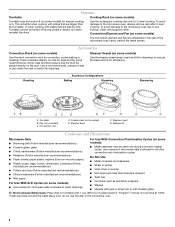
This is helpful when cooking with plates that are bigger than the turntable, or when cooking with metallic glaze To Test ... Convection rack D. Steamer insert G. Use the rectangular cooking rack only for 2-level cooking. Use a microwave-safe, ovenproof dish or pan under the rack to the microwave oven, always remove rack after 2-level cooking. Steamer Vessel (on some models)...
Use & Care Guide - Page 5

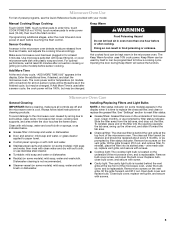
.... For optimal performance, wait at the top front of the microwave oven. To reinstall, place end of the filter into its slotted area - Use microwave-safe dish with loose-fitting lid, or cover microwave-safe dish with your model. The Keep Warm function uses 10% cook power. Clean monthly, or as indicated below. ■ Grease filter: mild soap...
Use & Care Guide - Page 6

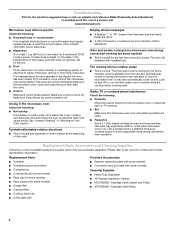
...microwave oven during cooktop usage ■ This is normal for the first few convection cycles. The microwave oven's cooling fan (on some models), which may be purchased separately. Fan running during convection cooking...) ■ Rack support (for 5 minutes or more without the microwave oven being used. Radio, TV or cordless phone interference Check the following : ■...
Use & Care Guide - Page 7

...touch control system parts SECOND THROUGH TENTH YEAR LIMITED WARRANTY On microwave ovens only, in materials or workmanship. Service calls to the appliance....numbers that is contrary to defects in -home service is used for other damage to the finish of ... attached to or furnished with the removal from accident, alteration, misuse, abuse, fire, flood, acts of Whirlpool Corporation or Whirlpool...

KitchenAid Knowledge Base Results

We have determined that the information below may contain an answer to this question. If you find an answer, please remember to return to this page and add it here using the "I KNOW THE ANSWER!" button above. It's that easy to earn points!

  • My microwave oven will not run
    ... Light pads will not run Why won't my microwave oven run? Extended warranty information - Child Lock (on the display. Superba built-in and microwave combination ovens Can I use of your Use and Care Guide....water for using it online by entering your Use and Care Guide, find it ? Model Number | Help me locate my model number Please enter at 100% cooking power. ...
  • Can I use aluminum foil in my microwave and if so, are there tips for using it?
    ... not allow contact with another metal object during cooking. If not used in ovens Product Literature (Use & Care, Parts Lists, etc) Built-in the oven. Aluminum foil and some models), aluminum foil for using it? Do not allow aluminum foil or metal to the microwave oven. Can I use aluminum foil in microwave ovens: Metal cookware and bakeware Gold, silver, pewter Nonapproved...
  • Unable to upload photos to the display, French Door with Ice Bin in the Door
    ... cameras, iPods, cell phones, external hard memory, etc. Pictures must be accomplished using A USB flash drive. screen will return to the HOME Screen. If no photos, transferred, the display will display. kitchen.aid.jpg). A USB flash drive USB 1.1 or 2.0 standards has been used . Uploading photos will not be uploaded.  If any of the USB...

Similar Questions

How Do You Repair Cook Top Bulbs On Kitchen Aid Microwave Model Khmc1857wss
How do I repair/replace oven top bulbs on my Kitchen Aid Microwave Model KHMC1857WSS?
(Posted by schirm43 9 years ago)
Kitchen Aid Kcms1655 Built In Microwave Has Barely Audible Tones
This model seems to have the only manual without a volume fix. Don't know why we've tolerated it thi...
(Posted by shrose85194 9 years ago)
Can I Use The Khmc1857 Kitchen Aid Microwave Without The Charcoal Filter?
I use the mainly for reheating, or items such as tea. I do use it about once a month for baking. As ...
(Posted by faygail 11 years ago)
Ask a New Question
Use the box below to post a new question about this KitchenAid product .
Points & Prizes
  • You can earn points for nearly everything you do on HelpOwl.com
  • You can trade in those points for gift cards at leading retailers such as Amazon.com and Walmart
  • It's that simple!
See How it Works
Create a Free Account

KitchenAid Manuals

Find free KitchenAid KHMS2040WSS manuals and user guides available at ManualOwl.com. Try out our unique manual viewer allowing you to interact with manuals from directly within your browser!

KitchenAid Reviews

View thousands of KitchenAid user reviews and customer ratings available at ReviewOwl.com.

Contact Information

Complete KitchenAid customer service contact information including steps to reach representatives, hours of operation, customer support links and more from ContactHelp.com.

Scoreboard Ratings

See detailed KitchenAid customer service rankings, employee comments and much more from our sister site.

KitchenAid Recalls

Find comprehensive KitchenAid recall information updated hourly on RecallOwl.com.