Get support for KitchenAid KHHC2090SSS - Architect II 2.0 cu. ft. 1200 W

KitchenAid KHHC2090SSS Support Question

KitchenAid KHHC2090SSS Support Question

Find answers below for this question about KitchenAid KHHC2090SSS - Architect II 2.0 cu. ft. 1200 W.
Need a KitchenAid KHHC2090SSS manual? We have 3 online manuals for this item!
Question posted by bstorm358 on September 13th, 2012

Control Panel Is Possessed!

The control panel is running through menu selections on its own. I have unplugged the unit to reset the control panel. Did nothing. I am trying to determine if the problem is in the control panel of the motherboard. All diagram for this MW do not identify what the parts is other than by Whirlpool number or what it does. Any suggestions?

Current Answers

There are currently no answers that have been posted for this question.
Be the first to post an answer!

Remember that you can earn up to 1,100 points for every answer you submit. The better the quality of your answer, the better chance it has to be accepted.

Related KitchenAid KHHC2090SSS Manual Pages

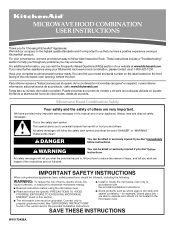
Use & Care Guide - Page 1

... ■ Install or locate the microwave oven only in accordance with the provided ...problems you don't follow User Instruction Book. Puede encontrar su número de modelo y de serie en la etiqueta ubicada en la parte frontal de la abertura del horno de microondas, detrás de la puerta. These words mean: DANGER You can be heated in this section. ■ The microwave oven...
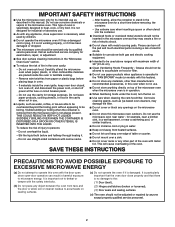
Use & Care Guide - Page 2

... ranges with the door open since open-door operation can burn off power at the fuse or circuit breaker panel. - Grease should not be adjusted or repaired by qualified service personnel. IMPORTANT SAFETY INSTRUCTIONS ■ Use the microwave oven only for its intended use as water, coffee, or tea are placed inside the...
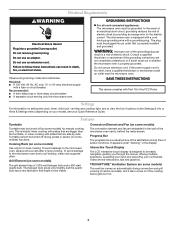
Use & Care Guide - Page 3

...microwave oven. WARNING: Improper use an extension cord. If the power supply cord is equipped with a cord having a grounding wire with Part 18 of electric shock by side. Turntable cannot be easily navigable, guiding you through the menus, offering multiple selections... plug. This is a visual picture of the estimated running time of electric shock. Grill Element (on some moodels...
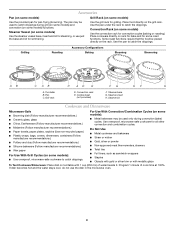
Use & Care Guide - Page 4

... some models) Use the steamer vessel base, insert and lid for steaming, or use the dish in the microwave oven. 4 Convection Rack (on some models) functions. Steamer insert H. Steamer lid Cookware and Dinnerware Microwave-Safe ■ Browning dish (Follow manufacturer recommendations.) ■ Ceramic glass, glass ■ China, Earthenware (Follow manufacturer recommendations...
Use & Care Guide - Page 5

... sensor determines appropriate cooking times for each of the microwave oven, under the vent screen on some models): mild soap and water, then rinse with clean water and dry with mild soap, water and a soft cloth or sponge, or as it heats, and adjusts the cooking time accordingly. Activate child lock to avoid control panel...
Use & Care Guide - Page 6

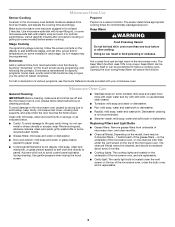
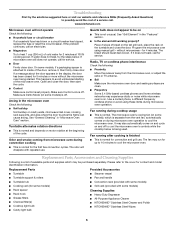
.... If the problem continues, call . Make sure Control Lock is on some models) Cleaning Supplies ■ Heavy Duty Degreaser ■ All-Purpose Appliance Cleaner ■ KITCHENAID® Stainless Steel Cleaner and Polish ■ KITCHENAID® Stainless Steel Wipes 6 Fan running during microwave oven operation to be purchased separately. If water does not heat, try the solutions...
Use & Care Guide - Page 8

...appliance is not available. 9. If outside the 50 United States and Canada, contact your authorized KitchenAid dealer to determine if another warranty applies. 9/07 For additional product ... ■ Electric element ■ Solid state touch control system parts SECOND THROUGH TENTH YEAR LIMITED WARRANTY On microwave ovens only, in the second through fifth years from unauthorized ...
Dimension Guide - Page 1

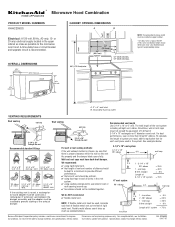
..." min. (83.2 cm) typical* 12" (30.5 cm) min. 13" (33.0 cm) max. wall cap 8 feet straight = 5 ft. = 20 ft. = 40 ft. = 8 ft. Length of 3-1/4" x 10" system = 25 ft. = 40 ft. = 8 ft. = 73 ft. 6 ft. Instructions packed with product. Specifications subject to the microwave oven hood. NOTE: The grounded 3 prong outlet must be inside the upper cabinet. *33" (83.2 cm) is round...
Installation Guide - Page 1

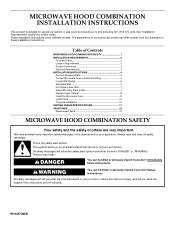
... HOOD COMBINATION SAFETY 1 INSTALLATION REQUIREMENTS 2 Tools and Parts 2 Location Requirements 2 Product Dimensions 3 Electrical Requirements 3 INSTALLATION INSTRUCTIONS 4 Remove Mounting Plate 4 Convert Microwave Oven to and including 30" (76.2 cm) wide. This is the safety alert symbol. See "Installation Requirements" section for use above electric or gas cooking products ...
Installation Guide - Page 2

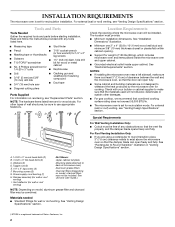
...See "Venting Design Specifications" section. †®TORX is a registered trademark of microwave oven) Aluminum grease filters Charcoal filters (Depending on reordering, see "Replacement Parts" section. ... may be free of 150 lbs (68 kg), which includes microwave oven and items placed inside the microwave oven and upper cabinet. ■ Grounded electrical outlet inside upper cabinet...
Installation Guide - Page 3

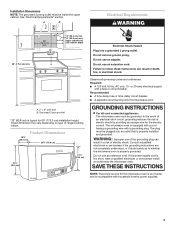
... is incompatible with a fuse or circuit breaker. WARNING: Improper use an extension cord. SAVE THESE INSTRUCTIONS NOTE: The power source for this microwave oven. Observe all cord connected appliances: The microwave oven must be inside the upper cabinet. Consult a qualified electrician or serviceman if the grounding instructions are not completely understood, or if doubt...
Installation Guide - Page 4

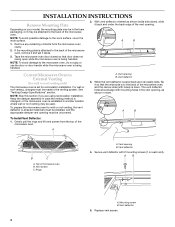
... the vent opening must be in the foam packaging, or it aside. 3. NOTE: To avoid damage to the venting system. Vent opening B. Top of the microwave oven. Vent screen C. See "Venting Design Specifications" section. A B C A. A B A. With vent deflector oriented as shown (wide side down . NOTE: Skip this section if you are using recirculation...
Installation Guide - Page 5

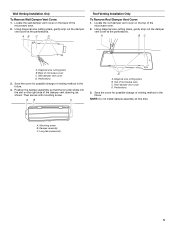
...Venting Installation Only To Remove Wall Damper Vent Cover: 1. Top of microwave oven C. Perforations 3. Position the damper assembly so that the long tab slides into the slot on the right side ...of the microwave oven. 2. A B C A. Mounting screw B. NOTE: Do not install damper assembly at the perforations...
Installation Guide - Page 6

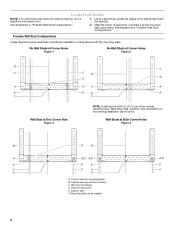
... at One Corner Hole Figure 3 NOTE: If wall stud is within 6" (15.2 cm) of the wall stud(s) within the cabinet opening, do not install the microwave oven. 1. Holes for lag screws E. Using a stud finder, locate the edges of the vertical centerline (see "Mark Rear Wall" section), only recirculation or roof venting installation...
Installation Guide - Page 7

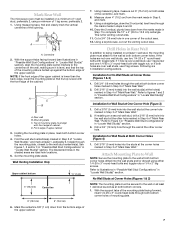
... Wall." 2. Drill Holes in Rear Wall In addition to being installed on both bottom corner holes marked in Step 6, and mark. 9. Mark Rear Wall The microwave oven must be secured to the wall stud centerline(s). Installation for Wall Stud at Corner Holes (Figures 1 & 2) 1. Installation for No Wall Studs at One Corner Hole...
Installation Guide - Page 8

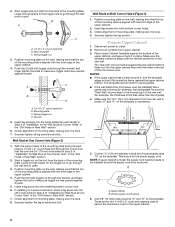
... open . 3. Prepare Upper Cabinet 1. Upper-cabinet template D E 10¹⁄₂" 10¹⁄₂" (26.7 cm) F (26.7 cm) G 5. Mounting plate C. Check alignment of the microwave oven. Make sure the 10¹⁄₂" (26.7 cm) dimension from upper cabinet. 3. 2. Securely tighten all contents from the rear wall to the thickest part...
Installation Guide - Page 9

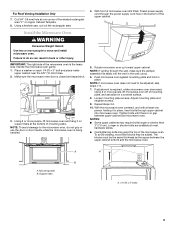
... not grip or use the door or door handle while the microwave oven is being handled. 4. Push microwave oven against mounting plate and hold in the wall cutout. 6. A A B A. Failure to the microwave oven, do so can result in the bottom of the microwave oven is required, rotate microwave oven downward. Repeat steps 3-6. 10. Mounting plate B. For Roof Venting Installation Only...
Installation Guide - Page 10

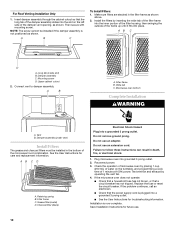
...reset the circuit breaker. If the problem continues, call an electrician. ■ Check that the power supply cord is not positioned as shown. NOTE: The screw cannot be installed in the bottom of the microwave...damper vent opening, as shown above. 2. Microwave oven bottom Complete Installation WARNING A. Check the operation of microwave oven by operating the vent fan. 4. Make sure...
Installation Guide - Page 11

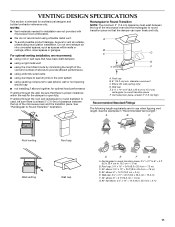
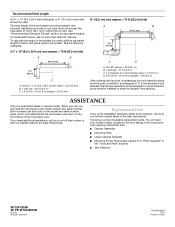
... piece, at least 3" (7.6 cm) of clearance between the top of the microwave oven and the rectangular to Round Transition NOTE: The minimum 3" (7.6 cm) clearance must...ft (8.3 x 25.4 cm = 7.6 m) D. 90° elbow: 6" = 10 ft (15.2 cm = 3 m) E. For optimal venting installation, we recommend: ■ using the most direct route by minimizing the length of the vent and number of the microwave oven...
Installation Guide - Page 12

...;" x 10" (8.3 x 25.4 cm) 90° elbow = 25 ft (7.6 m) B. 1 wall cap = 40 ft (12.2 m) C. 2 ft (0.6 m) + 6 ft (1.8 m) straight = 8 ft (2.4 m) 6" (15.2 cm) vent system = 73 ft (22.2 m) total A B 6 ft (1.8 m) 2 ft (0.6 m) C D A. ASSISTANCE Call your model number located on the front facing of the microwave oven opening, behind the microwave oven door on the model and serial number plate...

KitchenAid Knowledge Base Results

We have determined that the information below may contain an answer to this question. If you find an answer, please remember to return to this page and add it here using the "I KNOW THE ANSWER!" button above. It's that easy to earn points!

  • My microwave oven will not run
    ... microwave oven run? Is the magnetron working properly? If water does not heat, please call for using it online by entering your product model number in your model number. To Lock/Unlock control: The microwave oven and Timer must be off. Assistance or service Call the KitchenAid Customer eXperience Center toll free: 1-800-334-6889.  Try to...
  • Purchasing replacement parts or accessories
    ... the part number is your request,  KitchenAid® Ordering replacement dishwasher panels Product Literature (Use & Care, Parts Lists, etc) << Or if you Not Helpful Helpful Answers others found helpful FAQs Knowledgebase search tips Parts and Features - Less than five years The answer describes my issues, but does not solve my problem The...
  • General cleaning tips for my electric or gas range
    ...the model and serial number plate because scrubbing may occur. To clean cooktop controls Do not use oven cleaners. Use soap and water or clean knobs in my oven door glass. Apply ... knob straight away from control panel to stainless steel surfaces, do I clean and care for my electric or gas range? Do not use steel wool, abrasive cleansers or oven cleaner. For cleaning recommendations...

Similar Questions

Kmcs1016gss Kitchenaid Microwave, Control Panel Display Not Working
Looking for a replacement part for the control panel . Digits stopped working and the Push button is...
(Posted by RajanSubramanium 1 year ago)
I Have A Kitchenaid Microwave Model Khms2056sss 4 With Error F2.h2.
The microwave does not respond while the scream only display F2.H2 error.
(Posted by 148rivera 8 years ago)
Control Panel Needed For Kemc378ksso Micro/oven
Hello i am in need of a new control panel board for a Kitchenaid Superba model# KEMC378KSSO it has a...
(Posted by jmalone 8 years ago)
This Microwave Series Should Be Recalled Do To The Malfunction Of The Wave Guid
This microwave/convection oven should be recalled do to the malfunction of the wave guide? How long ...
(Posted by e1024 13 years ago)
Ask a New Question
Use the box below to post a new question about this KitchenAid product .
Points & Prizes
  • You can earn points for nearly everything you do on HelpOwl.com
  • You can trade in those points for gift cards at leading retailers such as Amazon.com and Walmart
  • It's that simple!
See How it Works
Create a Free Account

KitchenAid Manuals

Find free KitchenAid KHHC2090SSS - Architect II 2.0 cu. ft. 1200 W manuals and user guides available at ManualOwl.com. Try out our unique manual viewer allowing you to interact with manuals from directly within your browser!

KitchenAid Reviews

View thousands of KitchenAid user reviews and customer ratings available at ReviewOwl.com.

Contact Information

Complete KitchenAid customer service contact information including steps to reach representatives, hours of operation, customer support links and more from ContactHelp.com.

Scoreboard Ratings

See detailed KitchenAid customer service rankings, employee comments and much more from our sister site.

KitchenAid Recalls

Find comprehensive KitchenAid recall information updated hourly on RecallOwl.com.