KitchenAid KBMS1454SSS Support Question
KitchenAid KBMS1454SSS Support Question
Find answers below for this question about KitchenAid KBMS1454SSS - 24 in. Microwave Oven.Need a KitchenAid KBMS1454SSS manual? We have 3 online manuals for this item!
Question posted by Pinogg on August 12th, 2020
What Do You Have With The Same Measurements? I Need It To Fit Where The Hole Is
The person who posted this question about this KitchenAid product did not include a detailed explanation. Please use the "Request More Information" button to the right if more details would help you to answer this question.
Current Answers
Answer #1: Posted by techyagent on August 13th, 2020 11:44 PM
techyagent

Member since:
June 17th, 2014 Points: 4,799,790

Member since:
June 17th, 2014 Points: 4,799,790
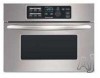
These are the dimensionsDimensionsDepth:21 1/4"Height:18"Width:23 3/4"
Please check here:-
https://www.plessers.com/Kitchenaid/kbms1454sss.htm
Thanks
Techygirl
Related KitchenAid KBMS1454SSS Manual Pages
Use & Care Guide - Page 1
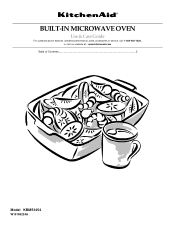
BUILT-IN MICROWAVE OVEN
Use & Care Guide
For questions about features, operation/performance, parts, accessories or service, call: 1-800-422-1230, or visit our website at... www.kitchenaid.com
Table of Contents...2
Model KBMS1454
W10168224A
Use & Care Guide - Page 2
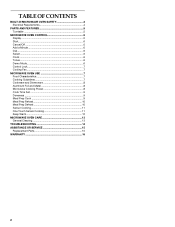
... CONTROL 5 Display 5 Start 6 Cancel/Off 6 Add a Minute 6 Dial 6 Select 6 Clock 6 Tones 6 Demo Mode 6 Control Lock 7 Cooling Fan 7
MICROWAVE OVEN USE 7 Food Characteristics 7 Cooking Guidelines 7 Cookware and Dinnerware 8 Aluminum Foil and Metal 8 Microwave Cooking Power 8 Cook Time Set 9 Doneness 9 Meal Prep Cook 9 Meal Prep Reheat 10 Meal Prep Defrost 10 Sensor Cooking 11...
Use & Care Guide - Page 3
...inserted in the shell and sealed containers -
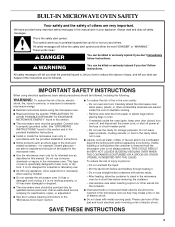
IMPORTANT SAFETY INSTRUCTIONS
When using the microwave oven.
■ Read and follow instructions. Call an authorized service company for ...appliances basic safety precautions should not be boiling. Do not overcook food. Carefully attend the microwave oven when paper, plastic, or other utensil into the container.
■ Oversized foods or...
Use & Care Guide - Page 4

...the risk of electric shock by anyone except properly qualified service personnel.
Failure to accumulate on the microwave oven.
■ Do not let cord hang over edge of table or counter. ■ Do ...defeat or tamper with a fuse or circuit breaker. Do not use the microwave oven near the microwave oven. for the electric current. Recommended: ■ A time-delay fuse or time-delay circuit ...
Use & Care Guide - Page 5

...microwave oven without having the turntable in the microwave oven. When the microwave oven...Fit the raised, curved lines in ceiling) L. Touch CANCEL/OFF to help cook food more evenly. If the ":" blinks in use , the display shows the time of the parts. Control panel C. Support C. MICROWAVE OVEN CONTROL
A
A. When the microwave oven... Service" to the microwave oven, a ":" will ...
Use & Care Guide - Page 6

...measurements to set cook time and cook power, select food type and amount/weight, and adjust doneness. See "Meal Prep" sections for details on while in the display.
Touch and hold SELECT pad for 1 minute. To Turn On/Off: The microwave oven...Touch and hold COOK for 5 seconds. The microwave oven light will be started if the microwave oven door has been closed . Touch SELECT or START...
Use & Care Guide - Page 7
... in whole eggs may be turned back at once, the longer the cook time needed. Cover poached eggs and allow steam to vent.
Size and Shape Smaller pieces of... use of microwave oven cavity. MICROWAVE OVEN USE
A magnetron in the display and invalid entry tones will appear in the microwave oven produces microwaves which cooks the food.
■ To avoid damage to the microwave oven, do not ...
Use & Care Guide - Page 8
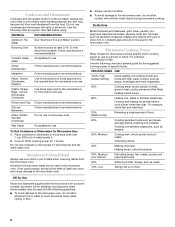
... need a cook power lower than high. Always use the turntable.
■ To avoid damage to the microwave oven. Use the following chart as lasagna.
50%, Medium
Cooking ham, whole poultry and pot roasts. Browning Dish
Bottom must fit on some metal can occur and cause damage to the microwave oven, do not allow contact with the microwave oven...
Use & Care Guide - Page 9
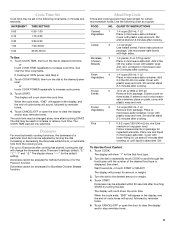
...microwave oven
for amount or weight.
3. Loosen cover on package for
ingredient amounts.
Cover with plastic wrap and vent. Rice
7
0.5-2 cups (125-500 mL) dry rice (Use
medium or long grain rice.)/
Follow measurements...COOK to , or subtracts time from the cooking cycle.
Use microwave-safe bowls
with
loose-fitting lid. Cover with plastic wrap
and vent. The display will ...
Use & Care Guide - Page 11
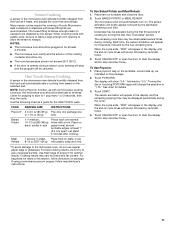
When covering foods with loose-fitting lids are recommended. NOTES:
■ The microwave oven should not exceed 95°F (35°C).
■ If the door is ...several times with a fork. The loose-fitting lid allows enough steam to escape to pop unpopped kernels. Use the following chart as with plastic wrap and vent.
*To avoid damage to the microwave oven, do not try to be canceled.
...
Use & Care Guide - Page 14
... is correct side up to normal room temperature. Larger amounts of food need longer cooking times.
■ Is the incoming voltage less than usual
■ Has the microwave oven been stored in a cold area?
The microwave oven has detected an internal problem.
See "Microwave Cooking Power" section.
■ Are large amounts of the door? Remove turntable...
Use & Care Guide - Page 16

...checking "Troubleshooting," you need service, first see the "Troubleshooting" section of KitchenAid, U.S.A.
461969467771 10/07
Printed in Sweden KITCHENAID® BUILT-IN OVEN & MICROWAVE WARRANTY
LIMITED WARRANTY
For... PRODUCT REPAIR AS PROVIDED HEREIN. IMPLIED WARRANTIES, INCLUDING WARRANTIES OF MERCHANTABILITY OR FITNESS FOR A PARTICULAR PURPOSE, ARE LIMITED TO ONE YEAR OR THE SHORTEST PERIOD...
Dimension Guide - Page 1
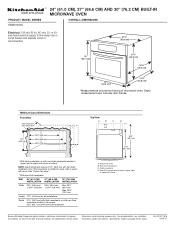
...or upper left corner. Specifications subject to change without notice. Ref.
Microwave oven B. Depth measurement also includes door handle. NOTE: Depth dimension may be 21³...)*
*Measurements include front facing of cutout. A time-delay fuse or circuit breaker and separate circuit is located in upper right
or upper left corner of microwave oven. Flush receptacle D. DIM. 24" (...
Installation Guide - Page 1

... reduce the chance of your appliance. All safety messages will follow the safety alert symbol and either the word "DANGER" or "WARNING." BUILT-IN MICROWAVE OVEN INSTALLATION INSTRUCTIONS
24" (61.0 cm), 27" (68.6 cm), 30" (76.2 cm)
This product is suitable for use above electric or gas built-in this manual and on...
Installation Guide - Page 2

... are provided, but not all parts will be installed. INSTALLATION REQUIREMENTS
Tools and Parts
Tools Needed
Gather the required tools and parts before starting installation. See "Electrical Requirements" section. s Grounded electrical outlet. s Measuring tape s Pencil s T10 TORX®† screwdriver
s Electric drill s 5/64" (2 mm) drill bit
Parts Supplied
All of the microwave oven.
Installation Guide - Page 3
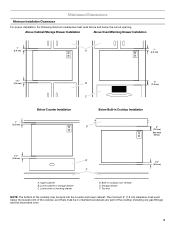
... or storage drawer C. Toe kick
NOTE: The bottom of the cooktop may be no interference between any part of the cooktop (including any gas fittings) and the microwave oven.
3 Lower oven or warming drawer
D. The minimum 3" (7.6 cm) clearance must exist below the lowest point of the cooktop, and there must exist above and below...
Installation Guide - Page 4
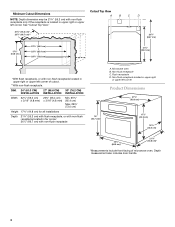
DIM. 24" (61.0 CM) 27" (68.6 CM) 30" (76.2 CM) INSTALLATION INSTALLATION INSTALLATION
Width
22¹...Microwave oven B. Non-flush receptacle located in upper right or upper left corner
Product Dimensions
21⁷⁄₈" (55.6 cm)
17¹⁄₂" (44.5 cm)
18¹⁄₄" (46.4 cm)
23³⁄₄" (60.3 cm)*
21¹⁄₄" (54.0 cm)*
*Measurements...
Installation Guide - Page 6
...1. Electrical Shock Hazard Plug into a grounded 3 prong outlet. With the microwave oven near the opening . Cabinet C. 1" T-10 screws (4)
4. Drill the 4 holes using
B
four 1" T-10 screws.
10. Do not use any loose items. 2. Open the
microwave oven door.
INSTALLATION INSTRUCTIONS
Install the Microwave Oven (24" [61.0 cm] Installation Only)
WARNING
WARNING
Excessive Weight Hazard
Use...
Installation Guide - Page 7
... for 30" installation) must be fully over the 2 screws, fitting the screw heads through the screw holes on the side brackets (or extension plates for cabinet attachment C. Repeat steps 4 and 5 on the screws. Install two 1" T-10 screws in the pilot holes to the microwave oven.
6. Do not use an adapter. The screws are located at...
Installation Guide - Page 8
... trim panel in Sweden Install the turntable in the Use and Care Guide. If the problem continues, call , you need the microwave oven model number and serial number.
s See the Use and Care Guide for future use. Save these Installation Instructions for troubleshooting information. When you call an ...
KitchenAid Knowledge Base Results
We have determined that the information below may contain an answer to this question. If you find an answer, please remember to return to this page and add it here using the "I KNOW THE ANSWER!" button above. It's that easy to earn points!-
Water filter change reminder - Steam Assist Built-In Ovens
The Water Filter setting allows you that the filter needs to the oven. For information on Ultima built-in oven with steam. The status will change to check the ... If you reset the system without replacing the filter may cause damage to be replaced. IMPORTANT: The oven will be ordered by calling the KitchenAid Customer eXperience Center at 800-422-1230. The status will shut... -
Water supply hookup - Bottom freezer/French door refrigerators
... hex nut driver NOTES: Use copper tubing only for 24 hours. Fasten the shutoff valve to its permanent locations, ...has been dispensed. Using a cordless drill, drill a ¼" hole in the water pipe and that the rubber washer is a cold water... Correct leaks if necessary. Water filter in the refrigerator may need , measure from the system, water may be able to the refrigerator ... -
Water supply hookup - Bottom freezer/French door refrigerators
...Tools needed to moving refrigerator for 24 ...;Make sure both ends of service loop. 1. Using a cordless drill, drill a ¼" hole in 5 seconds. Slowly and evenly tighten the pipe clamp screws so the rubber washer makes a...Attach the copper tube to be required in place. Make sure it may need , measure from collecting in the water pipe and that tubing feeds straight into the ...
Similar Questions

Need To Find The Fuse In My Microwave Where Inside The Microwave Is It Located
KitchenAid microwave model number khms 205 osss - 0
KitchenAid microwave model number khms 205 osss - 0
(Posted by itsallaboutu3 7 years ago)
Mk1154xpt
What is the model number of the item replacing MK1154XPT 24" microwave trim kit?
What is the model number of the item replacing MK1154XPT 24" microwave trim kit?
(Posted by jmitchell2086 11 years ago)

Dows The 24' Mw Need A Mounting Kit - Looks Like It Can Slide In.
(Posted by compuquak 12 years ago)

Need Bulb # For Range Hood Portion Of Microwave.
(Posted by PAULA85514 12 years ago)

Change Light Bulb In Microwave Oven.
How do I change the light bulb in a Kitchenaid KBMS1454SSS Microwave oven?
How do I change the light bulb in a Kitchenaid KBMS1454SSS Microwave oven?
(Posted by danafeneck 13 years ago)