Kenmore 4689 Support Question
Kenmore 4689 Support Question
Find answers below for this question about Kenmore 4689 - 30 in. Slide-In Electric Range.Need a Kenmore 4689 manual? We have 2 online manuals for this item!
Question posted by JEPEREZ1939 on September 21st, 2012
I Need To Fix My Kenmore Stove
The person who posted this question about this Kenmore product did not include a detailed explanation. Please use the "Request More Information" button to the right if more details would help you to answer this question.
Current Answers
Answer #1: Posted by Odin on September 21st, 2012 3:40 PM
Odin

Member since:
April 10th, 2010 Points: 41,236,700

Member since:
April 10th, 2010 Points: 41,236,700
Related Kenmore 4689 Manual Pages
Use and Care Guide - Page 2
... 2B8
Product Record
In this product.
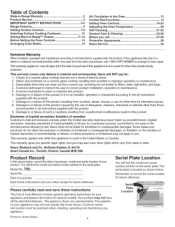
Table of Contents
Slide=in Range Warranty 2 Product Record 2 IMPORTANT SAFETY INSTRUCTIONS 3=5 Range Features 6 Setting Surface Controls 7=9 Selecting Surface Cooking Cookware... date of purchase, call 27=28 Protection Agreements 29 Sears Service 30
Kenmore Warranty When installed, operated and maintained according to all instructions supplied with...
Use and Care Guide - Page 3
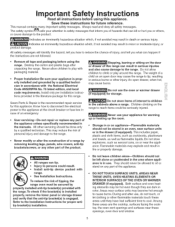
... seriously injured. Do not allow children to the appliance at the circuit breaker or fuse box in the cabinets above a range. Know how to disconnect the electrical power to play around the range.
Do not store items of interest to tip, resulting
in the literature package for warming up or heating up the...
Use and Care Guide - Page 4
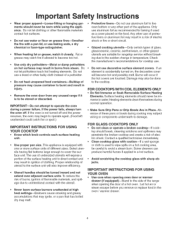
...not turned off . Select utensils having flat bottoms large enough to the side of the range when opening the door of electric shock.
To reduce the risk of burns, ignition of glass, glass/ceramic, ceramic, ...avoid a steam burn. Do not let clothing or other use a towel or other part of electric shock or fire or short circuit. Fat or grease may result in temperature. IMPORTANT--Do not attempt...
Use and Care Guide - Page 6
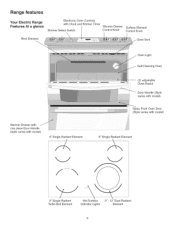
Range features
Your Electric Range Features At a glance
Broil Element
Electronic Oven Controls with Clock and Kitchen Timer
Simmer Select Switch
Warmer Drawer Control Knob
Surface Element Control Knob
Oven ...
Use and Care Guide - Page 8
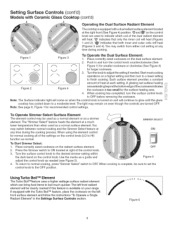
... a moderate level. Figure 2 Right Rear, Left Rear and
Left Front Elements
Figure 3
Each surface element provides a constant amount of the range when it is turned on and will influence the setting needed for the kind of the cookware indicates the cookware is touched before removing the cookware. Note: The Hot Surface Indicator...
Use and Care Guide - Page 9
...
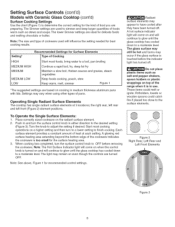
3. Note: The Surface Indicator light will come on when the control knob is available on your range. The "Simmer Select" feature heats the element at any time during cooking.
The left front surface...a dual radiant surface element located at each setting. Turn the knob to adjust the setting if needed (see Figure 5). , To return to normal cooking, press "Simmer Select" switch to OFE ...
Use and Care Guide - Page 10

... of food will cause it may leave metal marks which will influence the setting needed for flatness by
more than element. See Cleaning Recommendations for use on base material... ruler across the ceramic glass cooktop, they may scratch the glass.
10
If aluminum pans slide across the bottom of a material that
Correct
incorrect
make good contact with uneven cooking results....
Use and Care Guide - Page 13

... cake, yeast, bread, casseroles, small cuts of rack and slide out. Arranging Oven Racks
ALWAYS ARRANGE OVEN RACKS WHEN THE OVEN...range has been turned "OFF", but may also stop immediately and then turn "ON" and "OFF" by itself to reach around the cookware for proper air circulation and be sure pans and cookware do not touch each other, the oven door, sides or back of the rack upward and slide...
Use and Care Guide - Page 18

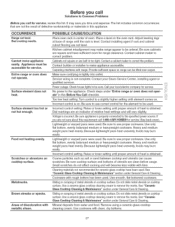
...Range not level. Pan too close to oven wall or rack overcrowded. • Pan warped. • Oven too cool.
• Oven overcrowded.
• Oven door opened too frequently.
• Place marked glass measuring cup filled with water on top or bottom.
is no need...before placing food in oven.
The cooking times and temperatures needed to bake a product may vary slightly from the oven ...
Use and Care Guide - Page 24
...Creme directly to the soiled area. Permanent
damage (such as
needed.
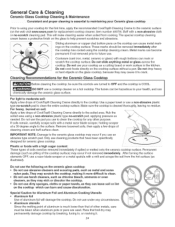
Special Caution for Aluminum Foil and Aluminum Cooking Utensils •... with a metal razor blade scraper, holding scraper
at a 30 degree angle to clean. • Do not use harsh ....
......
IMPORTANT NOTE: Damage to crack. Cleaning Recommendations
Sliding aluminum or copper clad bottom pans on the cooktop can...
Use and Care Guide - Page 26
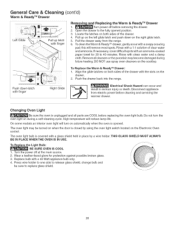
... Push down on the cooktop.
Wear a leather-faced glove for 30 to replace glass shield.
26 General Care & Cleaning (cont'd)
...latch.
5.
Push the drawer back into the range. Disconnect appliance from the range.
6. The oven light may become damaged ...Bulb: BE SURE OVEN IS COOL
1.
Pull the drawer away from electric power before removing the drawer.
2. Do not turn on the Electronic...
Use and Care Guide - Page 27
... or sand between cooktop and utensils can be accessible for service. Contact your local electric company for service. Power outage. Voltage is properly connected to the appliance. Small ...ceramic-glass cooktop have sufficient room for range clearance, Contact cabinet maker to correct problem, Cabinets not square or are built in this appliance. Sliding or scraping of oven. Remove using...
Installation Instructions - Page 3
... 2
3
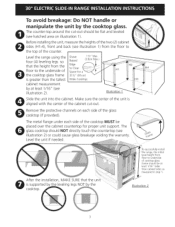
The counter-top around the cut -out.
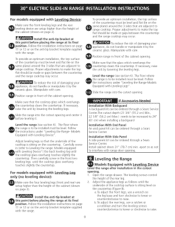
Level the range using the four (4)leveling legs so that the height from the floor... the leveling legs NOT by the cooktop glass. Illustration 1
Slide the unit into the cabinet.
The glass cooktop should NOT directly...could cause glass breakage voiding the warranty. Level the unit if needed. Make sure the center of the unit is
aligned with the ...
Installation Instructions - Page 4
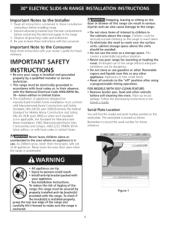
... for future reference.
Children could be seriously burned climbing on the range to reach items.
• To eliminate the need to the "off" position after using a programmable timing operation,
...installer or service technician.
• This range must be electrically grounded in accordance with local codes or, in their absence, with the National Electrical Code ANSI/NFPA No. 70--latest edition...
Installation Instructions - Page 5

... This Location. Punch Out Knockout for connecting the power supply cord to terminal block while connecting range. This appliance may occur,
2. NOTE: Electric Slide-in a fire, personal injury or electrical shock.
3. If a larger hole is discarded,
For mobile homes, new installations or recreational vehicles, use only a power supply kit designed for access to do...
Installation Instructions - Page 7

...
Range Installation
_,isT; uitImportant Note: Door removal is greater than 30 1/16" (76,4 cm), reduce the 3A" (1.9 cm) dimension.
oven door removal instructions. Figure 6 - 4-Wire Electrical...30" (76.2 cm) apart. Make sure they are plumb and level before attaching cooktop. CablferomResidence
Green (or Bare
Red_ b\ [-_
_
Copper)Wire
_
_Black
White Wire
• Tile countertops may need...
Installation Instructions - Page 8
... (21 3/4" (55.2 cm) Min., 22 1/8" (56.2 cm) Max.) needs to be increased to raise. Position range in the front two leveling legs until the cooktop glass overhang touches slightly the countertop...and turn the leveling screws counterclockwise to lower or clockwise to range cooktop. Slide the range into the cutout opening . The floor where the range is to make the top flat should be level. b....
Installation Instructions - Page 9
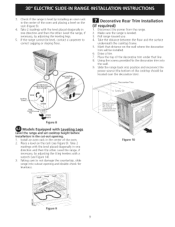
... oven rack in one direction and then the other. Make sure the range is leveled. 3. Checkif therangeis levebl y installinganovenrack in the cut-out opening and double check for levelness. Using the screws provided fix the decorative trim into
the wall.
, Slide the range back into cutout opening . 1. Place a level on the wall where the...
Installation Instructions - Page 11
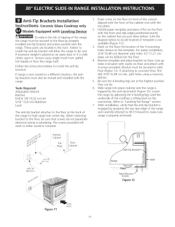
...anti-tip bracket attaches to the floor at the highest position they can be drilled into place making sure the range is ever moved to solid floor (Figure 12). When fastening bracket to the floor, be secured to a...Figure 11 )). 3. Draw a line on the floor (in the oven. Slide range into the floor. 4. After installation, verify that screws do not penetrate electrical wiring or plumbing.
Installation Instructions - Page 12
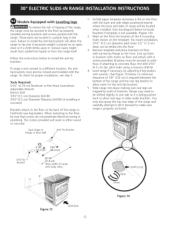
... up holes in concrete)
Brackets attach to hold both rear leg levelers. Slide range into the floor.
3. If range is required between the bottom of the range and the rear leg levelers to allow room for proper installation, see step... injury might result from spilled hot liquids or from the range itself. You may need to be sure that screws do not penetrate electrical wiring or plumbing.
Similar Questions

How Much Is A Glass Top For My Kenmore 4689 30 Inch Slide In Stove
(Posted by Jessicasanders2021 8 months ago)

Kenmore 46893: Does The Oven Of This Range Have A Bottom Heating Element?
No bottom heating element is visible.Oven takes 17 minutes to pre-heat to 350 degrees. Is this norma...
No bottom heating element is visible.Oven takes 17 minutes to pre-heat to 350 degrees. Is this norma...
(Posted by dckline 11 years ago)

Cutout Dimension For Kenmore 46893 Electric Range.
Please help to provide cutout dimension for Kenmore 46893 Electric Range. thks James
Please help to provide cutout dimension for Kenmore 46893 Electric Range. thks James
(Posted by bkcjames888 12 years ago)

Kenmore Electric Range Model #911-9389981
after i have the burner on about 2 min. my stove flashes a letter F what could this be
after i have the burner on about 2 min. my stove flashes a letter F what could this be
(Posted by lisadeclemente 12 years ago)

I Am Getting An Error Code Eo30 With My Kenmore Elite Slide In Range.
The range has already been replaced once and I am still havingthe same error messagewith the second ...
The range has already been replaced once and I am still havingthe same error messagewith the second ...
(Posted by spletting 14 years ago)