Hoover F7411900 Support Question
Hoover F7411900 Support Question
Find answers below for this question about Hoover F7411900 - SteamVac Dual-V Wide Path Deep Carpet Cleaner.Need a Hoover F7411900 manual? We have 1 online manual for this item!
Question posted by nancykies on December 21st, 2011
Brushes Won't Spin
I have a Max Extract carpet cleaner. Model #F7411900 Mfg Code G11A. I have used it only a few times and the brushes aren't spinning. I have cleaned the screen on the bottom. Please help
Current Answers
Related Hoover F7411900 Manual Pages
Product Manual - Page 1
....
©2011 Techtronic Floor Care Technology Limited. All rights reserved. #56518217 ID100262-R2
página E1
www.hoover.com
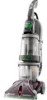
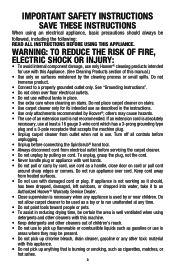
IMPORTANT: READ CAREFULLY BEFORE ASSEMBLY AND USE. THIS PRODUCT IS INTENDED FOR HOUSEHOLD USE ONLY. Owner's Manual
Operating and Servicing Instructions
Español - PLEASE DO NOT RETURN THIS PRODUCT TO THE STORE.
Product Manual - Page 2
... enter the complete model and Manufacturing Code in China
Manufacturing code
(Label located on bottom of cleaner)
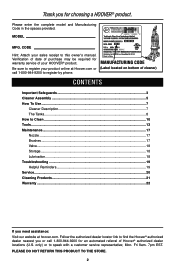
Contents
Important Safeguards 3 Cleaner Assembly...5 How To Use...7
Cleaner Description 7 The Tanks...to Clean...10 Tools...13 Maintenance...17 Nozzle...17 Brushes...17 Valve...18 Storage...18 Lubrication...18 Troubleshooting...19 Helpful Reminders 19 Service...20 Cleaning Products...
Product Manual - Page 3
... the machine plug. • Unplug carpet cleaner from outlet when not in use cord as cigarettes, matches, or hot ashes.
3 See "Grounding Instructions". • Do not clean over cord. If appliance is used as a toy or to an Authorized Hoover® Warranty Service Dealer. • Close supervision is necessary when any time. • Do not point...
Product Manual - Page 4
...Code.
1
A
2
E
D
F
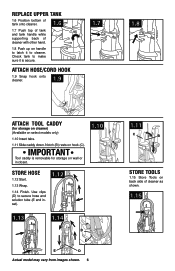
BGROUNDING
OUTLET BOX
G
C
4 The plug must be plugged into openings. Do not modify the plug provided with all parts of electric shock.
Grounding Instructions
This appliance must be grounded. Do not use with the carpet cleaner...should malfunction or breakdown, grounding provides a path of least resistance for use of a temporary adapter is not available ...
Product Manual - Page 5

... two or need for assembly. SpinScrub® Brush Assembly
Remove all parts are located before disposing of packing materials.
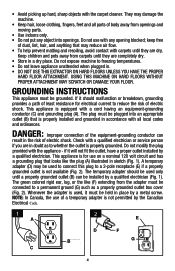
Hose/Cord Hook E. SpinScrub® Hand Tool*
*Available on select models only. Attach handle
1.2 Remove tank.
1.3 Position cord protector.
1.4 Slide handle down.
1.5 Insert bolts and attach nuts.
Cleaner B.
NOTE: Phillips screwdriver needed for assembly...
Product Manual - Page 6
... top of tank and tank handle while supporting back of cleaner as shown.
1.15 Attach hose/cord hook
1.9 1.9 Snap hook onto
cleaner.
1.7
1.8
Attach tool caddy
(for storage on select models only)
1.10 Insert tabs.
1.11 Slide caddy down. Notch (B) rests on handle to cleaner. Use clips (D) to secure hose and solution tube (E and inset).
1.12...
Product Manual - Page 7
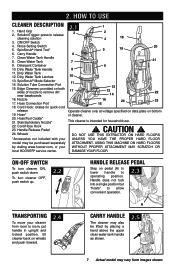
... on wheels and push forward.
2.4
A
Carry handle
The cleaner may also be purchased separately ATTACHMENT. Hand Grip 2. Clean Water Tank Handle
8. Cord Hook: rotates for household use.
22. USING THIS MACHINE ON HARD FLOORS
by placing a hand above the upper clean water tank handle as shown.
2.5
7 Actual model may be lifted by visiting www.hoover.com...
Product Manual - Page 8
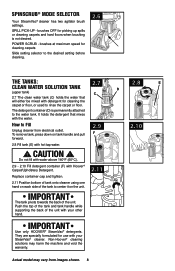
...;C).
2.9 - 2.10 Fill detergent container (F) with the water. IMPORTANT
Use only HOOVER® SteamVac® detergents. They are specially formulated for use with your other hand. Actual model may harm the machine and void the warranty. SPILL PICK-UP - brushes OFF for cleaning the
carpet or floor, or used to Fill
Unplug cleaner from images shown. 8 How to rinse the...
Product Manual - Page 9
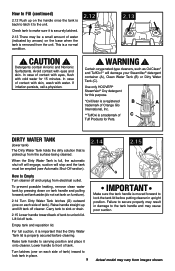
.... Lower handle to lock tank in damage to lock the tank lid before cleaning. CAUTION ! WARNING !
G
How to carrying position and place it onto cleaner.
This is moved forward to the tank handle and may result in place.
9
Actual model may be emptied (see Automatic Shut-Off section).
In case of tank.
Detergents...
Product Manual - Page 10
... will be noticeably reduced).
2.16 At that time, the yellow float disk will prevent wood finishes
from images shown. 10 Vacuum thoroughly - If your model. Wet a white absorbent cloth with cleaning tool attachments. For upholstery, check cleaning code - d. Vacuum upholstery with a vacuum cleaner with the detergent. To prevent staining, use . To avoid wetting and possible damage to...
Product Manual - Page 11
... MODELS WITH AUTO RINSE FEATURE (available on the same path backward as described above .
3.1/3.1a
3.2
Rinse ON AUWTAOSRIHNSE OFF
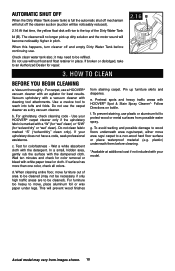
Fill Clean Water Tank according to instructions for Figs. 2.10 and 2.11. Turn cleaner ON.
3.2a Squeeze trigger to apply cleaning solution and slowly push cleaner forward (equals one area. IMPORTANT
To avoid saturating carpet, do not use straight...
Product Manual - Page 12
... nozzle with the SpinScrub® mode selector to pick up any residue on carpet or uholstery.
If furniture must be replaced before the carpet is necessary to be rotating slowly, disconnect cleaner from electical outlet and check and clean this screen.
3.4
3.5
Actual model may also be treated by following the instructions provided by placing the stair...
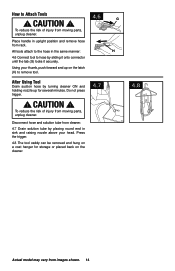
Product Manual - Page 13

... models only)
B. How to Reattach Tool Cover
4.5 The tool cover is pushed open too far. CAUTION ! Close door. For some spots may vary from moving parts, unplug cleaner.... end, matching tabs on small carpet areas, carpeted
A
stairs and upholstery. Stair/Upholstery Nozzle has a built-in brush to help provide the scrubbing action some models, the brushes
can be removed for extra
4.3...
Product Manual - Page 14
... model may vary from rack.
Disconnect hose and solution tube from cleaner.
4.7 Drain solution tube by placing round end in upright position and remove hose from images shown. 14 Do not press trigger.
!
After Using Tool
Drain suction hose by sliding it onto connector until the tab (G) locks it securely. All tools attach...
Product Manual - Page 15

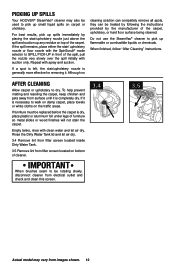
... "After Cleaning" instructions on page 12 and "After Using Tool" instructions on stairs.
Dry hands and plug cleaner into carpet pile.
Always end with more than 4 wet strokes over any one wet stroke).
4.9
4.10
A
B
Position tool against the riser and slightly press it against riser. Agitator brushes will not rotate while handle is a loss in...
Product Manual - Page 16
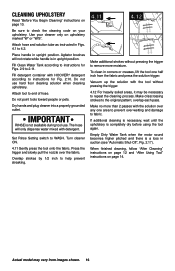
....
Make no more moisture. When finished cleaning, follow "After Cleaning" instructions on page 12 and "After Using Tool" instructions on page 10. Be sure to 4.2. Place handle in Figs. 4.1 to check the cleaning code on your cleaner only on upholstery marked "W" or "W/S".
overlap each pass.
Cleaning upholstery
Read "Before You Begin Cleaning" instructions on page 14.
Do not...
Product Manual - Page 17
...tanks as proper use and care of your cleaner will ensure continued cleaning effectiveness.
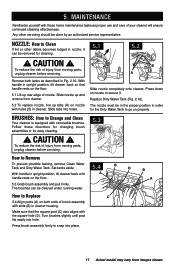
5. MAINTENANCE
Familiarize yourself with removable brushes. CAUTION !...cleaning.
! Remove both ends of injury from moving parts, unplug cleaner before servicing. The brushes can be cleaned under running water.
5.4
A
B
D
B
A
How to snap into place.
17 Actual model may vary from cleaner...
Product Manual - Page 18
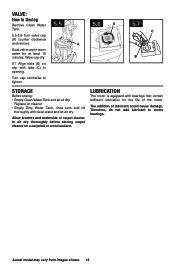
... Clean Water Tank.
5.5-5.6 Turn valve cap (A) counter clockwise and remove. Actual model may vary from images shown. 18 The addition of the motor. Replace on cleaner....
Storage
Before storing: • Empty Clean Water Tank and let air dry. Wipe cap dry.
5.7 Align slots (B) on a carpeted or wood surface. Allow brushes and underside of carpet cleaner to motor bearings.
Therefore, do not...
Product Manual - Page 19
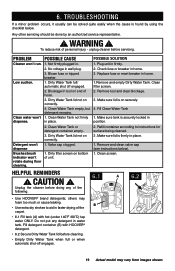
... in home.
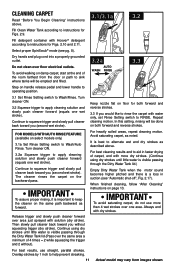
1.Remove and empty Dirty Water Tank. A 6.2
• Use HOOVER® brand detergents; Do not put any of personal injury - Clean water won't dispense.
2. Make sure lid is securely locked in place.
2. Dirty filter screen on bottom of hose.
3. CAUTION !
unplug cleaner before cleaning.
• Empty Dirty Water Tank when full or when automatic...
Product Manual - Page 21
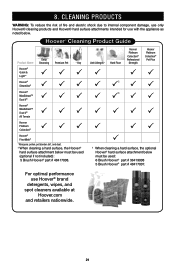
... below must be used : 6 Brush Hoover® part # 36419008 5 Brush Hoover® part # 48417007. ClLeEaAnNiInNG pPrRoOdDuUCtTsS
WARNING: To reduce the risk of fire and electric shock due to internal component damage, use only Hoover® cleaning products and Hoover® hard surface attachments intended for use Hoover® brand
detergents, wipes, and spot cleaners available at
Hoover...
Similar Questions

How To Fill And Operate Hoover Max Extract Spin Schrub 60 F7450100
My mom is borrowing my brother's hoover max extract spin scrub 60 but she doesn't remember how to fi...
My mom is borrowing my brother's hoover max extract spin scrub 60 but she doesn't remember how to fi...
(Posted by aspiringprov31woman 10 years ago)

How To Disassemble A Hoover Dual V Max Extract Wide Path
(Posted by rheajtrou 10 years ago)

Steamvac Dual V Widepath Brushes Won't Turn
(Posted by SerRhinot 10 years ago)

Hoover Steamvac Dual V Carpet Cleaner Brushes Wont Spin
(Posted by Msparche 10 years ago)

Brushes Won't Spin On Hoover Steamvac Dual V
(Posted by MerySolar 10 years ago)