HP J6480 Support Question
HP J6480 Support Question
Find answers below for this question about HP J6480 - Officejet All-in-One Color Inkjet.Need a HP J6480 manual? We have 4 online manuals for this item!
Question posted by rlraffaele on November 20th, 2018
Re 6480 Cartridge Stuck
The carriage is stuck on the right side. it will only slide when the part under the ink cartridges is manually pushed back and raising the cartridge slightly.
Current Answers
Answer #1: Posted by Troubleshooter101 on November 23rd, 2018 9:19 AM
Troubleshooter101

Member since:
September 30th, 2015 Points: 2,927,040

Member since:
September 30th, 2015 Points: 2,927,040
Please check the link below to fix this issue
Turn the All-in-One off and on again
- Press the Power button () to turn off the product.
- Wait 60 seconds.
- Press the Power button () to turn on the product.
NOTE:The product might go through a warm-up period. The product lights might flash and the carriage might move. Wait until the warm-up period finishes before proceeding.
- Try to print a self-test report. Refer to the steps on how to print a self-test report at the top of this document.
Clear any jammed paper
Step one: Remove any loose paper
Remove any loose sheets of paper from the input tray and the output tray.
CAUTION:
Do not remove jammed paper at this stage. Trying to clear jammed paper from the front of the product can damage the print mechanism.
Step two: Clear the paper jam from the back of the All-in-One
Use the following steps to check for and remove jammed paper from the back of the HP product.
- Press the Power button () to turn off the product.
- Disconnect the USB cable from the back of the product.
- Disconnect the power cord from the back of the product.
- Remove the duplexer from the back of the product. Press the buttons on each side of the duplexer, and then pull it toward you.Figure : Remove the duplexer
- Gently remove any jammed paper from the rollers, inside the product.
CAUTION:If the paper tears while removing it from the rollers, check the rollers for torn pieces of paper that might remain inside the product. If any torn pieces of paper remain inside the product, more paper jams are likely to occur.
- Press the latch on the side of the duplexer, and then open its cover.
- Gently remove any jammed paper from inside the duplexer.
- Reattach the duplexer. Gently push the door forward until it snaps into place.
Step three: Clear the paper jam from the front of the All-in-One
If you cannot remove the paper jam from the back of the product, follow these steps to remove the paper jam from the front.
- Open the cartridge door.Figure : Open the cartridge door
- Gently pull the paper out of the rollers.
NOTE:Remove paper from the front of the product as carefully as possible. If any torn pieces of paper remain inside the product, more paper jams are likely to occur, and this could damage the print mechanism.
- Close the cartridge door.Figure : Close the cartridge door
- Reconnect the power cord to the back of the product.
- Press the Power button () to turn on the product.
Make sure that the carriage moves freely
- Press the Power button () to turn on the product.
- Open the cartridge door.Figure : Open the cartridge door
- Without turning off the product, disconnect the power cord from the back of the product.
CAUTION:You must disconnect the power cord to move parts by hand without the risk of an electrical shock.
- Disconnect the power cord from the wall outlet.
- Look inside the product to see where the carriage is stuck, and then check for any torn paper or other objects that might be restricting the carriage.
NOTE:You might need a flashlight to illuminate areas for proper viewing.
- Reach inside the product through the cartridge door, and then manually move the carriage.
- If the carriage is stuck on the right side of the product, move the carriage to the left side of the product.
- If the carriage is stuck on the left side of the product, move the carriage to the right side of the product.
- If the carriage is stuck in the middle of the product, move the carriage to the right side of the product.
- Remove any loose paper or obstructions found.
- Make sure that the carriage can move freely across the width of the product by gently pushing the carriage to the left and then to the right.
- Close the cartridge door.Figure : Close the cartridge door
- Reconnect the power cord to the back of the product.
- Reconnect the power cord to the wall outlet.
- Press the Power button () to turn on the product.
Remove and reinstall the cartridges
Step one: Remove the cartridges
- Press the Power button () to turn on the product.
- Open the cartridge door. The carriage moves to the far right side of the product.Figure : Open the cartridge door
CAUTION:Wait until the carriage is idle and silent before proceeding.
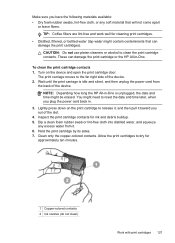
- Push down on the top of the cartridge to release it, and then pull it toward you to remove it from its slot.Figure : Remove the cartridge
CAUTION:Do not touch the copper-colored contacts or ink nozzles. Touching these parts can result in clogs, ink failure, and bad electrical connections.
Figure : Do not touch the contacts or ink nozzles - Check for obstructions under and around the carriage. Remove any obstructions.
Step two: Reinstall the cartridges
- Slide the cartridge back into the slot, and then push it forward until it clicks into place.Figure : Reinstall the cartridge
- If you are installing the tri-color cartridge, slide it into the left slot.
- If you are installing a black or photo cartridge, slide it into the right slot.
- Close the cartridge door.Figure : Close the cartridge door
- Try to print a self-test report. Refer to the steps on how to print a self-test report at the top of this document.
Click here and refer the HP document for more assistance
Thanks
Please respond to my effort to provide you with the best possible solution by using the "Acceptable Solution" and/or the "Helpful" buttons when the answer has proven to be helpful. Please feel free to submit further info for your question, if a solution was not provided. I appreciate the opportunity to serve you!
Troublshooter101
Related HP J6480 Manual Pages
Wireless Getting Started Guide - Page 11
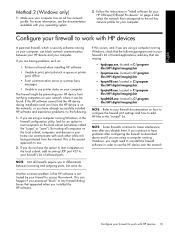
... to cause interference even after configuring the firewall as :
• Printer not found when installing HP software
• Unable to print, print job stuck in your HP Officejet/Officejet Pro device" on the local subnet (sometimes called the "scope" or "zone"). For more information, see printer status on your computer, can be preventing your...
Fax Getting Started Guide - Page 7
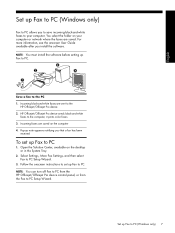
... Fax Settings, and then select Fax to the computer, it prints color faxes 3. Open the Solution Center, available on the computer 4. Pop-up note appears notifying you that a fax has been
received
To set up Fax to the
HP Officejet/Officejet Pro device 2.
Follow the onscreen instructions to set up Fax to PC. HP...
Fax Getting Started Guide - Page 9
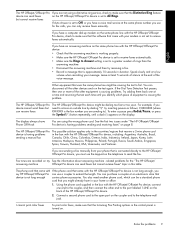
... Phone Off Hook
You are sending a fax manually from your message. I cannot print color faxes
To print color faxes, make sure that the Distinctive Ring feature on the back of silence at a low volume when recording your phone that is turned on page 8. The HP Officejet/Officejet Pro device cannot send faxes but cannot receive faxes...
User Guide - Page 10
... poor quality printout problems 139 Meaningless characters print 139 Ink is smearing ...140 Ink is not filling the text or graphics completely 141 Output is faded or dull colored 141 Colors are printing as black and white 141 Wrong colors are printing 142 Printout shows bleeding colors 142 Colors do not line up properly 142 Lines or...
User Guide - Page 17
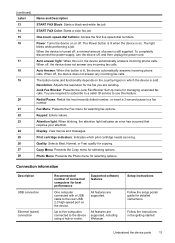
...Color: Starts a color fax job. The Power button is lit when the device is lit, the device automatically answers incoming phone calls. Auto answer light: When this button is on the device...Keypad: Enters values. Display: View menus and messages. Print cartridge indicators: Indicates which the device is lit, the device automatically answers incoming phone calls. Quality: Selects Best, Normal...
User Guide - Page 38
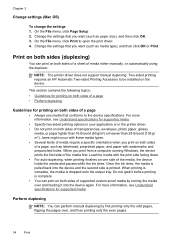
...media. When printing is complete, the media is printed. Perform duplexing
NOTE: You can perform manual duplexing by turning the media over , and then printing only the even pages.
34
Print Change... you print from a computer running Windows, the device prints the first side of the media, the device holds the media and pauses while the ink dries.
When you want (such as letterhead,...
User Guide - Page 42
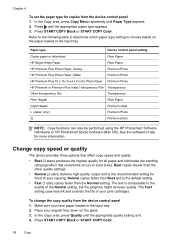
The Fast setting uses less ink and extends the life of your original face down on the paper loaded in the input tray. To change the copy quality from the device control panel 1. Place your print cartridges. In the Copy area, press Quality until the appropriate quality setting is the default setting.
• Fast...
User Guide - Page 55
...START FAX Black or START FAX Color. NOTE: Make sure the volume is the case, you will hear a dial tone. 3. Load your calling card PIN fast enough, the device might occur.
Send a fax ...the next step to continue speaking with the recipient before sending your PIN stored.
If the device detects an original loaded in a conversation before sending the fax, inform the recipient that ...
User Guide - Page 58
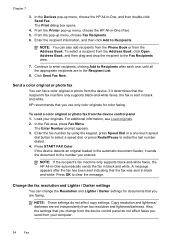
...-up menu, choose the HP All-in black and white. From the Printer pop-up menu, choose Fax Recipients. 6. Send a color original or photo fax
You can change from the device control panel do not affect copy settings. NOTE: These settings do not affect faxes you entered. Chapter 7
3. From the pop-up...
User Guide - Page 62

... faxes it receives while the device is low, it overwrites the oldest, printed faxes as a very detailed color photo, it might want to turn off Backup Fax Reception for security purposes. If the memory becomes full of the faxes it receives new faxes. Chapter 7
To receive a fax manually 1. NOTE: The automatic document feeder...
User Guide - Page 79
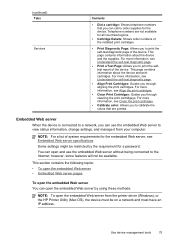
...; Calibrate color: Allows you through aligning the print cartridges. Some settings might be restricted by using these methods:
NOTE: To open the embedded Web server from your computer. Telephone numbers are printed. This page contains information about the device and the supplies. For more information, see Understand the self-test diagnostic page.
•...
User Guide - Page 82
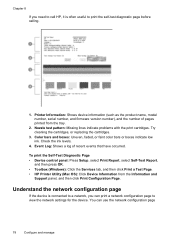
...Device Information from the tray.
2. Understand the network configuration page
If the device is often useful to view the network settings for the device.... before calling.
1. Printer Information: Shows device information (such as the product name, model number, ...that have occurred. Color bars and boxes: Uneven, faded, or faint color bars or boxes indicate low ink. Check the ink levels.
4. ...
User Guide - Page 125

... in the initialization process, which prepares the device and cartridges for printing. Handle the print cartridges
Before you replace or clean a print cartridge, you receive a low-ink warning message, consider having a replacement cartridge
Work with print cartridges 121
NOTE: When the ink level for planning purposes only.
Ink level warnings and indicators provide estimates for a print...
User Guide - Page 126

... to release it. Pull the print cartridge toward you try to replace the print cartridges until the print carriage is on. If prompted, choose your product, and then click one of the shopping links on the right.
4. Chapter 9 available to the far right side of the device.
3. The print carriage moves to avoid possible printing delays. If...
User Guide - Page 128

.... Chapter 9
If you remove and reinstall the same print cartridge, the device will fail. Close the print cartridge door. Load unused plain white paper into the right slot.
8. Press OK to align the print cartridges. NOTE: If you are installing a black, photo, or gray photo print cartridge, slide it into the input tray, and then try the...
User Guide - Page 129

... print cartridges, the alignment will fail. Press Setup. 3. To align the print cartridges from the device control panel at any of the lines of the ink nozzles....cartridges from the device control panel when prompted 1. Do not clean print cartridges unnecessarily, as this device.
Make sure you have letter or A4 unused plain white paper loaded in the input tray when you might have colored...
User Guide - Page 131
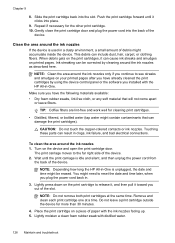
... erased. Lightly press down on the device and open the print cartridge door. Inspect the print cartridge contacts for
approximately ten minutes.
1 Copper-colored contacts 2 Ink nozzles (do not clean)
Work with print cartridges 127 Allow the print cartridges to the far right side of the device. The print carriage moves to dry for ink and debris buildup. 5. CAUTION: Do not...
User Guide - Page 132
Push the print cartridge forward until the print carriage is used in a dusty environment, a small amount of debris might need to the far right side of the device. 2. This debris can damage the print cartridges). Ink streaking can be erased. Make sure you have already cleaned the print cartridges by cleaning around the ink nozzles only if you continue to...
User Guide - Page 150

... need cleaning.
Check the setting and change it to protect your originals.
• Check the device ◦ The scanner lid might not be closed properly. ◦ The scanner glass or lid ... Clean the device for more information, see Change the copy settings.
146 Maintain and troubleshoot For more information.
• Black dots or streaks Ink, glue, correction fluid, or an unwanted ...
User Guide - Page 155

... information about the error. • Unwanted lines Ink, glue, correction fluid, or an unwanted substance might be on the original and not a result of the scanning process.
• Unclear text Try adjusting the settings. If you are having problems sending a manual fax • The device cannot receive faxes, but can send faxes •...
Similar Questions

Can You Use Size 90 Ink Cartridge On Hp Officejet J6480
(Posted by wombaoston 10 years ago)

How To Face Double Sided Document With Hp Officejet 4500 Inkjet Multifunction
(Posted by PhyToni 10 years ago)

Hp Officejet J6480 Won't Use Black Ink
(Posted by cjmbd 10 years ago)

Hp L7590 - Officejet Pro All-in-one Color Inkjet.
how do i chance the header on my printer?
how do i chance the header on my printer?
(Posted by annette98254 11 years ago)

Hinge Came Apart -- Misaligned
The left-side hinge supporting the top to the printer came apart when I was replacing ink. Now the t...
The left-side hinge supporting the top to the printer came apart when I was replacing ink. Now the t...
(Posted by katelin 11 years ago)