Dell PowerEdge T310 Support Question
Dell PowerEdge T310 Support Question
Find answers below for this question about Dell PowerEdge T310.Need a Dell PowerEdge T310 manual? We have 6 online manuals for this item!
Question posted by SLAYEth on December 23rd, 2013
How To Install Os From The Recovery Partition On A Dell Poweredge T310 Systems
The person who posted this question about this Dell product did not include a detailed explanation. Please use the "Request More Information" button to the right if more details would help you to answer this question.
Current Answers
Related Dell PowerEdge T310 Manual Pages
Getting Started Guide - Page 3
Dell™ PowerEdge™ T310 Systems
Getting Started With Your System
Regulatory Model E09S Regulatory Type E09S001
Getting Started Guide - Page 7
... Enterprise (x64) Editions
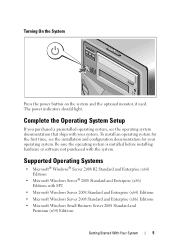
• Microsoft Windows Server® 2008 Standard and Enterprise (x86) Editions with the system. To install an operating system for your system.
The power indicators should light.
Be sure the operating system is installed before installing hardware or software not purchased with SP2
• Microsoft Windows Server 2008 Standard and Enterprise (x64) Editions...
Getting Started Guide - Page 8
... and tools for updates on supported operating systems, see www.dell.com. NOTE: Always check for configuring and managing your system, including those pertaining to troubleshoot the system and install or replace system components. • Microsoft Windows Essential Business Server 2008 Standard and Premium (x64) Editions
• Microsoft Windows Server 2003 R2 Standard and Enterprise (x64...
Hardware Owner's Manual - Page 6

... Drives 99 Removing an Optical or a Tape Drive 99 Installing an Optical or Tape Drive 100
Power Supplies 103 Removing a Redundant Power Supply 103 Installing a Redundant Power Supply 104 Removing a Non-Redundant Power Supply . . . 105 Installing a Non-Redundant Power Supply . . . . 106
System Fan 106 Removing the System Fan 106 Installing the System Fan 107
System Memory 108
6
Contents
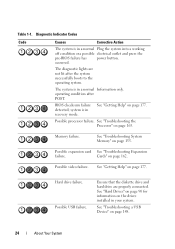
Hardware Owner's Manual - Page 24
....
24
About Your System
system is in recovery mode. Possible processor failure.
operating condition after the system successfully boots to the operating system. Memory failure. Possible expansion card See "Troubleshooting Expansion
failure. Hard drive failure. occurred. See "Troubleshooting System Memory" on the drives installed in a normal Plug the system into a working
off...
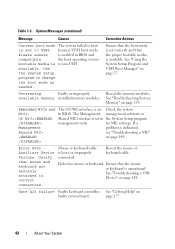
Hardware Owner's Manual - Page 42
... to correct connectors.
See "Using the System Setup Program and UEFI Boot Manager" on
faulty system board. Decreasing
Faulty or improperly
available memory installed memory modules.
Embedded NICx and NICy: OS NIC=, Management Shared NIC=
The OS NIC interface is set Check the system
in BIOS and the boot operating system is non-UEFI. Error 8602 Auxiliary...
Hardware Owner's Manual - Page 51
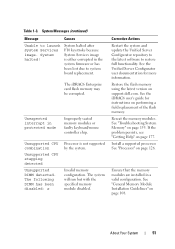
...! System halted after F10 keystroke because System Services image is not supported by the system. The iDRAC6 Enterprise card flash memory may be corrupted.
Corrective Actions
Restart the system and update the Unified Server Configurator repository to the latest software to launch System Services image. See the Unified Server Configurator user documentation for instructions on support.dell...
Hardware Owner's Manual - Page 64
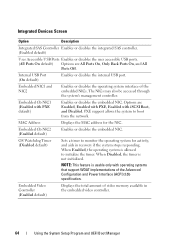
...system interface of video memory available in recovery if the system stops responding. The NICs may also be accessed through the system's management controller. When Enabled, the operating system is usable only with operating systems...and aids in the embedded video controller.
64
Using the System Setup Program and UEFI Boot Manager OS Watchdog Timer (Disabled default)
Sets a timer to boot ...
Hardware Owner's Manual - Page 69
... (for example, Microsoft® Windows Server® 2008 x64 version) to : • Add, delete, and arrange boot options • Access the System Setup program and BIOS-level boot options without rebooting 1 Turn on or restart your system. 2 Press after power is
(Immediate default)
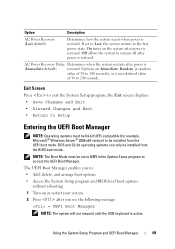
restored. Option
Description
AC Power Recovery (Last default)
Determines how the...
Hardware Owner's Manual - Page 76
...installed on or restart your system and try again.
76
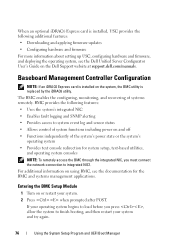
Using the System Setup Program and UEFI Boot Manager When an optional iDRAC6 Express card is installed, USC provides the following features: • Uses the system...operating system, see the Dell Unified Server Configurator User's Guide on using BMC, see the documentation for system setup, text-based utilities,
and operating system ...
Hardware Owner's Manual - Page 79
... only be done by the online or telephone service and support team.
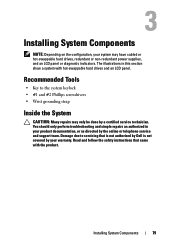
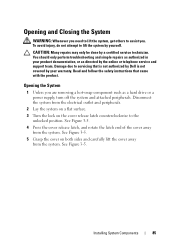
The illustrations in your warranty. Installing System Components
79 Read and follow the safety instructions that is not authorized by Dell is not covered by your product documentation, or as directed by a certified service technician.
Recommended Tools
• Key to servicing...
Hardware Owner's Manual - Page 81
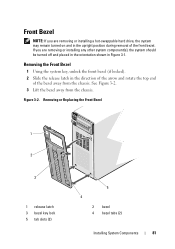
... in Figure 3-1. Figure 3-2. Removing or Replacing the Front Bezel
1
2
3
1 release latch 3 bezel key lock 5 tab slots (2)
5 4
2 bezel 4 bezel tabs (2)
Installing System Components
81 If you are removing or installing any other system component(s), the system should be turned off and placed in the orientation shown in the upright position during removal of the bezel away...
Hardware Owner's Manual - Page 85
... attached peripherals. Damage due to the unlocked position.
Installing System Components
85 See Figure 3-5.
5 Grasp the cover on the cover release latch counterclockwise to servicing that came with the product.
Read and follow the safety instructions that is not authorized by Dell is not covered by your product documentation, or as directed by...
Hardware Owner's Manual - Page 88

... the chassis.
88
Installing System Components Cooling Shroud
The cooling shroud covers the processor, heat sink, and memory modules, and provides air flow to servicing that is not authorized by Dell is not covered by your warranty. The cooling shroud directs airflow over the system processor and memory modules. WARNING: The memory modules and...
Hardware Owner's Manual - Page 95
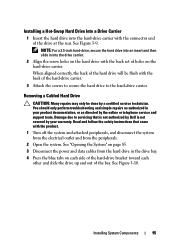
... with the back set of the bay. Damage due to the hard-drive carrier. See "Opening the System" on the hard drive with the product.
1 Turn off the system and attached peripherals, and disconnect the system from the electrical outlet and from the hard drive in your warranty. Installing System Components
95 See Figure 3-10.
Hardware Owner's Manual - Page 97
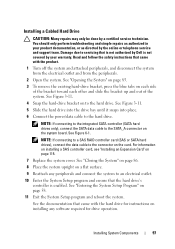
Damage due to servicing that is not authorized by Dell is enabled. See Figure 6-1.
See the documentation that the hard drive's controller is not covered by a certified service technician. See Figure 3-11.
4 Snap the hard-drive bracket on installing any peripherals and connect the system to the hard drive. NOTE: If connecting to the...
Hardware Owner's Manual - Page 99

If the drive is not covered by Dell is being permanently removed:
a Install an EMI filler panel into the empty drive bay. Read and follow the safety instructions that is not authorized by your warranty. See "Installing the Front Bezel Insert" on page 81. 3 Open the system. See "Removing the Front Bezel" on page 83...
Hardware Owner's Manual - Page 142
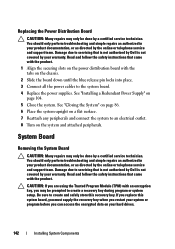
... the power distribution board with an encryption key, you replace this recovery key. Damage due to create a recovery key during program or system setup. If you may be prompted to servicing that came with the product. See "Installing a Redundant Power Supply" on the system and attached peripherals.
You should only perform troubleshooting and simple repairs...
Hardware Owner's Manual - Page 155

....
Read and follow the corrective actions provided by the diagnostic program.
2 If the system is not covered by Dell is not operational, turn off the system and attached peripherals, and unplug the system from the power source.
See "General Memory Module Installation Guidelines" on page 108 and verify that your warranty. See "Using Online Diagnostics...
Hardware Owner's Manual - Page 189
...
C
CD drive troubleshooting, 158
connectors USB, 12, 19 video, 12, 19
contacting Dell, 177 control panel assembly
features, 12 installing, 138 LCD panel features, 14 removing, 136 cooling fans troubleshooting, 154
cover closing, 86
D
damaged systems troubleshooting, 152
Dell contacting, 177
Dell PowerEdge Diagnostics using, 165
diagnostics advanced testing options, 167 testing options, 167 using...


