
Dell OptiPlex 755 Support Question
Dell OptiPlex 755 Support Question
Find answers below for this question about Dell OptiPlex 755.Need a Dell OptiPlex 755 manual? We have 3 online manuals for this item!
Question posted by busthsoft on June 26th, 2014
How To Remove Batter Optiplex 755
The person who posted this question about this Dell product did not include a detailed explanation. Please use the "Request More Information" button to the right if more details would help you to answer this question.
Current Answers
Related Dell OptiPlex 755 Manual Pages
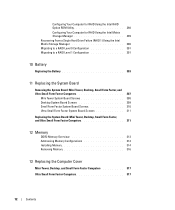
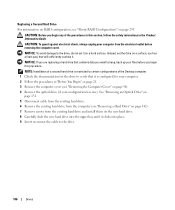
Quick Reference
Guide - Page 2
... registered trademarks or trademarks of Microsoft Corporation in any manner whatsoever without notice. © 2007 Dell Inc.
Information in this text: Dell, the DELL logo, OptiPlex, Inspiron, Dimension, Latitude, Dell Precision, DellNet, TravelLite, OpenManage, PowerVault, Axim, PowerEdge, PowerConnect, PowerApp, and StrikeZone are trademarks of Intel Corporation in the U.S and other...
Quick Reference
Guide - Page 3
... Computer 13 Before Working Inside Your Computer 14
Mini Tower Computer 16 System Views 16 Removing the Computer Cover 22 Inside Your Computer 24 System Board Components 25 Jumper Settings 26
Desktop Computer 27 System Views 27 Removing the Computer Cover 32 Inside Your Computer 33 System Board Components 35 Jumper Settings 36...
Quick Reference
Guide - Page 6
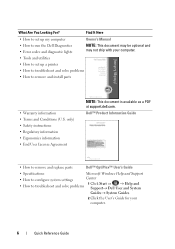
...™ Product Information Guide
• How to remove and replace parts
Dell™ OptiPlex™ User's Guide
• Specifications
Microsoft Windows...computer.
• Tools and utilities
• How to set up my computer
Owner's Manual
• How to remove and install parts
• Warranty information • Terms and Conditions (U.S. only) • Safety instructions • ...
Quick Reference
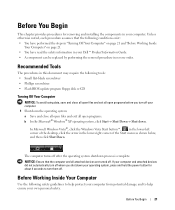
Guide - Page 13
... in your Dell™ Product Information
Guide. • A component can be replaced by performing the removal procedure in
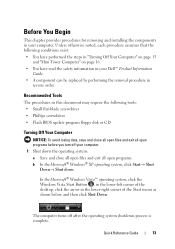
reverse order. The computer turns off your computer. In the Microsoft® Windows Vista™... operating system, click the Windows Vista Start Button , in the lower-left corner of the desktop, click the arrow in the lower-right corner of the Start menu as shown below, and ...
Quick Reference
Guide - Page 15
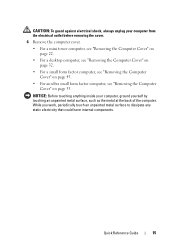
... back of the computer. NOTICE: Before touching anything inside your computer from the electrical outlet before removing the cover.
6 Remove the computer cover.
• For a mini tower computer, see "Removing the Computer Cover" on page 22.
• For a desktop computer, see "Removing the Computer Cover" on page 32.
• For a small form factor computer, see...
Quick Reference
Guide - Page 65
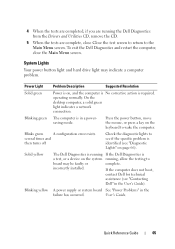
On the desktop computer, a solid green light indicates a network connection.
Solid yellow
The Dell Diagnostics is running If the Dell ...the power button, move the mouse, or press a key on the system running the Dell Diagnostics from the Drivers and Utilities CD, remove the CD.
5 When the tests are complete, close the Main Menu screen.
Blinking yellow A power supply or system board See "...
User's Guide - Page 2
CAUTION: A CAUTION indicates a potential for energy efficiency. Information in this text: Dell, the DELL logo, OptiPlex, TravelLite, OpenManage, and StrikeZone are trademarks of Intel Corporation in the U.S and other than its own. Reproduction in the United States and/or other countries; ...
User's Guide - Page 5
... Intrusion Switch 93 Resetting the Chassis Intrusion Detector 93
Removing the Heat Sink Assembly 94
System Board Components 95
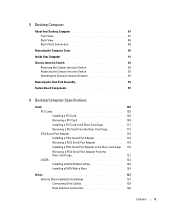
6 Desktop Computer Specifications
Cards 103 PCI Cards 103 Installing a PCI Card 103 Removing a PCI Card 109 Installing a PCI Card in the Riser-Card Cage 111 Removing a PCI Card From the Riser-Card Cage 114 PS...
User's Guide - Page 12
... Level 1 Configuration 301
10 Battery
Replacing the Battery 303
11 Replacing the System Board
Removing the System Board: Mini Tower, Desktop, Small Form Factor, and Ultra Small Form Factor Computers 307
Mini Tower System Board Screws 308 Desktop System Board Screws 309 Small Form Factor System Board Screws 310 Ultra Small Form Factor...
User's Guide - Page 18
...8226; Regulatory information • Ergonomics information • End User License Agreement
• How to remove and replace parts • Specifications • How to configure system settings • How to ...Microsoft Windows License Label
Find It Here Dell™ Product Information Guide
Dell™ OptiPlex™ User's Guide Microsoft Windows Help and Support Center
1 Click Start or ...
User's Guide - Page 21
...; Shut Down→ Shut down your operating system, press and hold the power button for removing and installing the components in your computer and attached devices did not automatically turn them off. ...174;, click the Windows Vista Start button™, , in the lower-left corner of the desktop, click the arrow in reverse order. Unless otherwise noted, each procedure assumes that the computer...
User's Guide - Page 22
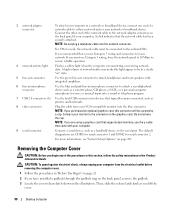
... against electrical shock, always unplug your computer and all attached devices from the electrical outlet before removing the cover.
5 Remove the computer cover.
• For a mini tower computer, see "Removing the Computer Cover" on page 27.
• For a desktop computer, see "Removing the Computer Cover" on page 90.
• For a small form factor computer, see...
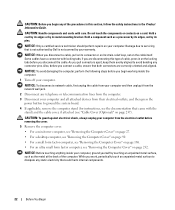
User's Guide - Page 29
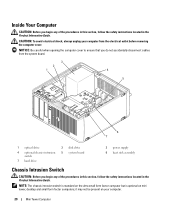
it may not be present on mini tower, desktop and small form factor computers; NOTICE: Be careful when opening the computer cover to ensure that you do not accidentally disconnect cables from the electrical outlet before removing the computer cover. Inside Your Computer
CAUTION: Before you begin any of the procedures in this...
User's Guide - Page 90
...you lift the
cover.
90
Desktop Computer
Then, slide the release latch back as printers and keyboards.
8 video connector
Plug the cable from the electrical outlet before removing the computer cover.
1 ...force the network speed to 10 Mbps to the network adapter connector on page 281. Removing the Computer Cover
CAUTION: Before you use the y-cable that typically remain connected, ...
User's Guide - Page 91
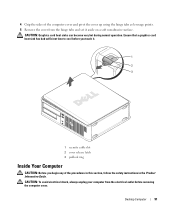
... begin any of the computer cover and pivot the cover up using the hinge tabs as leverage points. 5 Remove the cover from the electrical outlet before you touch it aside on a soft nonabrasive surface. Desktop Computer
91 CAUTION: Graphics card heat sinks can become very hot during normal operation. Ensure that a graphics...
User's Guide - Page 92
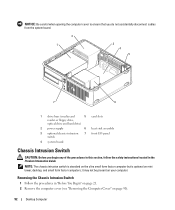
Removing the Chassis Intrusion Switch
1 Follow the procedures in the Product Information Guide. it may not be present on page 90).
92
Desktop Computer NOTE: The chassis intrusion switch is standard on the ultra small form factor computer but is optional on mini tower, desktop, and small form factor computers;
NOTICE: Be careful when...
User's Guide - Page 93

... place.
2 Reconnect the cable to the system board. 3 Replace the computer cover (see the Microsoft® Windows® desktop.
If you wait too long and the operating system logo appears, continue to remove the switch and its attached cable from the computer. 3 Disconnect the chassis intrusion switch cable from the system board...
User's Guide - Page 94

... on its top.
1
2
1 heat sink assembly 2 captive screw housing (2)
94
Desktop Computer Be sure that it has had sufficient time to select Reset. or right-arrow key to cool before you touch it.
2 Rotate the heat sink assembly upward, and remove the assembly from the computer. NOTE: The default setting is On...
User's Guide - Page 146
... you begin any of the Desktop computer. 1 Check the documentation for the drive to verify that it . NOTICE: If you are replacing a hard drive that will sufficiently cushion it is restricted to the drive.
146
Drives CAUTION: To guard against electrical shock, always unplug your files before removing the computer cover.
See...
User's Guide - Page 373
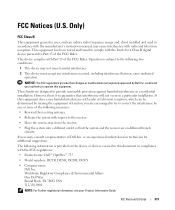
... cause harmful interference.
2 This device must accept any interference received, including interference that may cause interference with the FCC regulations:
• Product name: Dell™ OptiPlex™ 755
• Model numbers: DCTR, DCNE, DCSM, DCCY
• Company name: Dell Inc. could void your Product Information Guide.
Only)
FCC Class B
This equipment generates...


