
Dell Inspiron One 2320 Support Question
Dell Inspiron One 2320 Support Question
Find answers below for this question about Dell Inspiron One 2320.Need a Dell Inspiron One 2320 manual? We have 3 online manuals for this item!
Question posted by Cajma on September 4th, 2014
Inspiron One 2320 Touch Screen How To Set Up New User
The person who posted this question about this Dell product did not include a detailed explanation. Please use the "Request More Information" button to the right if more details would help you to answer this question.
Current Answers
Related Dell Inspiron One 2320 Manual Pages
Quick Start Guide (PDF) - Page 1
...8482;, the DELL logo, and Inspiron™ are trademarks of ga naar support.dell.com/manuals als u meer wilt weten over de functies en geavanceerde opties die voor uw desktop beschikbaar zijn.
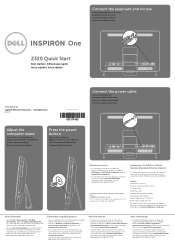
• Ga...Branchez le clavier et la souris Conecte el teclado y el mouse Conecte o teclado e o mouse
One
2320 Quick Start
Snel starten | Démarrage rapide Inicio rápido | Início rápido
...
Owners Manual - Page 7
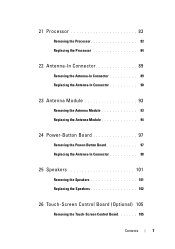
... 97
Removing the Power-Button Board 97 Replacing the Antenna-In Connector 98
25 Speakers 101
Removing the Speakers 101 Replacing the Speakers 102
26 Touch-Screen Control Board (Optional) 105
Removing the Touch-Screen Control Board 105
Contents
7
Owners Manual - Page 8
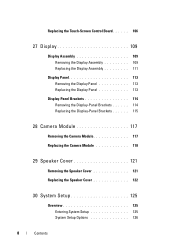
Replacing the Touch-Screen Control Board. . . . . . 106
27 Display 109
Display Assembly 109 Removing the Display Assembly 109 Replacing the Display Assembly 111
Display Panel 113 Removing the Display ...
Owners Manual - Page 15
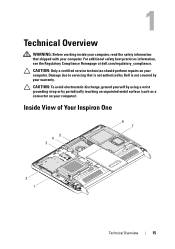
Inside View of Your Inspiron One
45 3
6 7
2 1
Technical Overview
15 CAUTION: To avoid electrostatic discharge, ground yourself by using a wrist ... your computer, read the safety information that is not authorized by Dell is not covered by periodically touching an unpainted metal surface (such as a connector on your computer.
Damage due to servicing that shipped with your computer.
Owners Manual - Page 16
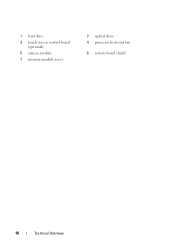
1 hard drive 3 touch-screen control board
(optional) 5 camera module 7 memory-module cover
2 optical drive 4 processor heat-sink fan
6 system-board shield
16
Technical Overview
Owners Manual - Page 18
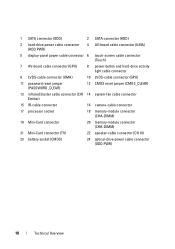
1 SATA connector (ODD)
2 SATA connector (HDD)
3 hard-drive power cable connector (HDD PWR)
4 AV-board cable connector (UMA)
5 display-panel power cable connector 6 touch-screen cable connector (Touch)
7 AV-board cable connector (GPU)
8 power-button and hard-drive activity light cable connector
9 LVDS-cable connector (UMA)
10 LVDS-cable connector (GPU)
11 password ...
Owners Manual - Page 23
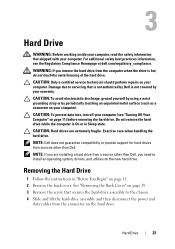
... remove the hard drive while the computer is On or in "Before You Begin" on the new hard drive. NOTE: Dell does not guarantee compatibility or provide support for hard drives from the ... Remove the back cover. Damage due to servicing that is not authorized by Dell is hot, do not touch the metal housing of the hard drive.
CAUTION: To prevent data loss, turn off your computer. 3
Hard...
Owners Manual - Page 57
..."Removing the Side I /O cover. See "System Board Components" on page 11 and record all the screens in system setup utility. See "Removing the Rear-Stand Assembly"
on page 35. 4 Remove the rear...warranty.
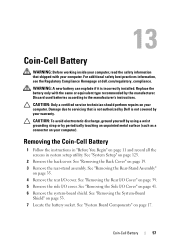
Damage due to the manufacturer's instructions. WARNING: A new battery can explode if it is not covered by periodically touching an unpainted metal surface (such as a connector on your ...
Owners Manual - Page 58
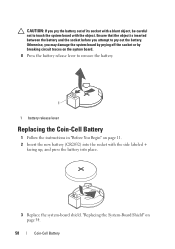
"Replacing the System-Board Shield" on page 11. 2 Insert the new battery (CR2032) into the socket with the object. Ensure that the object is inserted between the ...Battery CAUTION: If you pry the battery out of its socket with a blunt object, be careful not to touch the system board with the side labeled +
facing up, and press the battery into place.
3 Replace the system-board shield.
Owners Manual - Page 83
... Processor
1 Follow the instructions in the release position so that the socket is not covered by periodically touching an unpainted metal surface (such as a connector on page 39. 5 Remove the side I /O ... release lever completely to servicing that is not authorized by Dell is ready for the new processor. Processor
83 See "Removing the Back Cover" on your computer. 20
Processor
WARNING...
Owners Manual - Page 84

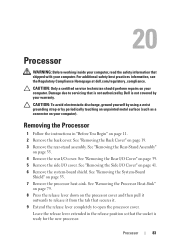
... the processor to remove it from the socket.
2 1
1 socket
2 processor
Replacing the Processor
1 Follow the instructions in "Before You Begin" on page 11. 2 Unpack the new processor, being careful not to touch the underside of the
processor.
Owners Manual - Page 105
... service technician should perform repairs on your warranty. CAUTION: To avoid electrostatic discharge, ground yourself by using a wrist grounding strap or by your computer).
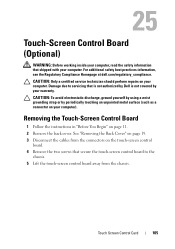
25
Touch-Screen Control Board (Optional)
WARNING: Before working inside your computer, read the safety information that is not authorized by Dell is not covered by periodically...
Owners Manual - Page 106
... "Replacing the Back Cover" on the computer, replace all screws and ensure that secure the touch-screen control board to the
chassis. 4 Connect the cables to the computer.
106
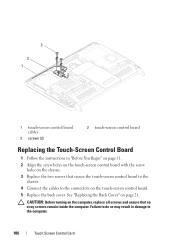
Touch Screen Control Card 3
2 1
1 touch-screen control board cables
3 screws (2)
2 touch-screen control board
Replacing the Touch-Screen Control Board
1 Follow the instructions in damage to the connectors on the...
Owners Manual - Page 107
6 Connect your computer and all attached devices to electrical outlets, and turn them on. Touch Screen Control Card
107
Owners Manual - Page 110
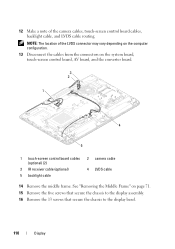
See "Removing the Middle Frame" on the system board, touch-screen control board, AV board, and the converter board.
3 2
1
4
5
1 touch-screen control board cables (optional) (2)
3 IR receiver cable (optional) 5 backlight cable
2 camera cable 4 ... display bezel.
110
Display NOTE: The location of the camera cables, touch-screen control board cables, backlight cable, and LVDS cable routing.
Owners Manual - Page 111
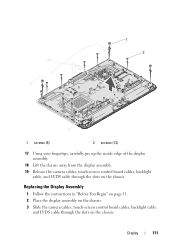
Replacing the Display Assembly
1 Follow the instructions in "Before You Begin" on page 11. 2 Place the display assembly on the chassis. 3 Slide the camera cables, touch-screen control board cables, backlight cable
and LVDS cable through the slots on the chassis.
1 2
1 screws (5)
2 screws (13)
17 Using your fingertips, carefully pry up the ...
Owners Manual - Page 112
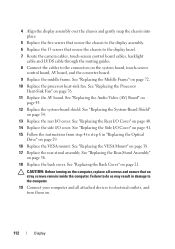
...stray screws remain inside the computer. See "Replacing the Rear-Stand Assembly"
on the system board, touch-screen
control board, AV board, and the converter board. 9 Replace the middle frame. See "Replacing...and ensure that secure the chassis to the display bezel. 7 Route the camera cables, touch-screen control board cables, backlight
cable and LVDS cable through the routing guides. 8 Connect ...
Owners Manual - Page 125
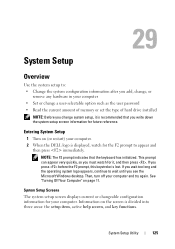
... the user password • Read the current amount of memory or set the type of hard drive installed
NOTE: Before you change system setup, it , and then press . Information on page 11. See "Turning Off Your Computer" on the screen is recommended that the keyboard has initialized. If you see the Microsoft Windows desktop.
Owners Manual - Page 126
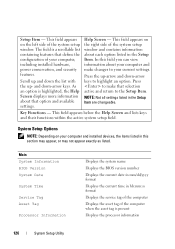
...Utility
Key Functions - System Setup Options
NOTE: Depending on the right side of your current settings. and down -arrow keys to your computer, including installed hardware, power conservation, and ... are changeable. This field appears on your computer and make that option and available settings.
Help Screen -
Scroll up and down the list with the up -arrow and down -arrow...
Owners Manual - Page 132
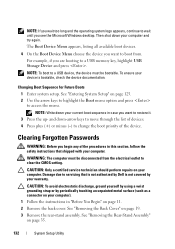
...example, if you want to boot from the electrical outlet to clear the CMOS setting. CAUTION: To avoid electrostatic discharge, ground yourself by using a wrist grounding strap... "Removing the Back Cover" on your device is not covered by periodically touching an unpainted metal surface (such as a connector on page 19. 3 Remove...desktop. WARNING: The computer must be disconnected from .
Similar Questions

How To Restore A Dell Inspiron 2320 Touch Screen Desktop To Factory
(Posted by dmantopdo 9 years ago)

How To Change Touch Screen Settings On Inspiron One 9
(Posted by Zejames3 10 years ago)

How To Set Default Touch Screen Settings On Dell Inspiron
(Posted by ramac1248 10 years ago)

Setting Up Dell Inspiron One 2320 Touch Screen How To
(Posted by chotlw200 10 years ago)

How To Start Dell Inspiron 2320 Touch Screen Not Working
(Posted by vee2clj221 10 years ago)