Dell Inspiron One 2320 Support Question
Find answers below for this question about Dell Inspiron One 2320.Need a Dell Inspiron One 2320 manual? We have 3 online manuals for this item!
Question posted by spartbken on November 30th, 2013
How Adjust 2320 Inspiron Monitor Stand
The person who posted this question about this Dell product did not include a detailed explanation. Please use the "Request More Information" button to the right if more details would help you to answer this question.
Current Answers
There are currently no answers that have been posted for this question.
Be the first to post an answer! Remember that you can earn up to 1,100 points for every answer you submit. The better the quality of your answer, the better chance it has to be accepted.
Be the first to post an answer! Remember that you can earn up to 1,100 points for every answer you submit. The better the quality of your answer, the better chance it has to be accepted.
Related Dell Inspiron One 2320 Manual Pages
Quick Start Guide (PDF) - Page 1
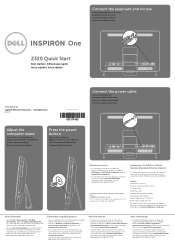

...3355). Dell™, the DELL logo, and Inspiron™ are trademarks of problemen voor de klantenservice...described in this document in accordance with your desktop, click Start→ All Programs→...el mouse Conecte o teclado e o mouse
One
2320 Quick Start
Snel starten | Démarrage rapide ...- 07
Printed in China
0GX7TPA00
Adjust the computer stand
Pas de stand van de computer aan Ré...
Owners Manual - Page 2

... used in this document is strictly forbidden.
Other trademarks and trade names may be used in this text: Dell™, the DELL™ logo, and Inspiron™ are either trademarks or registered trademarks of Microsoft Corporation in trademarks and trade names other countries. disclaims any manner whatsoever without notice. © 2011...
Owners Manual - Page 3
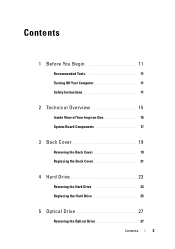

Contents
1 Before You Begin 11
Recommended Tools 11 Turning Off Your Computer 11 Safety Instructions 11
2 Technical Overview 15
Inside View of Your Inspiron One 15 System Board Components 17
3 Back Cover 19
Removing the Back Cover 19 Replacing the Back Cover 21
4 Hard Drive 23
Removing the Hard ...
Owners Manual - Page 4
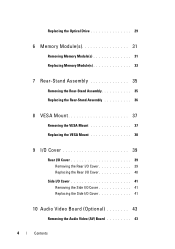

Replacing the Optical Drive 29
6 Memory Module(s 31
Removing Memory Module(s 31 Replacing Memory Module(s 33
7 Rear-Stand Assembly 35
Removing the Rear-Stand Assembly 35 Replacing the Rear-Stand Assembly 36
8 VESA Mount 37
Removing the VESA Mount 37 Replacing the VESA Mount 38
9 I/O Cover 39
Rear I/O Cover 39 Removing the Rear I/O Cover...
Owners Manual - Page 15
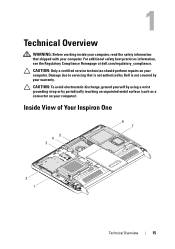

Inside View of Your Inspiron One
45 3
6 7
2 1
Technical Overview
15
1
Technical Overview
WARNING: Before working inside your computer, read the safety information that is not authorized by Dell is not ...
Owners Manual - Page 35
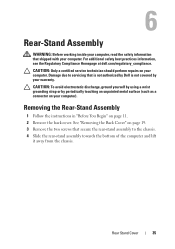

... a certified service technician should perform repairs on your warranty. See "Removing the Back Cover" on page 19. 3 Remove the two screws that secure the rear-stand assembly to servicing that shipped with your computer). CAUTION: To avoid electrostatic discharge, ground yourself by using a wrist grounding strap or by your computer. Removing...
Owners Manual - Page 36
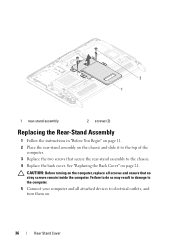

... electrical outlets, and turn them on the chassis and slide it to the top of the
computer. 3 Replace the two screws that secure the rear-stand assembly to the computer. 5 Connect your computer and all screws and ensure that no stray screws remain inside the computer. Failure to do so may...
Owners Manual - Page 37
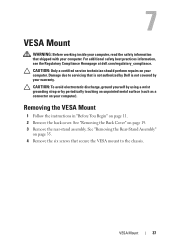

... page 35. 4 Remove the six screws that secure the VESA mount to servicing that shipped with your computer). See "Removing the Rear-Stand Assembly"
on page 19. 3 Remove the rear-stand assembly. CAUTION: Only a certified service technician should perform repairs on page 11. 2 Remove the back cover. Removing the VESA Mount
1 Follow...
Owners Manual - Page 38
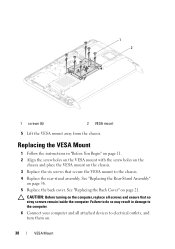

1 2
1 screws (6)
2 VESA mount
5 Lift the VESA mount away from the chassis. See "Replacing the Rear-Stand Assembly"
on page 21.
See "Replacing the Back Cover" on page 36. 5 Replace the back cover. CAUTION: Before turning on the chassis. 3 ... holes on the
chassis and place the VESA mount on the computer, replace all attached devices to the chassis. 4 Replace the rear-stand assembly.
Owners Manual - Page 39
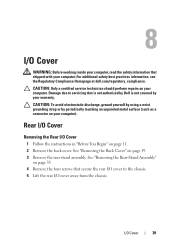

... the Regulatory Compliance Homepage at dell.com/regulatory_compliance. CAUTION: Only a certified service technician should perform repairs on page 19. 3 Remove the rear-stand assembly. See "Removing the Rear-Stand Assembly"
on page 35. 4 Remove the four screws that is not authorized by Dell is not covered by periodically touching an unpainted metal...
Owners Manual - Page 40
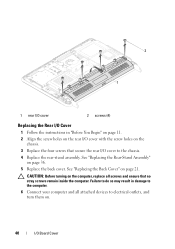

...computer. 6 Connect your computer and all screws and ensure that no stray screws remain inside the computer. See "Replacing the Rear-Stand Assembly"
on page 21.
See "Replacing the Back Cover" on page 36. 5 Replace the back cover. Failure to do ... rear I/O cover
2 screws (4)
Replacing the Rear I/O Cover
1 Follow the instructions in damage to the chassis. 4 Replace the rear-stand assembly.
Owners Manual - Page 43
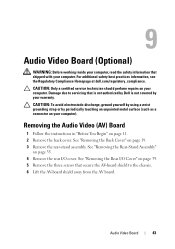

...AV) Board
1 Follow the instructions in "Before You Begin" on page 19. 3 Remove the rear-stand assembly. CAUTION: To avoid electrostatic discharge, ground yourself by using a wrist grounding strap or by periodically... that is not authorized by Dell is not covered by your computer. See "Removing the Rear-Stand Assembly"
on page 35. 4 Remove the rear I /O Cover" on your computer. For additional...
Owners Manual - Page 45
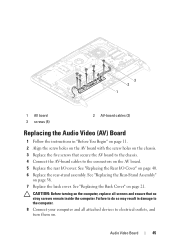

.... 4 Connect the AV-board cables to electrical outlets, and turn them on.
See "Replacing the Rear I /O cover. See "Replacing the Rear-Stand Assembly"
on page 40. 6 Replace the rear-stand assembly. CAUTION: Before turning on page 21.
Audio Video Board
45 See "Replacing the Back Cover" on the computer, replace all attached...
Owners Manual - Page 47
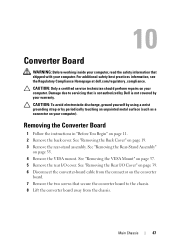

.... 7 Remove the two screws that shipped with your computer. See "Removing the Back Cover" on page 35. 4 Remove the VESA mount. See "Removing the Rear-Stand Assembly"
on page 19. 3 Remove the rear...
Owners Manual - Page 48
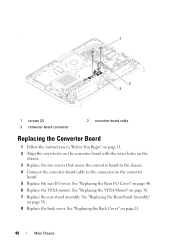

... secure the converter board to the chassis. 4 Connect the converter-board cable to the connector on page 21.
48
Main Chassis See "Replacing the Rear-Stand Assembly"
on page 40. 6 Replace the VESA mount. See "Replacing the Rear I /O cover. See "Replacing the VESA Mount" on page 38. 7 Replace the rear...
Owners Manual - Page 51
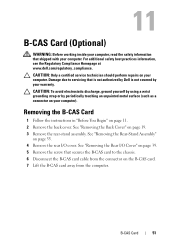

... discharge, ground yourself by using a wrist grounding strap or by your warranty.
See "Removing the Rear-Stand Assembly"
on your computer). CAUTION: Only a certified service technician should perform repairs on page 35. 4... Follow the instructions in "Before You Begin" on page 19. 3 Remove the rear-stand assembly. See "Removing the Back Cover" on page 11. 2 Remove the back cover....
Owners Manual - Page 52
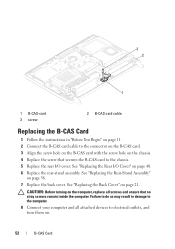

See "Replacing the Rear-Stand Assembly"
on page 21. CAUTION: Before turning on the computer, replace all attached devices to ...the connector on the B-CAS card. 3 Align the screw hole on the B-CAS card with the screw hole on page 40. 6 Replace the rear-stand assembly. See "Replacing the Rear I /O cover. 3 2
1
1 B-CAS-card 3 screw
2 B-CAS card cable
Replacing the B-CAS Card
1 ...
Owners Manual - Page 53
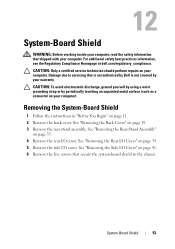

...Board Shield
1 Follow the instructions in "Before You Begin" on page 19. 3 Remove the rear-stand assembly.
CAUTION: Only a certified service technician should perform repairs on your computer. CAUTION: To avoid ...yourself by using a wrist grounding strap or by your computer. See "Removing the Rear-Stand Assembly"
on page 41. 6 Remove the five screws that secure the system-board shield...
Owners Manual - Page 55


... to the computer. 8 Connect your computer and all screws and ensure that no stray screws remain inside the computer. See "Replacing the Rear-Stand Assembly" on .
6 Replace the rear-stand assembly. CAUTION: Before turning on page 21. See "Replacing the Back Cover" on the computer, replace all attached devices to electrical outlets...
Owners Manual - Page 132

..." on page 35.
132
System Setup Utility See "Removing the Rear-Stand Assembly" on page 19. 3 Remove the rear-stand assembly. For example, if you are booting to boot from the electrical... keys to highlight the Boot menu option and press to wait until you see the Microsoft Windows desktop.
CAUTION: Only a certified service technician should perform repairs on page 11. 2 Remove the back...
Similar Questions
How Do You Adjust The Monitor Stand On The Dell 2320
(Posted by MAUP2MTN 9 years ago)
How To Adjust Monitor Stand Inspiron One Not Firm
(Posted by antcrow 10 years ago)
How To Adjust Dell Monitor Stand In Inpiron All In One 2320
(Posted by workpDad 10 years ago)

