Dell Inspiron 660 Support Question
Dell Inspiron 660 Support Question
Find answers below for this question about Dell Inspiron 660.Need a Dell Inspiron 660 manual? We have 2 online manuals for this item!
Question posted by aceone303 on August 25th, 2015
Connecting Audio Cable
I want to connect the audio cables to my computer. one audio cable is in the monitor and other is coming from the analog external speaker.
Current Answers
Answer #1: Posted by TechSupport101 on August 25th, 2015 9:40 PM
TechSupport101

Member since:
May 24th, 2013 Points: 12,171,325

Member since:
May 24th, 2013 Points: 12,171,325
The computer audio port is greenish and you can only use one of the two as far as I can tell. The analog external may require a powered amp depending on it exact makeup. All see the desktop's manual here https://www.helpowl.com/manuals/Dell/Inspiron660/163002 for more info on the audio setup and the figures thereof.
Related Dell Inspiron 660 Manual Pages
View - Page 2

... (optional)
HDMI HDMI
HDMI DVI
NOTE: If you ordered your computer with an optional discrete graphics card, connect the display to the port on your discrete graphics card
4 Connect the power cable and press the power button
5 Complete Windows setup
完成 Windows Windows 設定 Windows Windows
Record your Windows...
Owners Manual - Page 1
Dell Inspiron 660 Owner's Manual
Computer model: Inspiron 660 Regulatory model: D11M Regulatory type: D11M002
Owners Manual - Page 2
All rights reserved.
Intel® and Intel SpeedStep® are registered trademarks of Intel Corporation in this text: Dell™, the DELL logo, and Inspiron™ are trademarks of Dell Inc.; disclaims any manner whatsoever without notice. © 2012 Dell Inc. A00
and/or other than its own.
2012 - 04
...
Owners Manual - Page 9
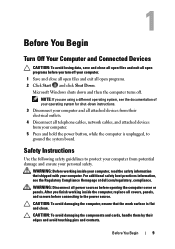
..., save and close all open files and exit all power sources before connecting to ground the system board. WARNING: Before working inside your computer and... your computer from your personal safety.
After you finish working inside the computer, replace all telephone cables, network cables, and attached devices from potential damage and ensure your computer.
5 Press and hold the power ...
Owners Manual - Page 10
... harm internal components. When connecting cables, ensure that you must disengage before disconnecting the cable. CAUTION: To disconnect a network cable, first unplug the cable from your computer, ground ... for complete information about safety precautions, working inside the computer. When disconnecting cables, keep them evenly aligned to avoid bending any of the computer.
Recommended...
Owners Manual - Page 11
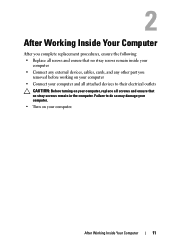
... computer, replace all attached devices to their electrical outlets
CAUTION: Before turning on your computer • Connect your computer and all screws and ensure that no stray screws remain inside your
computer • Connect any external devices, cables, cards, and any other part you
removed before working on your computer. After Working Inside Your...
Owners Manual - Page 19
Computer Cover
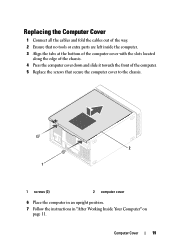
19 Replacing the Computer Cover
1 Connect all the cables and fold the cables out of the way. 2 Ensure that no tools or extra parts are left inside the computer. 3 Align the tabs at the bottom of the computer ...
Owners Manual - Page 34
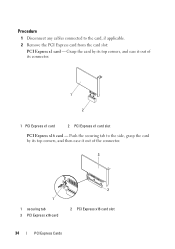
..., and ease it out of the connector.
3
1
1 securing tab 3 PCI Express x16 card
2 2 PCI Express x16 card slot
34
PCI Express Cards Procedure
1 Disconnect any cables connected to the side, grasp the card by its connector.
1
2
1 PCI Express x1 card
2 PCI Express x1 card slot
PCI Express x16 card - Push the securing...
Owners Manual - Page 36
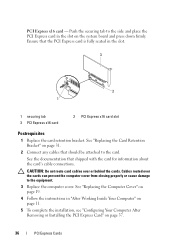
... the computer cover. See "Replacing the Computer Cover" on page 19.
4 Follow the instructions in the slot on page 31.
2 Connect any cables that shipped with the card for information about the card's cable connections. Ensure that the PCI Express card is fully seated in the slot.
3
2 1
1 securing tab 3 PCI Express x16 card
2 PCI...
Owners Manual - Page 37
..." on page 91.
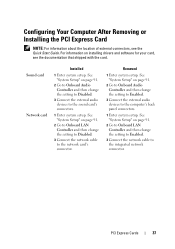
2 Go to Onboard Audio Controller and then change the setting to Enabled.
3 Connect the network cable to the computer's back panel connectors.
1 Enter system setup.
See "System Setup" on page 91.
2 Go to Onboard LAN Controller and then change the setting to Disabled.
3 Connect the external audio devices to the network card's connector...
Owners Manual - Page 41
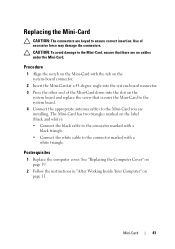
...a 45-degree angle into the slot on the label (black and white): • Connect the black cable to the connector marked with a
white triangle. The Mini-Card has two triangles marked on...the screw that there are keyed to the connector marked with a
black triangle. • Connect the white cable to ensure correct insertion. Mini-Card
41
See "Replacing the Computer Cover" on page ...
Owners Manual - Page 48
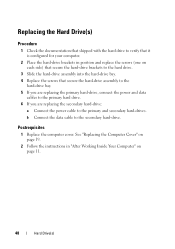
b Connect the data cable to the hard drive.
3 Slide the hard-drive assembly into the hard-drive bay. 4 Replace the ...hard-drive bay. 5 If you are replacing the primary hard-drive, connect the power and data
cables to the primary hard drive. 6 If you are replacing the secondary hard-drive:
a Connect the power cable to the primary and secondary hard-drives.
Postrequisites
1 Replace the computer ...
Owners Manual - Page 55
..." on page 19.
2 Replace the front bezel. Optical Drive
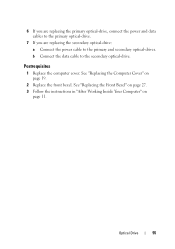
55 6 If you are replacing the primary optical-drive, connect the power and data cables to the primary optical-drive.
7 If you are replacing the secondary optical-drive: a Connect the power cable to the secondary optical-drive. See "Replacing the Computer Cover" on
page 11...
Owners Manual - Page 59
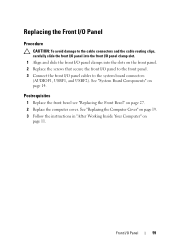
... Front I/O Panel
Procedure
CAUTION: To avoid damage to the cable connectors and the cable routing clips, carefully slide the front I/O panel into the ...USBF2). See "System Board Components" on page 27. 2 Replace the computer cover. Front I /O panel cables to the front panel. 3 Connect the front I /O Panel
59
Postrequisites
1 Replace the front bezel see "Replacing the Front Bezel" on page...
Owners Manual - Page 63
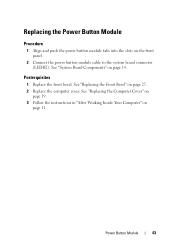
... tabs into the slots on page 27. 2 Replace the computer cover. Postrequisites
1 Replace the front bezel.
See "Replacing the Front Bezel" on the front panel.
2 Connect the power button module cable to the system board connector (LEDH2).
Owners Manual - Page 67
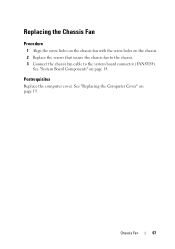
... the screw holes on the chassis fan with the screw holes on the chassis. 2 Replace the screws that secure the chassis fan to the chassis. 3 Connect the chassis fan cable to the system board connector (FANSYS4).
Owners Manual - Page 71

... Replacing the Processor Fan and Heat-Sink Assembly
Procedure
CAUTION: Ensure that secure the processor fan and heat-sink
assembly to the system board. 5 Connect the processor fan cable to the system board connector
(FANCPU). Postrequisites
1 Replace the computer cover. See "System Board Components" on the system board. 4 Tighten the captive screws...
Owners Manual - Page 83
....
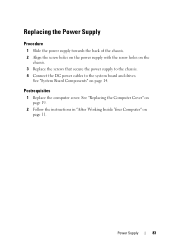
2 Follow the instructions in "After Working Inside Your Computer" on the
chassis. 3 Replace the screws that secure the power supply to the chassis. 4 Connect the DC power cables to the system board and drives. Postrequisites
1 Replace the computer cover. Replacing the Power Supply
Procedure
1 Slide the power supply towards the back of...
Owners Manual - Page 86
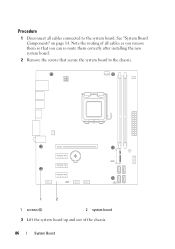
See "System Board Components" on page 14. Note the routing of all cables connected to the chassis.
1
2
1 screws (6)
2 system board
3 Lift the system board up and out of the chassis.
86
System Board Procedure
1 Disconnect all cables as you remove them so that you can re-route them correctly after installing the new system...
Owners Manual - Page 87
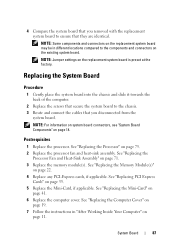
... the chassis and slide it towards the back of the computer.
2 Replace the screws that secure the system board to the chassis. 3 Route and connect the cables that you removed with the replacement system board to the components and connectors on page 14.
Postrequisites
1 Replace the processor. See "Replacing the Memory Module...
Similar Questions


Why Wont My Dell Desktop Inspiron 518 Turn On Blinking Amber
(Posted by Flavijvm 10 years ago)

How To Use The Hdmi Cable On Inspiron Desktop Inspiron One 2330
(Posted by mhoras 10 years ago)
