Dell Inspiron 3421 Support Question
Dell Inspiron 3421 Support Question
Find answers below for this question about Dell Inspiron 3421.Need a Dell Inspiron 3421 manual? We have 2 online manuals for this item!
Question posted by govindraj on July 17th, 2013
Connecting Laptop To Projector Usb Port?
Dell N3421 laptop doesnot have video port but has HDMI port. How do we connect this laptop to Projector which has USB. Any tips welcome
Current Answers
Answer #1: Posted by prateekk007 on July 17th, 2013 7:28 AM
prateekk007

Member since:
December 5th, 2012 Points: 2,137,520

Member since:
December 5th, 2012 Points: 2,137,520
Hi govindraj
Please follow the below mentioned steps that might help you :
1. Turn on the projector and open the laptop so that the laptop powers on.
2. Plug one end of the USB cable into the projector's USB port.
3. Plug the other end of the USB cable into any working USB port on your laptop.
4. Click "Agree" or "OK" if you see a dialog box appear on your laptop's screen.
Press FN+F1 and check if it works.
Hope This Helps.
For easy access to drivers, manuals and product updates, please visit our Support Site .
Thanks & Regards
Prateek K
Related Dell Inspiron 3421 Manual Pages
Owner's Manual - Page 1

Inspiron 14/14R Owner's Manual
Computer model: Inspiron 3421/5421 Regulatory model: P37G Regulatory type: P37G001
Owner's Manual - Page 2

... Bluetooth SIG, Inc. Microsoft®, Windows®, and the Windows start button logo are either trademarks or registered trademarks of Microsoft Corporation in this text: Dell™, the DELL logo, and Inspiron™ are not followed. A00 Notes, Cautions, and Warnings
NOTE: A NOTE indicates important information that helps you make better use of...
Owner's Manual - Page 3
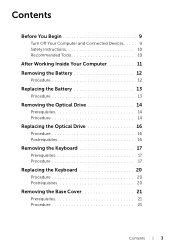
Contents
Before You Begin 9
Turn Off Your Computer and Connected Devices . . . . . 9 Safety Instructions 10 Recommended Tools 10
After Working Inside Your Computer 11 Removing the Battery 12
Procedure 12
Replacing the Battery 13
Procedure 13
...
Owner's Manual - Page 5

...
Removing the I/O Board 39
Prerequisites 39 Procedure 40
Replacing the I/O Board 41
Procedure 41 Postrequisites 41
Removing the Power-Adapter Port 42
Prerequisites 42 Procedure 43
Replacing the Power-Adapter Port 45
Procedure 45 Postrequisites 45
Removing the System Board 46
Prerequisites 46 Procedure 47
Replacing the System Board 49
Procedure 49...
Owner's Manual - Page 9
... you are using a different operating system, see the documentation of the
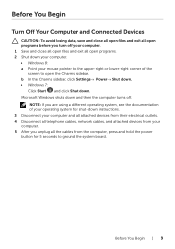
screen to ground the system board. Before You Begin
Turn Off Your Computer and Connected Devices
CAUTION: To avoid losing data, save and close all open files and exit all the cables from the computer, press and hold the power...
Owner's Manual - Page 10
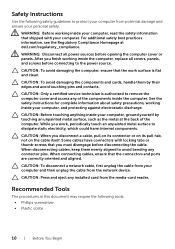
...an unpainted metal surface, such as the metal at dell.com/regulatory_compliance.
CAUTION: To avoid damaging the computer,...static electricity, which could harm internal components. When connecting cables, ensure that shipped with locking tabs or ... your computer, read the safety information that the connectors and ports are correctly oriented and aligned.
CAUTION: When you must disengage...
Owner's Manual - Page 11
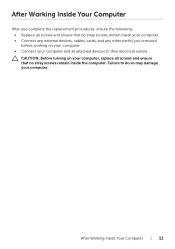
... Computer
After you complete the replacement procedures, ensure the following: • Replace all screws and ensure that no stray screws remain inside your computer. • Connect any external devices, cables, cards, and any other part(s) you removed before working on your computer, replace all attached devices to do so may damage...
Owner's Manual - Page 12
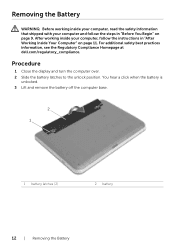
... your computer and follow the instructions in "Before You Begin" on page 11. For additional safety best practices information, see the Regulatory Compliance Homepage at dell.com/regulatory_compliance. Removing the Battery
WARNING: Before working inside your computer, read the safety information that shipped with your computer, follow the steps in "After...
Owner's Manual - Page 13
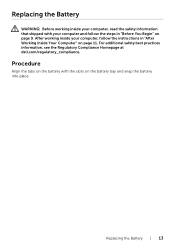
For additional safety best practices information, see the Regulatory Compliance Homepage at dell.com/regulatory_compliance. Replacing the Battery | 13 Procedure
Align the tabs on the battery with your computer, follow the steps in "After Working Inside Your Computer" ...
Owner's Manual - Page 27
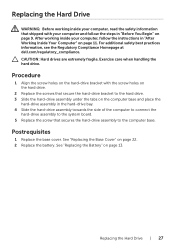
...the
hard-drive assembly in the hard-drive bay. 4 Slide the hard-drive assembly towards the side of the computer to connect the
hard-drive assembly to the computer base. Exercise care when handling the hard drive.
Procedure
1 Align the screw holes... Begin" on page 11. For additional safety best practices information, see the Regulatory Compliance Homepage at dell.com/regulatory_compliance.
Owner's Manual - Page 30
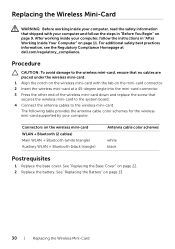
...card down and replace the screw that secures the wireless mini-card to the system board. 4 Connect the antenna cables to the wireless mini-card, ensure that shipped with the tab on the mini...-card connector. 2 Insert the wireless mini-card at dell.com/regulatory_compliance. Replacing the Wireless Mini-Card
WARNING: Before working inside your computer, read ...
Owner's Manual - Page 42
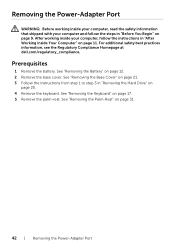
Removing the Power-Adapter Port
WARNING: Before working inside your computer, read the safety information that shipped with ... battery. See "Removing the Battery" on page 31.
42 | Removing the Power-Adapter Port For additional safety best practices information, see the Regulatory Compliance Homepage at dell.com/regulatory_compliance. See "Removing the Palm-Rest" on page 12. 2 Remove the base ...
Owner's Manual - Page 43

Removing the Power-Adapter Port | 43 Procedure
1 Peel the tape that secures the display cable to the display-cable connector. 2 Lift the connector latch and pull the tape to disconnect the display cable from the
display-cable connector.
1 2
3
1 display cable 3 connector latch
2 tape
3 Peel the display cable from the fan. 4 Move the display cable away from the power-adapter-port cable.
Owner's Manual - Page 44
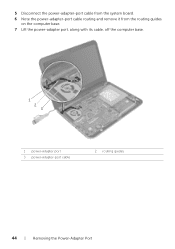
5 Disconnect the power-adapter-port cable from the system board. 6 Note the power-adapter-port cable routing and remove it from the routing guides
on the computer base. 7 Lift the power-adapter port, along with its cable, off the computer base.
1
2 3
1 power-adapter port 3 power-adapter-port cable
2 routing guides
44 | Removing the Power-Adapter Port
Owner's Manual - Page 45
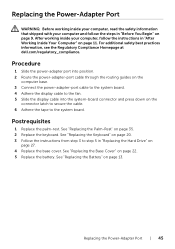
...1 Slide the power-adapter port into position. 2 Route the power-adapter-port cable through the routing guides on the
computer base. 3 Connect the power-adapter-port cable to the system board...safety best practices information, see the Regulatory Compliance Homepage at dell.com/regulatory_compliance. Replacing the Power-Adapter Port
WARNING: Before working inside your computer, read the safety ...
Owner's Manual - Page 47
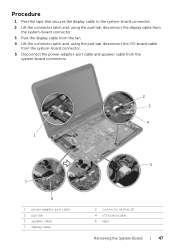
.... 4 Lift the connector latch and, using the pull-tab, disconnect the I/O-board cable
from the system-board connector. 5 Disconnect the power-adapter-port cable and speaker cable from the
system-board connectors.
2 3
4 1
7
6
1 power-adapter-port cable 3 pull-tab 5 speaker cable 7 display cable
5
2 connector latches (2) 4 I/O-board cable 6 tape
Removing the System Board | 47
Owner's Manual - Page 48

... assembly. 6 Remove the screw that secures the system board to the computer base. 7 Lift the system board at an angle and release the system-board ports from the slots
on page 51.
48 | Removing the System Board
Owner's Manual - Page 49
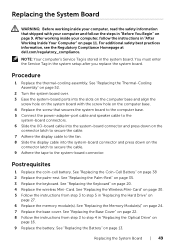
...Replace the screw that secures the system board to the computer base. 5 Connect the power-adapter-port cable and speaker cable to the
system-board connectors. 6 Slide the ... page 11. For additional safety best practices information, see the Regulatory Compliance Homepage at dell.com/regulatory_compliance. After working inside your computer and follow the instructions in "Replacing the Hard...
Owner's Manual - Page 67
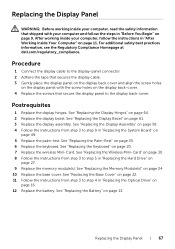
..."Replacing the Battery" on page 20. 7 Replace the wireless Mini-Card. Procedure
1 Connect the display cable to the display-panel connector. 2 Adhere the tape that secures the ... the battery. For additional safety best practices information, see the Regulatory Compliance Homepage at dell.com/regulatory_compliance. Postrequisites
1 Replace the display hinges. See "Replacing the Display Hinges" ...
Owner's Manual - Page 70
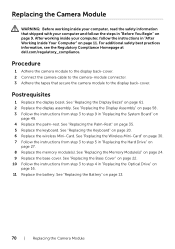
..." on page 9. Procedure
1 Adhere the camera module to the display back-cover. 2 Connect the camera cable to step 5 in "After Working Inside Your Computer" on page 11....5 Replace the keyboard. For additional safety best practices information, see the Regulatory Compliance Homepage at dell.com/regulatory_compliance. See "Replacing the Display Assembly" on page 58. 3 Follow the instructions from...
Similar Questions


Can I Connect A Dell Inspiron N5050 To A Tv With The Hdmi Port
(Posted by bughineen 10 years ago)

Does The Vga Port Of The Inspiron N7110 Provide An S Video Signal
(Posted by jblhsom24 10 years ago)

How To Connect Dell Inspiron N5050 With Lcd To Tv Via Hdmi
(Posted by aboobMo 10 years ago)