Dell 5110 Color Laser Support Question
Dell 5110 Color Laser Support Question
Find answers below for this question about Dell 5110 Color Laser.Need a Dell 5110 Color Laser manual? We have 1 online manual for this item!
Question posted by dajanagrzic on January 16th, 2012
How To Turn On A Keyboard Light On A Dell Inspiron 5110?
The person who posted this question about this Dell product did not include a detailed explanation. Please use the "Request More Information" button to the right if more details would help you to answer this question.
Current Answers
Related Dell 5110 Color Laser Manual Pages
Service Manual - Page 2
....
Other trademarks and trade names may be used in this text: Dell™, the DELL logo, and Inspiron™ are either the entities claiming the marks and names or their products. A00 is subject to hardware or loss of your computer.
Microsoft®, ...
Service Manual - Page 3
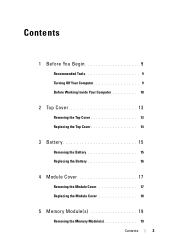
Contents
1 Before You Begin 9
Recommended Tools 9 Turning Off Your Computer 9 Before Working Inside Your Computer 10
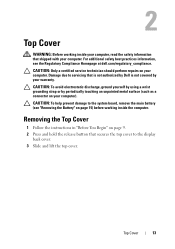
2 Top Cover 13
Removing the Top Cover 13 Replacing the Top Cover 14
3 Battery 15
Removing ...
Service Manual - Page 4
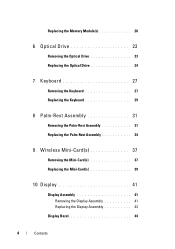
Replacing the Memory Module(s 20
6 Optical Drive 23
Removing the Optical Drive 23 Replacing the Optical Drive 24
7 Keyboard 27
Removing the Keyboard 27 Replacing the Keyboard 29
8 Palm-Rest Assembly 31
Removing the Palm-Rest Assembly 31 Replacing the Palm-Rest Assembly 34
9 Wireless Mini-Card(s 37
Removing the Mini-Card(s ...
Service Manual - Page 9
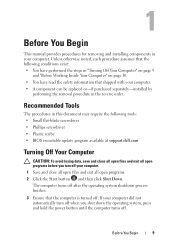
...; Phillips screwdriver • Plastic scribe • BIOS executable update program available at support.dell.com
Turning Off Your Computer
CAUTION: To avoid losing data, save and close all open files and... component can be replaced or-if purchased separately-installed by
performing the removal procedure in "Turning Off Your Computer" on page 9
and "Before Working Inside Your Computer" on page 10...
Service Manual - Page 10
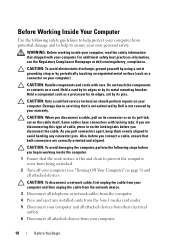
For additional safety best practices information, see "Turning Off Your Computer" on your warranty. Do not touch the components or ...a cable, ensure that is not authorized by Dell is flat and clean to prevent the computer cover from being scratched.
2 Turn off your computer (see the Regulatory Compliance Homepage at dell.com/regulatory_compliance. CAUTION: To avoid damaging the computer...
Service Manual - Page 11

CAUTION: To help prevent damage to the system board, remove the main battery (see "Removing the Battery" on page 15) before working inside the computer. 7 Remove the battery (see "Removing the Battery" on page 15). 8 Turn the computer top-side up, open the display, and press the power button to ground the system board.
Before You Begin
11
Service Manual - Page 13
...to the system board, remove the main battery (see the Regulatory Compliance Homepage at dell.com/regulatory_compliance.
CAUTION: To avoid electrostatic discharge, ground yourself by using a wrist ... Begin" on page 9. 2 Press and hold the release button that is not authorized by Dell is not covered by periodically touching an unpainted metal surface (such as a connector on your ...
Service Manual - Page 14
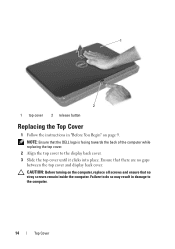
...damage to the display back cover. 3 Slide the top cover until it clicks into place. CAUTION: Before turning on page 9. Failure to do so may result in "Before You Begin" on the computer, replace .... NOTE: Ensure that there are no stray screws remain inside the computer. Ensure that the DELL logo is facing towards the back of the computer while replacing the top cover.
2 Align the ...
Service Manual - Page 15
...3
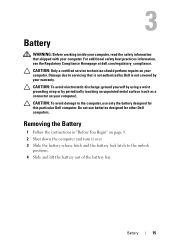
Battery
WARNING: Before working inside your computer, read the safety information that is not authorized by Dell is not covered by periodically touching an unpainted metal surface (such as a connector on your computer).... should perform repairs on page 9. 2 Shut down the computer and turn it over. 3 Slide the battery release latch and the battery lock latch to the computer, use...
Service Manual - Page 17
...the Battery" on page 15). 3 Loosen the captive screw that is not authorized by Dell™ is not covered by periodically touching an unpainted metal surface (such as a ...should perform repairs on page 9. 2 Remove the battery (see the Regulatory Compliance Homepage at dell.com/regulatory_compliance. CAUTION: To avoid electrostatic discharge, ground yourself by using a wrist grounding strap ...
Service Manual - Page 18
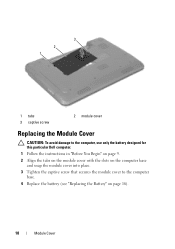
3 2 1
1 tabs 3 captive screw
2 module cover
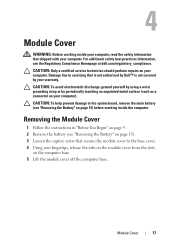
Replacing the Module Cover
CAUTION: To avoid damage to the computer, use only the battery designed for this particular Dell computer. 1 Follow the instructions in "Before You Begin" on page 9. 2 Align the tabs on the module cover with the slots on the computer base and ...
Service Manual - Page 19

... fingertips to the system board, remove the main battery (see the Regulatory Compliance Homepage at dell.com/regulatory_compliance. Your computer has two user-accessible SODIMM sockets, labeled DIMM A and DIMM... your computer memory by your computer. Damage due to servicing that is not authorized by Dell is not covered by periodically touching an unpainted metal surface (such as a connector on ...
Service Manual - Page 21

Memory
21 CAUTION: Before turning on the computer. Failure to do so may result in the computer:
Click Start ...page 18). 5 Replace the battery (see "Replacing the Battery" on page 16), or connect
the AC adapter to the computer. 6 Turn on the computer, replace all screws and ensure that no stray screws remain inside the computer. As the computer boots, it detects the...
Service Manual - Page 27
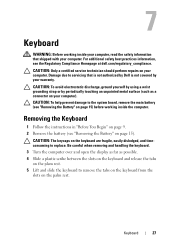
Be careful when removing and handling the keyboard. 3 Turn the computer over and open the display as far as a connector on the keyboard are fragile, easily dislodged, and timeconsuming to the system board, remove the main battery (see the Regulatory Compliance Homepage at dell.com/regulatory_compliance. Keyboard
27 CAUTION: To avoid electrostatic discharge, ground yourself by...
Service Manual - Page 28
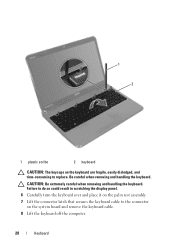
... to do so could result in scratching the display panel. 6 Carefully turn the keyboard over and place it on the system board and remove the keyboard cable. 8 Lift the keyboard off the computer.
28
Keyboard 1 2
1 plastic scribe
2 keyboard
CAUTION: The keycaps on the keyboard are fragile, easily dislodged, and time-consuming to the connector on the palm...
Service Manual - Page 29
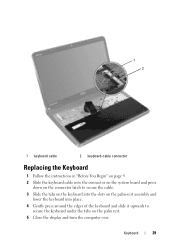
...keyboard cable into the connector on the system board and press
down on the connector latch to secure the cable. 3 Slide the tabs on the keyboard into the slots on the palm-rest assembly and
lower the keyboard... into place. 4 Gently press around the edges of the keyboard and slide it upwards to
secure the keyboard under ...
Service Manual - Page 32

4 Turn the computer over and open the display as far as possible. 5 Remove the keyboard (see "Removing the Keyboard" on page 27). 6 Remove the four screws on the system board.
32
Palm-Rest Assembly CAUTION: Pull on the plastic tab on top of the ...
Service Manual - Page 40

... remain inside the computer. NOTE: If you must install the appropriate drivers and utilities.
40
Wireless Mini-Card(s)
Follow the instructions from a source other than Dell, you are installing a communication card from step 4 to the computer. 9 Install the drivers and utilities for your computer, as required. CAUTION: Before...
Service Manual - Page 71

... by periodically touching an unpainted metal surface (such as a connector on your computer. CAUTION: To prevent data loss, turn off your computer (see the Regulatory Compliance Homepage at www.dell.com/regulatory_compliance.
For additional safety best practices information, see "Turning Off Your Computer" on page 9) before working inside the computer. Hard Drive
71
Service Manual - Page 89

...'s Service Tag in the Select Your Product Line list. c Select the product brand in the Enter a service tag: field,
click Go, and proceed to support.dell.com/support/downloads. 3 Locate the BIOS update file for your computer:
NOTE: The Service Tag for your desktop. 7 Click Close if the Download Complete window...
Similar Questions

Flashing Red/orange Light On Top. Printer Will Not Work.
What is the problem and how do I fix it?
What is the problem and how do I fix it?
(Posted by dmath3 9 years ago)

Why Is A Red Light Falshing On My Del 1130n Laser Printer
(Posted by cooldwan 10 years ago)

