Get support for Canon PIXMA Pro9000 Mark II

Canon PIXMA Pro9000 Mark II Support Question

Canon PIXMA Pro9000 Mark II Support Question

Find answers below for this question about Canon PIXMA Pro9000 Mark II.
Need a Canon PIXMA Pro9000 Mark II manual? We have 1 online manual for this item!
Question posted by helenconnolly on November 12th, 2012

Back Paper Feeder Will Not Feed

The person who posted this question about this Canon product did not include a detailed explanation. Please use the "Request More Information" button to the right if more details would help you to answer this question.

Current Answers

There are currently no answers that have been posted for this question.
Be the first to post an answer!

Remember that you can earn up to 1,100 points for every answer you submit. The better the quality of your answer, the better chance it has to be accepted.

Related Canon PIXMA Pro9000 Mark II Manual Pages

Getting Started - Page 1

Please keep it in hand for future reference. Photo Printer series Getting Started Read Me First Make sure to read this manual before using the printer.
Getting Started - Page 2

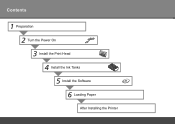
Contents 1 Preparation 2 Turn the Power On 3 Install the Print Head 4 Install the Ink Tanks 5 Install the Software 6 Loading Paper After Installing the Printer
Getting Started - Page 3

...; Symbols The following symbols are either registered trademarks or trademarks of Adobe Systems Incorporated in the U.S. Descriptions for safe operation. Additional explanations. Model Number: K10335 (Pro9000 Mark II)  Instructions that , if ignored, could result in personal injury or material damage. and/or other countries. • Adobe, Adobe Photoshop, Adobe RGB and Adobe RGB...
Getting Started - Page 4

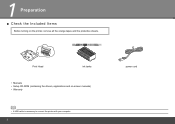
1 Preparation ■ Check the Included Items Before turning on -screen manuals) • Warranty • A USB cable is necessary to connect the printer with your computer.  power cord Print Head ink tanks • Manuals • Setup CD-ROM (containing the drivers, applications and on the printer, remove all the orange tapes and the protective sheets.
Getting Started - Page 5

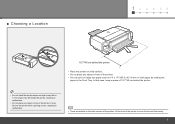
... are wheels on the back corners of the printer. • You can print on large size paper such as 14" x 17"/355.6 x 431.8 mm or thick paper by loading the paper in front of the printer. Lift the front of 15.7"/40 cm behind the printer • Place the printer on a flat surface. • Do not place...
Getting Started - Page 6

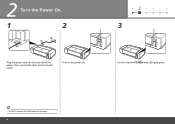
Confirm that the POWER lamp (B) lights green. • Do NOT connect the USB cable at this stage.  Turn on the printer (A). 2 Turn the Power On 1 2 2 1 123 4 5 6 3 A B Plug the power cord into the back left of the printer, then connect the other end to the wall outlet.
Getting Started - Page 7

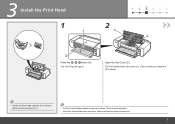
.... 3 Install the Print Head 1 A 2 C 1 234 5 6 D B Press the button (A). This is normal operation. • If the Print Head Holder does not move, make sure that the printer is where you install the Print Head.) • Handle the Print Head carefully. Open the Top Cover (C).
Getting Started - Page 11

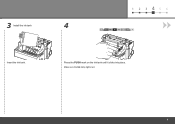
Make sure the Ink lamp lights red.  3 Install the ink tank 4 1 2 345 6 Insert the ink tank. Press the PUSH mark on the ink tank until it clicks into place.
Getting Started - Page 13

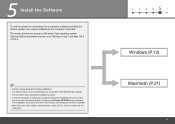
The screens below are not supported. 1 2 3 456 Windows (P.12) Macintosh (P.21) 11 5 Install the Software To use the printer by connecting it left off when your computer has been restarted. • Mac OS 9, Mac OS X Classic environments, or Mac OS X v.10.3.8 or earlier are ...
Getting Started - Page 16

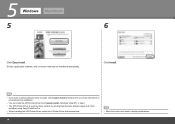
.... Drivers, application software, and on -screen instructions to proceed with the installation. • You can install the XPS Printer Driver from Custom Install. (Windows Vista SP1 or later.) • The XPS Printer Driver is a printer driver suitable for printing High Dynamic Range images (full 16-bit workflow) using Easy-PhotoPrint Pro. • When...
Getting Started - Page 18

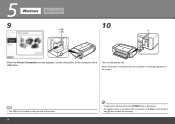
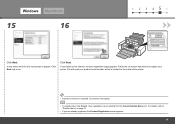
.... • If installation does not continue after 10 minutes, click Help on the printer (A). When the printer is recognized by the computer, a message appears on the screen. • The USB port is located on the right side of the printer. 16 • It takes about 30 seconds for the POWER lamp to the...
Getting Started - Page 19

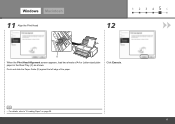
Pinch and slide the Paper Guide (D) against the left edge of A4 or Letter-sized plain paper in the Rear Tray (C) as shown. Windows Macintosh 11 Align the Print Head 12 1 2 3 456 C D When the Print Head Alignment screen appears, load two sheets of the paper. Click Execute. • For details, refer to "6 Loading Paper" on page 28. 17
Getting Started - Page 21

... registered, the Product Registration screen appears. 19 For details, refer to the Internet, the user registration page appears. Follow the on the inside of the printer. • Internet connection is required. (Connection fees apply.) • To register later, click Cancel. It may take a while for the next screen to register your...
Getting Started - Page 22

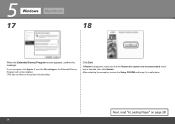
If you can agree, click Agree. Next, read "6 Loading Paper" on the printer's functionality.) Click Exit. After restarting the computer, remove the Setup CD-ROM and keep it in a safe place. If you click Do not agree, the ...
Getting Started - Page 23

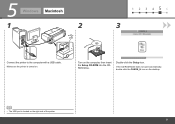
... CD-ROM folder does not open automatically, double-click the CANON_IJ icon on the desktop. • The USB port is turned on. Make sure the printer is located on the computer, then insert the Setup CD-ROM into the CDROM drive. Double-click the Setup icon.
Getting Started - Page 26

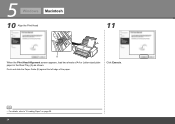
Click Execute. • For details, refer to "6 Loading Paper" on page 28. 24 5 Windows Macintosh 10 Align the Print Head 11 A B When the Print Head Alignment screen appears, load two sheets of the paper. Pinch and slide the Paper Guide (B) against the left edge of A4 or Letter-sized plain paper in the Rear Tray (A) as shown.
Getting Started - Page 29

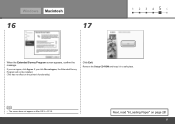
....3.9. If you can agree, click Agree. Remove the Setup CD-ROM and keep it in a safe place. • The screen does not appear on the printer's functionality.) Click Exit. Next, read "6 Loading Paper" on page 28! 27 Windows Macintosh 16 17 1 2 3 456 When the Extended Survey Program screen appears, confirm the message.
Getting Started - Page 30

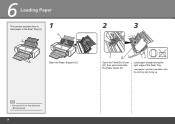
... the Rear Tray (A). Load paper straight along the right edge of the Rear Tray. A 1 C B Open the Paper Support (C). 2 3 E D Open the Feed Slot Cover (D), then pinch and slide the Paper Guide (E). 6 Loading Paper This section explains how to load paper in portrait orientation with the printing side facing up. • Pull out the Front Tray Extension (B) beforehand...
Getting Started - Page 31

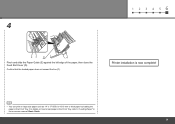
... to "Loading Paper" in the on large size paper such as 14" x 17"/355.6 x 431.8 mm or thick paper by loading the paper in the Front Tray. Confirm that the loaded paper does not exceed the line (F). 1 2 3 4 56 4 EF D Pinch and slide the Paper Guide (E) against the left edge of the paper, then close the Feed Slot Cover...
Getting Started - Page 35

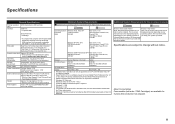
... on-screen displayed properly depending on Photo Paper Plus Glossy II. Internet Explorer version. Operating System Windows... Approx. 660 (W) x 354 (D) x 192 (H) mm * With the Paper Support, Front Tray and Front Feed Support retracted. Specifications are available for the on-screen manuals Browser: Easy Guide...printer. • Macintosh: Hard Disk must be guaranteed on a PC ...

Similar Questions

Printer Prints Black Line On Left Margin Of Paper When Copying From Paper Feeder
printer prints black line on left margin of paper when copying from paper feeder?
(Posted by marksj 11 years ago)
Paper Stopped Feeding Through Paper Feeder. The Machine Said Out Of Paper.
I can't get the paper to feed through the feeder. I've tried to change the paper, put more in, put l...
(Posted by jmdavis1 11 years ago)
Rear Tray
How do I load paper in the rear tray and where is the rear tray?  Thank you.  Shirley
(Posted by rochestersmr 11 years ago)
Ask a New Question
Use the box below to post a new question about this Canon product .
Points & Prizes
  • You can earn points for nearly everything you do on HelpOwl.com
  • You can trade in those points for gift cards at leading retailers such as Amazon.com and Walmart
  • It's that simple!
See How it Works
Create a Free Account

Canon Manuals

Find free Canon PIXMA Pro9000 Mark II manuals and user guides available at ManualOwl.com. Try out our unique manual viewer allowing you to interact with manuals from directly within your browser!

Canon Reviews

View thousands of Canon user reviews and customer ratings available at ReviewOwl.com.

Contact Information

Complete Canon customer service contact information including steps to reach representatives, hours of operation, customer support links and more from ContactHelp.com.

Scoreboard Ratings

See detailed Canon customer service rankings, employee comments and much more from our sister site.

Canon Recalls

Find comprehensive Canon recall information updated hourly on RecallOwl.com.