Get support for Brother International PC 420 - PRW Limited Edition Project Runway Sewing Machine

Brother International PC 420 Support Question

Brother International PC 420 Support Question

Find answers below for this question about Brother International PC 420 - PRW Limited Edition Project Runway Sewing Machine.
Need a Brother International PC 420 manual? We have 1 online manual for this item!
Question posted by lindaflora4 on July 30th, 2014

How Do I Oil My Pc-420?

The person who posted this question about this Brother International product did not include a detailed explanation. Please use the "Request More Information" button to the right if more details would help you to answer this question.

Current Answers

There are currently no answers that have been posted for this question.
Be the first to post an answer!

Remember that you can earn up to 1,100 points for every answer you submit. The better the quality of your answer, the better chance it has to be accepted.

Related Brother International PC 420 Manual Pages

Users Manual - English - Page 2

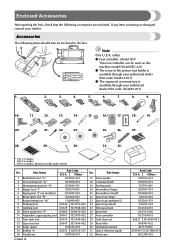
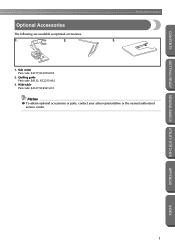
... Code U.S.A. Enclosed Accessories After opening the box, check that the following items should also be used on machine) 6 Blind stitch foot "R" 7 Button fitting foot "M" 8 Walking foot 9 Quilting foot 10 Stitch ... 3 Monogramming foot "N" 4 Zipper foot "I" 5 Zigzag foot "J" (on this machine model NX-400/PC-420. ● The screw of the presser foot holder is available through your retailer.
Users Manual - English - Page 3

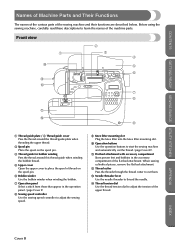
... this thread guide when winding the bobbin thread. 5 Upper cover Open the upper cover to place the spool of the upper thread. Before using the sewing machine, carefully read these descriptions to adjust the tension of thread on the spool pin. 6 Bobbin winder Use the bobbin winder when winding the bobbin. 7 Operation...
Users Manual - English - Page 4

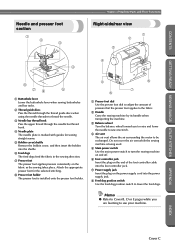
... switch to lower the feed dogs. APPENDIX INDEX Cover C Do not cover the air vent while the sewing machine is installed onto the presser foot holder. 5 6 8 7 1 Presser foot dial Use the presser ...The presser foot is being used. 5 Main power switch Use the main power switch to turn the sewing machine on and off. 6 Foot controller jack Insert the plug on the end of pressure that the presser...
Users Manual - English - Page 5

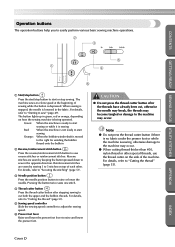
... or lower the needle. For details, refer to "Starting to 5 stitches on top of each other special threads, use the thread cutter on how the sewing machine is moved to the right for winding the bobbin thread onto the bobbin 2 Reverse/reinforcement stitch button Press the reverse/reinforcement stitch button to...
Users Manual - English - Page 6

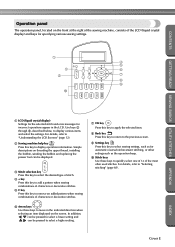
... decorative stitches. 5 C key Press this key to move in the indicated direction when selecting an item displayed on the front at the right of the sewing machine, consists of the most often used stitches. In addition, can be pressed to select a lower setting and can be pressed to select a higher setting. 7 OK...
Users Manual - English - Page 7

GETTING READY SEWING BASICS UTILITY STITCHES APPENDIX INDEX 1 Side cutter Part code: SA177,XC3879-002 2. Quilting guide Part code: SA132, XC2215-002 3. Wide table Part code: SA537,XC4541-...
Users Manual - English - Page 8

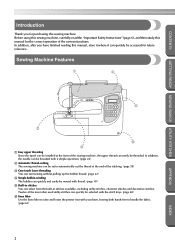
... available, including utility stitches, character stitches and decorative stitches. In addition, the needle can be threaded with a simple operation. (page 24) 2 Automatic thread-cutting The sewing machine can be set to automatically cut the thread at the front of the most often used utility stitches can quickly be selected with the stitch...
Users Manual - English - Page 9

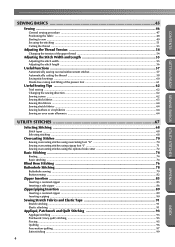
...Cover E Optional Accessories ...1 Introduction ...2 Sewing Machine Features ...2 Contents ...3 Important Safety Instructions 6 GETTING READY 9 Turning the Machine On/Off 10 Power supply precautions ...10 Turning on the machine ...11 Turning off the machine ...11 Understanding the LCD Screens 12 Checking machine operating procedures ...13 Changing the Machine Settings 14 Changing the settings...
Users Manual - English - Page 10

... ...55 Adjusting the stitch length ...56 Useful Functions ...57 Automatically sewing reverse/reinforcement stitches 57 Automatically cutting the thread ...58 Saving stitch settings...Sewing Tips ...62 Trial sewing ...62 Changing the sewing direction ...62 Sewing curves ...62 Sewing thick fabrics ...63 Sewing thin fabrics ...64 Sewing stretch fabrics ...64 Sewing leathers or vinyl fabrics ...64 Sewing ...
Users Manual - English - Page 11

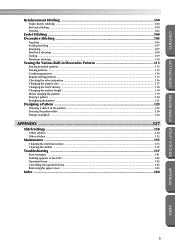
... Heirloom stitching ...110 Sewing the Various Built-In Decorative Patterns 113 Sewing beautiful patterns ...113 Sewing patterns ...113 Combining patterns ...114 Repeat sewing patterns ...115 Checking the... ...128 Utility stitches ...128 Other stitches ...133 Maintenance ...135 Cleaning the machine surface ...135 Cleaning the shuttle ...135 Troubleshooting ...137 Error messages ...141 Nothing...
Users Manual - English - Page 12

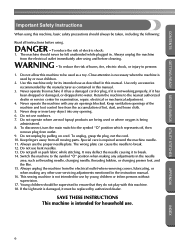
... symbol "{" position which represents off, then remove plug from the electrical outlet immediately after using . Do not allow this machine to the symbol "{" position when making any opening. 6. This sewing machine is required around the machine needle. 11. Do not unplug by the manufacturer as described in . Always use by or near children. 2. The...
Users Manual - English - Page 13

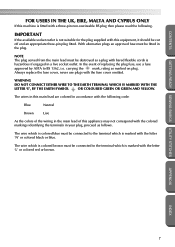
... the main lead of replacing the plug fuse, use plugs with the fuse cover omitted. CONTENTS GETTING READY SEWING BASICS UTILITY STITCHES FOR USERS IN THE UK, EIRE, MALTA AND CYPRUS ONLY If this machine is fitted with the letter 'N' or colored black or blue. WARNING DO NOT CONNECT EITHER WIRE TO...
Users Manual - English - Page 14

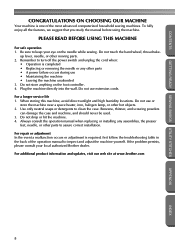
... table in the back of the most advanced computerized household sewing machines. Be sure to assure correct installation. up lever, needle, or other parts • A power failure occurs during use • Maintaining the machine • Leaving the machine unattended 3. Do not drop or hit the machine. 4. Do not use extension cords. Benzene, thinner, and scouring...
Users Manual - English - Page 15

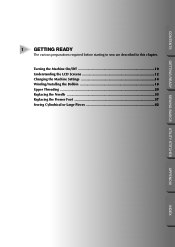
... The various preparations required before starting to sew are described in this chapter. Turning the Machine On/Off 10 Understanding the LCD Screens 12 Changing the Machine Settings 14 Winding/Installing the Bobbin 18 Upper Threading ...24 Replacing the Needle 33 Replacing the Presser Foot 37 Sewing Cylindrical or Large Pieces 42 APPENDIX INDEX...
Users Manual - English - Page 55

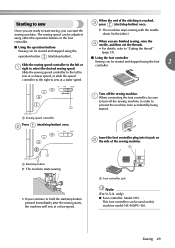
... a slower speed, or slide the speed controller to the right to sew at a slow speed. operation button (start the sewing machine. Insert the foot controller plug into its jack on this machine model NX-400/PC-420. Once you are finished sewing, raise the 4 needle, and then cut the threads. • For details, refer to "Cutting the...
Users Manual - English - Page 68

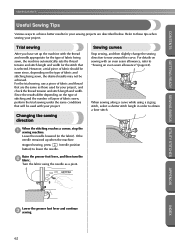
... length and width for the stitch that are described below. Changing the sewing direction When the stitching reaches a corner, stop the 1 sewing machine. SEWING BASICS CONTENTS GETTING READY SEWING BASICS UTILITY STITCHES Useful Sewing Tips Various ways to achieve better results for your sewing projects are the same as a pivot. However, a trial piece of fabric should be...
Users Manual - English - Page 79

... the fabric in the side cutter. 0 The cut in the fabric should be cut fabric, use a rag to apply a small amount of oil to the cutting edge of the sewing machine. Pass the upper thread under the side cutter, 7 and then pull it by removing any lint or dust. ● If the side...
Users Manual - English - Page 119

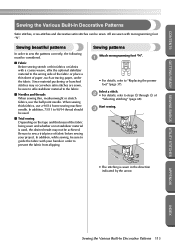
... stabilizer material to the fabric. ■ Needles and threads When sewing thin, mediumweight or stretch fabrics, use a 90/14 home sewing machine needle. Select a stitch. 2 • For details, refer to "Replacing the presser foot" (page 37). CONTENTS GETTING READY SEWING BASICS UTILITY STITCHES Sewing the Various Built-In Decorative Patterns Satin stitches, cross-stitches and...
Users Manual - English - Page 127

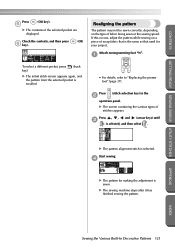
... sewing machine stops after it has finished sewing the pattern. X The contents of stitches appears. Realigning the pattern The pattern may not be sewn correctly, depending on a piece of fabric being sewn or the sewing speed. X The screen containing the various types of the selected pocket are displayed. Start sewing. 4 X The pattern for your project. Press...
Users Manual - English - Page 142

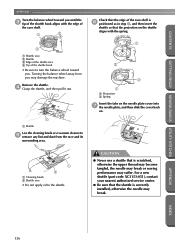
...not apply oil to 5 remove any lint and dust from you . CAUTION ● Never use a shuttle that is correctly installed, otherwise the needle may break. GETTING READY SEWING BASICS UTILITY ... wheel toward you may damage the machine. For a new shuttle (part code: XC3153-051), contact your nearest authorized service center. ● Be sure that the projection on the shuttle aligns with the edge...

Similar Questions

Ask a New Question
Use the box below to post a new question about this Brother International product .
Points & Prizes
  • You can earn points for nearly everything you do on HelpOwl.com
  • You can trade in those points for gift cards at leading retailers such as Amazon.com and Walmart
  • It's that simple!
See How it Works
Create a Free Account

Brother International Manuals

Find free Brother International PC 420 - PRW Limited Edition Project Runway Sewing Machine manuals and user guides available at ManualOwl.com. Try out our unique manual viewer allowing you to interact with manuals from directly within your browser!

Brother International Reviews

View thousands of Brother International user reviews and customer ratings available at ReviewOwl.com.

Contact Information

Complete Brother International customer service contact information including steps to reach representatives, hours of operation, customer support links and more from ContactHelp.com.

Scoreboard Ratings

See detailed Brother International customer service rankings, employee comments and much more from our sister site.