Get support for Amana NTW4600YQ

Amana NTW4600YQ Support Question

Amana NTW4600YQ Support Question

Find answers below for this question about Amana NTW4600YQ.
Need a Amana NTW4600YQ manual? We have 4 online manuals for this item!
Question posted by Cindymbrister on October 13th, 2013

When Washer Goes Into Cycle To Fill And Then The Lid Lock Is Suppose To Engage

When you start washer the fill light comes on and then the lid lock is suppose to engage and then finish cycles and wash. When it gets to lid lock it sounds like it try's but the fill and lid lock lights start bleak

Current Answers

There are currently no answers that have been posted for this question.
Be the first to post an answer!

Remember that you can earn up to 1,100 points for every answer you submit. The better the quality of your answer, the better chance it has to be accepted.

Related Amana NTW4600YQ Manual Pages

Installation Instruction - Page 2

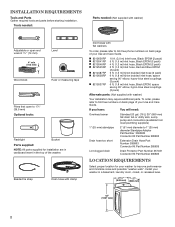
...washer to toll-free phone numbers on back page of the washer. INSTALLATION REQUIREMENTS Tools and Parts Gather required tools and parts before starting installation. Tools needed: Parts needed: (Not supplied with washer... LOCATION REQUIREMENTS Select proper location for installation are in cardboard insert in a basement, laundry room, closet, or recessed area. 271/2" 27" (648 mm) (686 mm...
Installation Instruction - Page 3

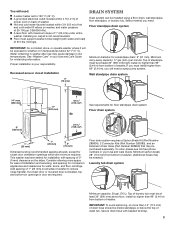
... gal. (64 L) per minute. Top of wash tub. Wall standpipe drain system 14" max. (356 mm) 17" (432 mm) 48 in.2 (310 cm2) See requirements for installation with maximum slope of washer. (Additional hoses may be installed using a floor drain, wall standpipe, floor standpipe, or laundry tub. If a closet door or louvered door...
Installation Instruction - Page 4

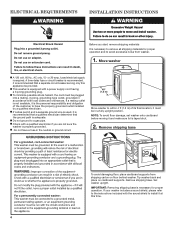
... washer includes a sound shield, please refer to install it must be plugged into a mating, 3 prong, grounding-type outlet, grounded in accordance with a qualified electrician if you start:...outlet installed by a qualified electrician. Set washer upright. n If codes permit and a separate ground wire is used, it and make sure lid is recommended that a qualified electrician determine that...
Installation Instruction - Page 5

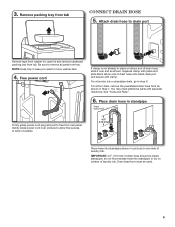
...form Firmly grasp power cord plug and pull to drain port Remove tape from washer lid, open lid and remove cardboard packing tray from rear panel. For a floor drain, remove... place power cord over console to allow free access to move washer later. 4. 3. Remove packing tray from tray. IMPORTANT: 4.5" (113 mm) of laundry tub. Drain hose form must be inside standpipe; See "Tools...
Installation Instruction - Page 6

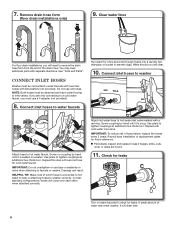
... hoses if bulges, kinks, cuts, wear, or leaks are only connecting to washer correctly. You may enter washer. HELPFUL TIP: Make note of hose failure, replace the hoses every 5 years...cold water faucet. Record hose installation or replacement dates for a few seconds through hoses into a laundry tub, drainpipe, or bucket to water faucets Run water for future reference. NOTE: Both hoses ...
Installation Instruction - Page 7

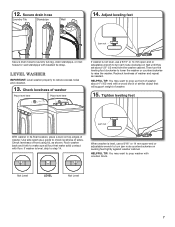
... to prop washer with floor. Recheck levelness of front using lid, as a guide to prop up front of washer about 1/2" (13 mm) from the washer cabinet. Use side seam as shown. If washer is level,...HELPFUL TIP: You may want to turn the leveling foot clockwise to lower the washer or counterclockwise to laundry tub leg, drain standpipe, or inlet hoses for wall standpipe with a wood ...
Installation Instruction - Page 8

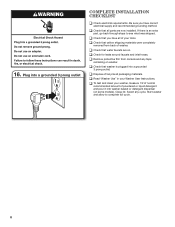
... test and clean your Washer User Instructions. Close lid. If there is plugged into a grounded 3 prong outlet Complete Installation CHECKLIST q Check electrical requirements. q Check that water faucets are now installed. Select any tape remaining on washer. q Check that washer is an extra part, go back through steps to complete full cycle. 8 Start washer and allow to see...
Use and Care - Page 2

WASHER SAFETY 2
Use and Care - Page 3

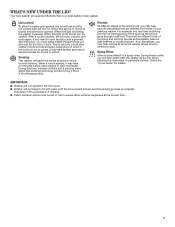
When this light is lit, the lid is locked and cannot be different kinds of spins to a spray rinse. Depending on . Sounds At different stages of the wash cycle, you try to add a garment after washer movement has stopped. IMPORTANT: ■■ Washer will perform a series of humming and whirring sounds as the lid lock goes through a self-test. Sensing This washer will ...
Use and Care - Page 4

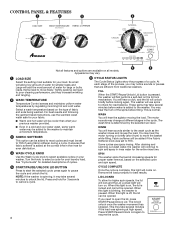
... fabric softener during a cycle. FILL When the START/Pause/Unlock Lid button is locked and cannot be added to most amount of water for detailed descriptions of cycles. 6 CYCLE STATUS LIGHTS The Cycle Status Lights show the progress of fabric and soils being washed. After draining and spinning out wash water, the washer will unlock briefly before filling. LID LOCKED To allow for the...
Use and Care - Page 5

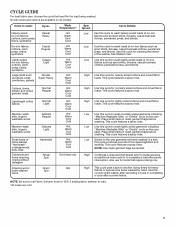
... heavy fabrics or special-care items washed by hand. Use this cycle for cleaning the interior of no -iron fabrics such as sport shirts, blouses, casual business clothes, permanent press, and blends. See Washer Care. This cycle features a spray rinse. This cycle features a spray rinse. High Use this cycle for lightly soiled cottons and mixed fabric loads...
Use and Care - Page 6

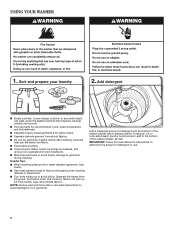
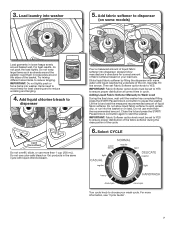
... instructions to avoid damage to use. 6 USING YOUR WASHER 1. Loose change, buttons, or any small object can pass under the agitator and become trapped, causing unexpected sounds. ■■ Sort garments by recommended cycle, water temperature, and colorfastness. ■■ Separate heavily soiled garments from lightly soiled. ■■ Separate delicate garment from lint...
Use and Care - Page 7

... warm water until the washer has completed filling, press the START/Pause/Unlock Lid button to ensure proper distribution at correct time in loose piles around the agitator; IMPORTANT: Do not tightly pack or force items into washer 5. 3. Items need to dispenser (on your wash cycle. Do not use more information, see "Cycle Guide". 7 MAX FILL Dilute...
Use and Care - Page 8

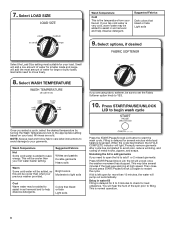
... than your previous washer provided. the lid will light. This may be added to add 1 or 2 missed garments: Press START/Pause/Unlock Lid; If your load. Select WASH TEMPERATURE If you need to YES. 10. Press START/PAUSE/UNLOCK LID to begin wash cycle Once you select a cycle, select the desired temperature by turning the Wash Temperature knob to start the wash cycle. Filling is...
Use and Care - Page 9

... month or every 30 wash cycles, whichever occurs sooner, to control the rate at which soils and detergent accumulate. 3. A lways leave the washer lid open between uses to help dry out the washer and prevent the buildup of the washer. e. Select the cycle recommended for more information. If cycle must be interrupted, press START/Pause/Unlock Lid once or twice...
Use and Care - Page 10

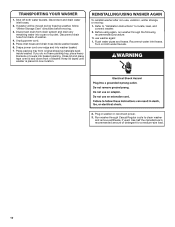
... hose from drain system and drain any remaining water into a pan or bucket. Drape power cord over lid and down front of washer. Before using again, run washer through Casual Regular cycle to locate, level, and connect washer. 2. Flush water pipes and hoses. If you do not have packing tray, place heavy blankets or towels...
Use and Care - Page 11

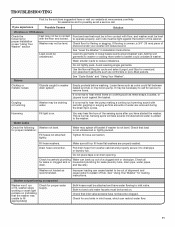
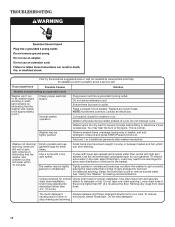
... It is on clothing such as expected Washer won't run or fill, washer stops working or wash light remains on . Noises See "Cycle Guide" and "Using Your Washer". You may not be in contact Front...a continuous humming sound with the floor and locked. If flooring is not level. Improper loading can back up out of plywood under your washer will take several minutes before washing. Jam nuts ...
Use and Care - Page 12

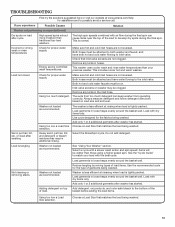
..., leaving the load wetter than cycles with a low spin speed. Add only 1 or 2 additional garments after washer has started. See "Using Your Washer" for proper installation. Check plumbing...cycle with high spin speeds. Lid must be rearranged to run or fill, washer stops working or wash light remains on (indicating that the washer was unable to outlet. Do not interrupt cycle...
Use and Care - Page 13

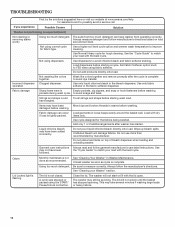
... "Using Your Washer" section. See the "Cycle Guide" to the bottom of garments being washed. This is tangling Washer not loaded as recommended. Choose a Load Size that inlet valve screens are not clogged. Not cleaning or removing stains Washer not loaded as expected (cont.) Solution Dry spots on load after washer has started . TROUBLESHOOTING First try the solutions...
Use and Care - Page 14

... load size and soil level. Unload washer as soon as cycle is not closed. Lid Locked light is flashing The lid is complete. Close the lid. The suds from operating correctly. Use a higher soil level cycle option and warmer wash temperature to avoid snags and tears. Use Normal Heavy cycle for the fabrics being washed. Use dispensers to measure correctly. Do...

Similar Questions

Ntw4630yq Fill Sensing Problem?
When starting cycle washing machine briefly starts filling with fill sensing light on then it tries ...
(Posted by abom311 7 years ago)
Amana Washer Model Number Ntw4600yq Ww
Washer will not fill. I disconnect the lid lock cause it kept flashing
(Posted by Otheahc 8 years ago)
Lid Lock Light Is Flashing
lid lock light is flashing none stop and won't let us do anything g with it it started after the las...
(Posted by Dirtroadridercs 8 years ago)
Ask a New Question
Use the box below to post a new question about this Amana product .
Points & Prizes
  • You can earn points for nearly everything you do on HelpOwl.com
  • You can trade in those points for gift cards at leading retailers such as Amazon.com and Walmart
  • It's that simple!
See How it Works
Create a Free Account

Amana Manuals

Find free Amana NTW4600YQ manuals and user guides available at ManualOwl.com. Try out our unique manual viewer allowing you to interact with manuals from directly within your browser!

Amana Reviews

View thousands of Amana user reviews and customer ratings available at ReviewOwl.com.

Contact Information

Complete Amana customer service contact information including steps to reach representatives, hours of operation, customer support links and more from ContactHelp.com.

Scoreboard Ratings

See detailed Amana customer service rankings, employee comments and much more from our sister site.

Amana Recalls

Find comprehensive Amana recall information updated hourly on RecallOwl.com.