Acer Aspire 4752Z Support Question
Acer Aspire 4752Z Support Question
Find answers below for this question about Acer Aspire 4752Z.Need a Acer Aspire 4752Z manual? We have 1 online manual for this item!
Question posted by hasyimif on February 25th, 2013
No Display In Appear After Press Power Button
Hello, could anyone please help me.. My 4752Z can't turned on normally. The power indicator already on but no any display appear?
I search on google it may be caused by failure on BIOS. But I can't boot from USB Drive to start resetting BIOS due to no any display at all.
Any suggestion really achievable. Thanks :)
Current Answers
Related Acer Aspire 4752Z Manual Pages
Aspire 4352, 4752, 4752G, 4752Z Service Guide - Page 6
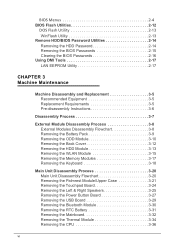
...Utility 2-13 WinFlash Utility 2-13 Remove HDD/BIOS Password Utilities 2-14 Removing the HDD Password 2-14 Removing the BIOS Passwords 2-15 Clearing the BIOS Passwords 2-16 Using DMI Tools 2-17 LAN ... Touchpad Board 3-24 Removing the Left & Right Speakers 3-25 Removing the Power Button Board 3-27 Removing the USB Board 3-29 Removing the Bluetooth Module 3-30 Removing the RTC Battery 3-31...
Aspire 4352, 4752, 4752G, 4752Z Service Guide - Page 8
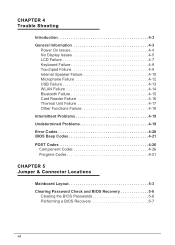
... 4-3
Power On Issues 4-4 No Display Issues 4-5 LCD Failure 4-7 Keyboard Failure 4-8 Touchpad Failure 4-9 Internal Speaker Failure 4-10 Microphone Failure 4-12 USB Failure 4-13 WLAN Failure 4-14 Bluetooth Failure 4-15 Card Reader Failure 4-16 Thermal Unit Failure 4-17 Other Functions Failure 4-18 Intermittent Problems 4-19 Undetermined Problems 4-19 Error Codes 4-20 BIOS Beep...
Aspire 4352, 4752, 4752G, 4752Z Service Guide - Page 21

...3
Power button
Description
Web camera for video communication. Hardware Specifications and Configurations
1-11 Notebook Tour 0 This section provides an overview of the features and functions of the notebook. Also called liquid crystal display (LCD), displays computer output.
Turns the computer on and off.
4
Keyboard
For entering data into your computer.
5
Power indicator
Indicates...
Aspire 4352, 4752, 4752G, 4752Z Service Guide - Page 38
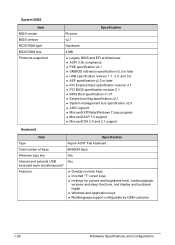
... v2.1 SMBIOS reference specification v2.5 or later USB specification revision 1.1, 2.0. and 3.0 ASF specification v2.0 or later PCI Express base specification revision 2.1 PCI BIOS specification revision 2.1 BIOS Boot specification v1.01 Simple boot flag specification v2.1 System management bus specification v2.0 ...
Aspire 4352, 4752, 4752G, 4752Z Service Guide - Page 62
... disk files
to a bootable USB device containing the Crisis Recovery
disk files. 3. Press and hold the Fn + Esc keys (this is the BIOS recovery hotkey), then press the
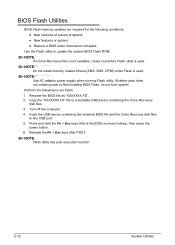
power button. 6. Release the Fn + Esc keys after POST. BIOS Flash Utilities 0
BIOS Flash memory updates are required for the following to finish loading BIOS Flash, do not boot system.
NOTE: NOTE...
Aspire 4352, 4752, 4752G, 4752Z Service Guide - Page 66
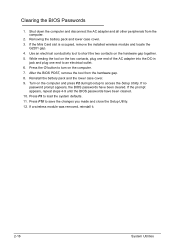
... the Setup Utility. 12. Press the button to turn on the two contacts, plug one end of the AC adapter into the DC-in
jack and plug one end to access the Setup Utility. Reinstall the battery pack and the lower case cover. 9. If no
password prompt appears, the BIOS passwords have been cleared. 10...
Aspire 4352, 4752, 4752G, 4752Z Service Guide - Page 88
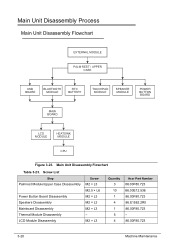
... 0 Main Unit Disassembly Flowchart 0
EXTERNAL MODULE PALM REST / UPPER
CASE
USB BOARD
BLUETOOTH MODULE
RTC BATTERY
TOUCHPAD MODULE
SPEAKER MODULE
POWER BUTTON BOARD
MAIN BOARD
LCD MODULE
HEATSINK MODULE
CPU
Figure 3-23. Screw List
Step Palmrest Module/Upper Case Disassembly
Power Button Board Disassembly Speakers Disassembly Mainboard Disassembly Thermal Module Disassembly LCD Module...
Aspire 4352, 4752, 4752G, 4752Z Service Guide - Page 90
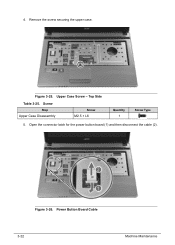
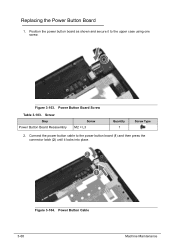
Open the connector latch for the power button board (1) and then disconnect the cable (2). Power Button Board Cable 3-22
Machine Maintenance Remove the screw securing the upper case. Screw
Step Upper Case Disassembly
Screw M2.5 × L6
Quantity 1
Screw Type
5. Figure 3-26. Upper Case Screw -
Figure 3-25. Top Side
Table 3-25. 4.
Aspire 4352, 4752, 4752G, 4752Z Service Guide - Page 93

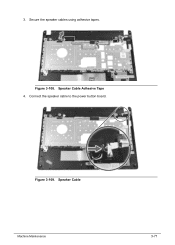
Release the speaker cables from the power button board. Removing the Left & Right Speakers 0
1. Disconnect the speaker cable from the tape securing it. Figure 3-32. Speaker Cable 3. Figure 3-31.
Speaker Cable Adhesive Tape Machine Maintenance
3-25 Perform the "Removing the Palmrest Module/Upper Case" procedure described on page 3-21.
2.
Aspire 4352, 4752, 4752G, 4752Z Service Guide - Page 95

Remove the adhesive tape securing the power button board. Power Button Adhesive Tape 3. Figure 3-36. Perform the "Removing the Palmrest Module/Upper Case" procedure described on page 3-21.
2. Figure 3-35.
Power Button Cable Machine Maintenance
3-27
Open the connector latch for the power button board (1) and then disconnect the cable (2). Removing the Power Button Board 0
1.
Aspire 4352, 4752, 4752G, 4752Z Service Guide - Page 136
...Figure 3-103. Screw
Step Power Button Board Reassembly
Screw M2 × L3
Quantity 1
Screw Type
2. Replacing the Power Button Board 0 1.
Connect the power button cable to the upper case using one screw. Power Button Cable 3-68
Machine Maintenance
Position the power button board as shown and secure it to the power button board (1) and then press the connector latch (2) until...
Aspire 4352, 4752, 4752G, 4752Z Service Guide - Page 137

Power Button Adhesive Tape
Machine Maintenance
3-69 Secure the power button board using adhesive tape. Figure 3-105. 3.
Aspire 4352, 4752, 4752G, 4752Z Service Guide - Page 139
Speaker Cable Machine Maintenance
3-71
Speaker Cable Adhesive Tape 4. Secure the speaker cables using adhesive tapes. Connect the speaker cable to the power button board. 3.
Figure 3-108. Figure 3-109.
Aspire 4352, 4752, 4752G, 4752Z Service Guide - Page 142

... Cable 4. Upper Case Screw - Close the LCD panel and turn the computer over. Connect the power button cable to the mainboard (1) and then press the connector latch (2) until it locks into place.
Figure 3-115. Top Side
Table 3-115. Secure the upper case using one screw. Quantity 1
Screw Type
3-74
...
Aspire 4352, 4752, 4752G, 4752Z Service Guide - Page 156

... 4-3
Power On Issues 4-4 No Display Issues 4-5 LCD Failure 4-7 Keyboard Failure 4-8 Touchpad Failure 4-9 Internal Speaker Failure 4-10 Microphone Failure 4-12 USB Failure 4-13 WLAN Failure 4-14 Bluetooth Failure 4-15 Card Reader Failure 4-16 Thermal Unit Failure 4-17 Other Functions Failure 4-18 Intermittent Problems 4-19 Undetermined Problems 4-19 Error Codes 4-20 BIOS Beep...
Aspire 4352, 4752, 4752G, 4752Z Service Guide - Page 159

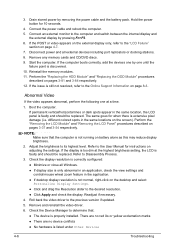
Make sure the computer has power by pressing Fn+F5.
Switch between the internal and external
display by checking for the applicable hotkey sequence. 2. Make sure that internal display is no power, refer to the "Power On Issues" section on page 4-4. Troubleshooting
4-5 Do not replace a non-defective FRU:
Figure 4-2.
No Display Issues 0
If the Display does not work, perform...
Aspire 4352, 4752, 4752G, 4752Z Service Guide - Page 160
..." and "Removing the LCD Panel" procedures described on pages 3-81 and 3-84 respectively.
12. If the issue is not normal, right-click on the external display only, refer to Disassembly Process.
3. If the display is too dim at a time.
1. Boot the computer. Connect the power cable and reboot the computer.
5. Drain stored power by pressing Fn+F5.
6.
Aspire 4352, 4752, 4752G, 4752Z Service Guide - Page 189

...
3 USBCN2
USB board cable connector
4 USBCN1
USB board cable connector
5 SW_R1
Touchpad button
6 SW_L1
Touchpad button
No. Code 8 CARD1 9 RTC1
10 CHARGE R_LED1
11 MEDIA_ LED1
12 COM_ LED1
13 PWRCN1
7 PWR_LED1 Power indicator
14 LCD1
Component Memory card reader Battery
Battery charge indicator
Hard drive activity indicator Bluetooth/Wireless network indicator Power button board cable...
Aspire 4352, 4752, 4752G, 4752Z Service Guide - Page 192

...contacts on the computer and press F2 during bootup to load the system defaults. 11. Turn on the hardware gap together. ...Press the button to short the clear password hardware gap (G2201) located on the computer. 7. G2201 Hardware Gap
1. If the Mini Card slot is occupied, remove the installed wireless module and locate the
G2201 gap. 4. If the prompt appears, repeat steps 4-9 until the BIOS...
Aspire 4352, 4752, 4752G, 4752Z Service Guide - Page 194
... detailed instructions.
5-8
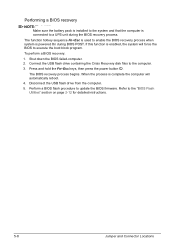
Jumper and Connector Locations Press and hold the Fn+Esc keys, then press the power button .
Performing a BIOS recovery 0
NOTE: NOTE:
Make sure the battery pack is installed to the system and that the computer is powered On during the BIOS recovery process. Disconnect the USB flash drive from the computer.
5. Perform a BIOS flash procedure to update the...
Similar Questions

Which Driver Suitable For Wifi In Windows Xp Os (acer Aspire 4752z Laptop)
(Posted by skalidoss18 9 years ago)

My Laptop Acer Cannot Open Windows.after I Press Power Button Acer Logo Show In
(Posted by Abidnit 10 years ago)

Both Power Button, Power Indicator Light And Battery Light Are Flashing Help?
Used a different power adaptor to power my Acer aspire 5750 the other day and now the original power...
Used a different power adaptor to power my Acer aspire 5750 the other day and now the original power...
(Posted by gsrnae 11 years ago)
Why Is My New Laptop Suddenly Had Power On Failure?
(Posted by bsc812004 11 years ago)

In My Acer Aspire 4752z Laptop The Os Is Win 7 (32 Bit) , My Webcam Status Is No
in my acer aspire 4752z laptop the os is win 7 (32 bit) , my webcam status is not working . the 1.3 ...
in my acer aspire 4752z laptop the os is win 7 (32 bit) , my webcam status is not working . the 1.3 ...
(Posted by ssaimm 12 years ago)