User Guide
Page 18
Low-power license-exempt radio communication devices (RSS-210) 36 Exposure of humans to -disk recovery 20 Password 20 Using software 21 Playing DVD movies 21 Power management 22 eMachines Recovery Management 23 Burn backup discs 24 Restore 25 Restore Windows from backup discs 26 Troubleshooting 29 Troubleshooting tips 29 Error messages 29 ... Connectivity options 18 Built-in network feature 18 Universal Serial Bus (USB) 18 Installing memory 19 BIOS utility 20 Boot sequence 20 Enable disk-to RF fields (RSS-102) 36 LCD panel ergonomic specifications 36
Low-power license-exempt radio communication devices (RSS-210) 36 Exposure of humans to -disk recovery 20 Password 20 Using software 21 Playing DVD movies 21 Power management 22 eMachines Recovery Management 23 Burn backup discs 24 Restore 25 Restore Windows from backup discs 26 Troubleshooting 29 Troubleshooting tips 29 Error messages 29 ... Connectivity options 18 Built-in network feature 18 Universal Serial Bus (USB) 18 Installing memory 19 BIOS utility 20 Boot sequence 20 Enable disk-to RF fields (RSS-102) 36 LCD panel ergonomic specifications 36
User Guide
Page 24
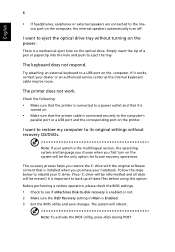
...be loose. out port on the computer, the internal speakers automatically turn on the power. I want to -disk recovery is enabled or not. 2 Make sure the D2D Recovery setting in Main is important to rebuild your dealer or an authorized service center as the internal keyboard cable ...the only option for future recovery operations. Simply insert the tip of a pen or paperclip into the hole and push to the line- Before performing a restore operation, please check the BIOS settings. 1 Check to see if eMachines Disk-to eject the optical drive tray without recovery CD/DVDs. The system...
...be loose. out port on the computer, the internal speakers automatically turn on the power. I want to -disk recovery is enabled or not. 2 Make sure the D2D Recovery setting in Main is important to rebuild your dealer or an authorized service center as the internal keyboard cable ...the only option for future recovery operations. Simply insert the tip of a pen or paperclip into the hole and push to the line- Before performing a restore operation, please check the BIOS settings. 1 Check to see if eMachines Disk-to eject the optical drive tray without recovery CD/DVDs. The system...

User Guide
Page 25
This feature occupies 15 GB in a hidden partition on your hard disk. Important! English 7 To start the recovery process: 1 Restart the system. 2 While the eMachines logo is showing, press + at the same time to enter the recovery process. 3 Refer to the onscreen instructions to perform system recovery.
This feature occupies 15 GB in a hidden partition on your hard disk. Important! English 7 To start the recovery process: 1 Restart the system. 2 While the eMachines logo is showing, press + at the same time to enter the recovery process. 3 Refer to the onscreen instructions to perform system recovery.
User Guide
Page 38
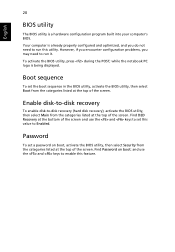
... BIOS utility, activate the BIOS utility, then select Boot from the categories listed at the top of the screen. Enable disk-to-disk recovery To enable disk-to enable this utility. However, if you encounter configuration problems, you do not need to run this feature. Boot sequence... To set a password on boot: and use the and keys to -disk recovery (hard disk recovery), activate the BIOS utility, then select Main ...
... BIOS utility, activate the BIOS utility, then select Boot from the categories listed at the top of the screen. Enable disk-to-disk recovery To enable disk-to enable this utility. However, if you encounter configuration problems, you do not need to run this feature. Boot sequence... To set a password on boot: and use the and keys to -disk recovery (hard disk recovery), activate the BIOS utility, then select Main ...


