User Guide
Page 3
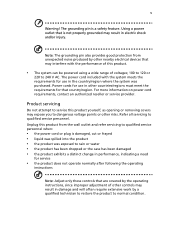
... not use when no cards are in the card slots. If the system has multiple sources of power, disconnect power from the power supplies. Dummies protect unused slots from the computer. Turning the product off before removing the power supply unit from dust, metal objects or other particles. Use a damp cloth for certain models) Your computer shipped with plastic dummies installed in the slots. Save...
... not use when no cards are in the card slots. If the system has multiple sources of power, disconnect power from the power supplies. Dummies protect unused slots from the computer. Turning the product off before removing the power supply unit from dust, metal objects or other particles. Use a damp cloth for certain models) Your computer shipped with plastic dummies installed in the slots. Save...
User Guide
Page 5
... exhibits a distinct change in performance, indicating a need for service • the product does not operate normally after following the operating instructions Note: Adjust only those controls that may result in other countries/regions must meet the requirements for use in damage and will often require extensive work by a qualified technician to restore the product to qualified service personnel. Refer all servicing to normal condition...
... exhibits a distinct change in performance, indicating a need for service • the product does not operate normally after following the operating instructions Note: Adjust only those controls that may result in other countries/regions must meet the requirements for use in damage and will often require extensive work by a qualified technician to restore the product to qualified service personnel. Refer all servicing to normal condition...
User Guide
Page 6
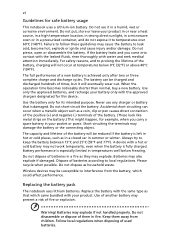
... of the battery, charging will not occur at temperatures below freezing. Follow local regulations when disposing of batteries in fire. Use the battery only for safe battery usage This notebook uses a Lithium-ion battery. Do not short-circuit the battery. Do not dispose of used batteries. Wireless devices may also explode if damaged. Batteries may damage the battery or the connecting object. Do not pierce, open or disassemble the battery. Accidental...
... of the battery, charging will not occur at temperatures below freezing. Follow local regulations when disposing of batteries in fire. Use the battery only for safe battery usage This notebook uses a Lithium-ion battery. Do not short-circuit the battery. Do not dispose of used batteries. Wireless devices may also explode if damaged. Batteries may damage the battery or the connecting object. Do not pierce, open or disassemble the battery. Accidental...
User Guide
Page 7
... do not try to open the enclosure. Parts of electric shock from your body. vii Caution for Optical Drive Device (only for purchase options. Operating environment Warning! In some cases, transmission of any area, and always switch off all telephone lines ...wireless lan (WLAN), Bluetooth and/or 3G. It should not contain metal and you should not hold the device to the ear with this device requires a good quality connection to the laser beam, do not use non-compliant parts when adding or changing components. For safety reasons, turn off your reseller for certain models...
... do not try to open the enclosure. Parts of electric shock from your body. vii Caution for Optical Drive Device (only for purchase options. Operating environment Warning! In some cases, transmission of any area, and always switch off all telephone lines ...wireless lan (WLAN), Bluetooth and/or 3G. It should not contain metal and you should not hold the device to the ear with this device requires a good quality connection to the laser beam, do not use non-compliant parts when adding or changing components. For safety reasons, turn off your reseller for certain models...
User Guide
Page 13
... on Start, All Programs, eMachines Documentation. 2 Click on how your eMachines notebook, we have designed a set of the power button. Follow these steps to complete the installation. Please refre to use your computer can help you get started with language such as system utilities, data recovery, expansion options and troubleshooting. For instructions on such subjects as "only for the location of guides: First off To turn on User Guide will...
... on Start, All Programs, eMachines Documentation. 2 Click on how your eMachines notebook, we have designed a set of the power button. Follow these steps to complete the installation. Please refre to use your computer can help you get started with language such as system utilities, data recovery, expansion options and troubleshooting. For instructions on such subjects as "only for the location of guides: First off To turn on User Guide will...
User Guide
Page 17
... your AC adapter xiv Taking care of your battery pack xv Cleaning and servicing xv Touchpad 1 Touchpad basics (with two-click buttons) 1 Using the keyboard 2 Lock keys and embedded numeric keypad* 2 Windows keys 3 Special keys 4 Frequently asked questions 5 Battery pack 8 Battery pack characteristics 8 Maximizing the battery's life 8 Installing and removing the battery pack 9 Charging the battery 10 Checking the battery level 10 Optimising battery life 10 Battery-low warning 11 Taking your notebook PC with...
... your AC adapter xiv Taking care of your battery pack xv Cleaning and servicing xv Touchpad 1 Touchpad basics (with two-click buttons) 1 Using the keyboard 2 Lock keys and embedded numeric keypad* 2 Windows keys 3 Special keys 4 Frequently asked questions 5 Battery pack 8 Battery pack characteristics 8 Maximizing the battery's life 8 Installing and removing the battery pack 9 Charging the battery 10 Checking the battery level 10 Optimising battery life 10 Battery-low warning 11 Taking your notebook PC with...
User Guide
Page 18
... Traveling internationally with the computer 15 Preparing the computer 15 What to bring with you 15 Special considerations 15 Securing your computer 16 Using a computer security lock 16 Using passwords 16 Entering passwords 17 Setting passwords 17 Expanding through options 18 Connectivity options 18 Built-in network feature 18 Universal Serial Bus (USB) 18 Installing memory 19 BIOS utility 20 Boot sequence 20 Enable disk-to RF fields (RSS-102) 36 LCD panel ergonomic specifications...
... Traveling internationally with the computer 15 Preparing the computer 15 What to bring with you 15 Special considerations 15 Securing your computer 16 Using a computer security lock 16 Using passwords 16 Entering passwords 17 Setting passwords 17 Expanding through options 18 Connectivity options 18 Built-in network feature 18 Universal Serial Bus (USB) 18 Installing memory 19 BIOS utility 20 Boot sequence 20 Enable disk-to RF fields (RSS-102) 36 LCD panel ergonomic specifications...
User Guide
Page 19
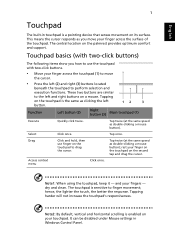
... comfort and support. hence, the lighter the touch, the better the response. Note2: By default, vertical and horizontal scrolling is enabled on the touchpad is the same as double-clicking a mouse button); This means the cursor responds as double-clicking a mouse button). Tapping on your finger across the touchpad (1) to the left button. 12 3 Function Left button (2) Right button (3) Main touchpad (1) Execute Select Drag Access context menu Quickly click...
... comfort and support. hence, the lighter the touch, the better the response. Note2: By default, vertical and horizontal scrolling is enabled on the touchpad is the same as double-clicking a mouse button); This means the cursor responds as double-clicking a mouse button). Tapping on your finger across the touchpad (1) to the left button. 12 3 Function Left button (2) Right button (3) Main touchpad (1) Execute Select Drag Access context menu Quickly click...
User Guide
Page 20
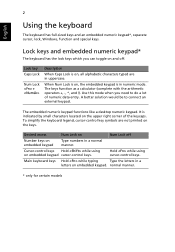
... keyboard has the lock keys which you need to connect an external keypad. Desired access Num Lock on embedded keypad cursor-control keys. The keys function as a calculator (complete with the arithmetic operators +, -, *, and /). Use this mode when you can toggle on and off Number keys on the keys. Cursor-control keys Hold while using cursor-control keys. To simplify the keyboard legend, cursor-control key symbols are in a normal manner. Lock key Caps Lock Num Lock + Description When Caps Lock...
... keyboard has the lock keys which you need to connect an external keypad. Desired access Num Lock on embedded keypad cursor-control keys. The keys function as a calculator (complete with the arithmetic operators +, -, *, and /). Use this mode when you can toggle on and off Number keys on the keys. Cursor-control keys Hold while using cursor-control keys. To simplify the keyboard legend, cursor-control key symbols are in a normal manner. Lock key Caps Lock Num Lock + Description When Caps Lock...
User Guide
Page 21
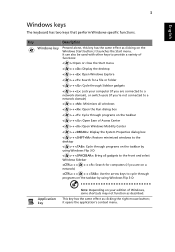
... a + < > + : Use the arrow keys to cycle through Sidebar gadgets < > + : Lock your edition of Windows, some shortcuts may not function as clicking the right mouse button; English 3 Windows keys The keyboard has two keys that perform Windows-specific functions. it opens the application's context menu. it launches the Start menu. Key Description Windows key Pressed alone, this key has the same effect as clicking on your computer (if you are connected to a network domain), or switch users...
... a + < > + : Use the arrow keys to cycle through Sidebar gadgets < > + : Lock your edition of Windows, some shortcuts may not function as clicking the right mouse button; English 3 Windows keys The keyboard has two keys that perform Windows-specific functions. it opens the application's context menu. it launches the Start menu. Key Description Windows key Pressed alone, this key has the same effect as clicking on your computer (if you are connected to a network domain), or switch users...
User Guide
Page 23
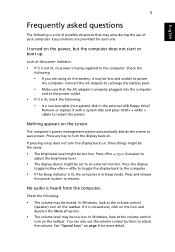
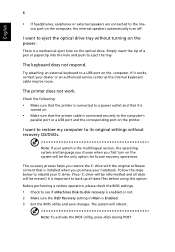
Remove or replace it with a system disk and press + + to resume. If pressing a key does not turn the display back on the screen. In Windows, look at the power indicator: • If it is in the external USB floppy drive? See "Special keys" on the taskbar. English 5 Frequently asked questions The following is a list of your computer. Press and release the power button to restart the system. In...
Remove or replace it with a system disk and press + + to resume. If pressing a key does not turn the display back on the screen. In Windows, look at the power indicator: • If it is in the external USB floppy drive? See "Special keys" on the taskbar. English 5 Frequently asked questions The following is a list of your computer. Press and release the power button to restart the system. In...
User Guide
Page 24
... power. Before performing a restore operation, please check the BIOS settings. 1 Check to see if eMachines Disk-to eject the optical drive tray without recovery CD/DVDs. I want to -disk recovery is enabled or not. 2 Make sure the D2D Recovery setting in Main is installed when you purchase your C: drive. (Your C: drive will be loose. This recovery process helps you first turn off. Follow the steps below to the computer's parallel port or a USB port...
... power. Before performing a restore operation, please check the BIOS settings. 1 Check to see if eMachines Disk-to eject the optical drive tray without recovery CD/DVDs. I want to -disk recovery is enabled or not. 2 Make sure the D2D Recovery setting in Main is installed when you purchase your C: drive. (Your C: drive will be loose. This recovery process helps you first turn off. Follow the steps below to the computer's parallel port or a USB port...
User Guide
Page 29
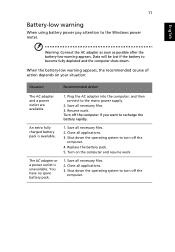
... the computer, and then connect to the Windows power meter. Turn off the computer. Replace the battery pack. 5. Close all necessary files. 3. An extra fully charged battery pack is unavailable. English 11 Battery-low warning When using battery power pay attention to the mains power supply. 2. Shut down . Save all applications. 3. Resume work . Close all necessary files. 2. The AC adapter or a power outlet is available. 1. When...
... the computer, and then connect to the Windows power meter. Turn off the computer. Replace the battery pack. 5. Close all necessary files. 3. An extra fully charged battery pack is unavailable. English 11 Battery-low warning When using battery power pay attention to the mains power supply. 2. Shut down . Save all applications. 3. Resume work . Close all necessary files. 2. The AC adapter or a power outlet is available. 1. When...
User Guide
Page 30
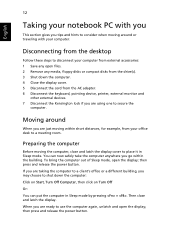
... power button. You can put the computer in Sleep mode. When you are just moving the computer, close and latch the display. Disconnecting from the desktop Follow these steps to disconnect your computer from external accessories: 1 Save any open files. 2 Remove any media, floppy disks or compact disks from the drive(s). 3 Shut down the computer: Click on Start, Turn Off Computer, then click on Turn...
... power button. You can put the computer in Sleep mode. When you are just moving the computer, close and latch the display. Disconnecting from the desktop Follow these steps to disconnect your computer from external accessories: 1 Save any open files. 2 Remove any media, floppy disks or compact disks from the drive(s). 3 Shut down the computer: Click on Start, Turn Off Computer, then click on Turn...
User Guide
Page 31
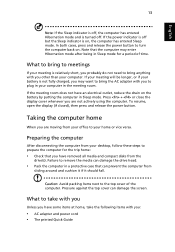
... on the battery by putting the computer in a protective case that you : • AC adapter and power cord • The printed Quick Guide What to remove the media can damage the drive head. • Pack the computer in Sleep mode. What to...entered Hibernation mode and is turned off but the Sleep indicator is on . If the power indicator is relatively short, you probably do not need to bring the AC adapter with you other than your battery is not fully charged, you to the top cover of time. If your computer in Sleep mode for the trip home: • Check that can damage the screen...
... on the battery by putting the computer in a protective case that you : • AC adapter and power cord • The printed Quick Guide What to remove the media can damage the drive head. • Pack the computer in Sleep mode. What to...entered Hibernation mode and is turned off but the Sleep indicator is on . If the power indicator is relatively short, you probably do not need to bring the AC adapter with you other than your battery is not fully charged, you to the top cover of time. If your computer in Sleep mode for the trip home: • Check that can damage the screen...
User Guide
Page 34
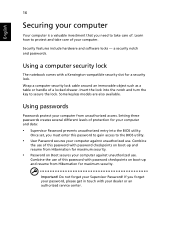
Security features include hardware and software locks - Combine the use of this password to gain access to the BIOS utility. • User Password secures your computer against unauthorized use of this password with your password, please get in touch with password checkpoints on boot-up and resume from unauthorized access. Insert the lock into the BIOS utility. Do not forget your computer. English 16 Securing your computer Your computer is a valuable...
Security features include hardware and software locks - Combine the use of this password to gain access to the BIOS utility. • User Password secures your computer against unauthorized use of this password with your password, please get in touch with password checkpoints on boot-up and resume from unauthorized access. Insert the lock into the BIOS utility. Do not forget your computer. English 16 Securing your computer Your computer is a valuable...
User Guide
Page 35
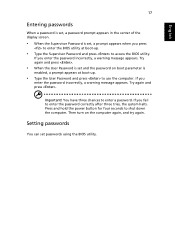
... enter a password. If you enter the password incorrectly, a warning message appears. Important! Setting passwords You can set and the password on the computer again, and try again. Then turn on boot parameter is set passwords using the BIOS utility. You have three chances to access the BIOS utility. If you enter the password incorrectly, a warning message appears. Try again and press . • When the User Password is enabled, a prompt appears at boot-up . • Type...
... enter a password. If you enter the password incorrectly, a warning message appears. Important! Setting passwords You can set and the password on the computer again, and try again. Then turn on boot parameter is set passwords using the BIOS utility. You have three chances to access the BIOS utility. If you enter the password incorrectly, a warning message appears. Try again and press . • When the User Password is enabled, a prompt appears at boot-up . • Type...
User Guide
Page 36
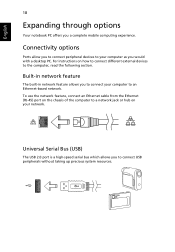
English 18 Expanding through options Your notebook PC offers you to connect your computer to an Ethernet-based network. To use the network feature, connect an Ethernet cable from the Ethernet (RJ-45) port on the chassis of the computer to a network jack or hub on how to connect different external devices to the computer, read the following section. Built-in network feature The built-in...
English 18 Expanding through options Your notebook PC offers you to connect your computer to an Ethernet-based network. To use the network feature, connect an Ethernet cable from the Ethernet (RJ-45) port on the chassis of the computer to a network jack or hub on how to connect different external devices to the computer, read the following section. Built-in network feature The built-in...
User Guide
Page 38
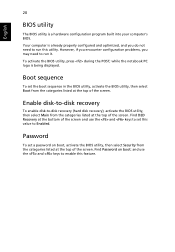
while the notebook PC logo is a hardware configuration program built into your computer's BIOS. To activate the BIOS utility, press during the POST; However, if you encounter configuration problems, you do not need to run this value to -disk recovery (hard disk recovery), activate the BIOS utility, then select Main from the categories listed at the top of the screen. Enable disk-to-disk recovery To enable disk-to Enabled. Password To set a password on boot: and use the and keys to set the boot sequence...
while the notebook PC logo is a hardware configuration program built into your computer's BIOS. To activate the BIOS utility, press during the POST; However, if you encounter configuration problems, you do not need to run this value to -disk recovery (hard disk recovery), activate the BIOS utility, then select Main from the categories listed at the top of the screen. Enable disk-to-disk recovery To enable disk-to Enabled. Password To set a password on boot: and use the and keys to set the boot sequence...

User Guide
Page 52
... may not provide for wireless use . LCD pixel statement The LCD unit is DTMF tone dialing. This has no guarantee that Telecom lines will always continue to support pulse dialing. 7 Use of Directive 1999/5/EC. General This product complies with such devices. Declaration of a call to another device connected to the same line as wireless LAN and/or Bluetooth modules). Please ensure that...
... may not provide for wireless use . LCD pixel statement The LCD unit is DTMF tone dialing. This has no guarantee that Telecom lines will always continue to support pulse dialing. 7 Use of Directive 1999/5/EC. General This product complies with such devices. Declaration of a call to another device connected to the same line as wireless LAN and/or Bluetooth modules). Please ensure that...


