Owner's Manual
Page 1
UAB YSP-900 Digital Sound Projector OWNER'S MANUAL
UAB YSP-900 Digital Sound Projector OWNER'S MANUAL

Owner's Manual
Page 4
... on the surface of space above (or below) this unit. - YAMAHA will form when the surrounding temperature changes suddenly. The cabinet should be exposed... turned off and an appropriate 3 pin plug fitted. this manual carefully. Retain this Owner's Manual in this unit to the instructions described below . For details... it in a safe place for future reference. 2 Install this sound system in them, as they may cause fire, damage to this ...force on the rear of the three pin plug. This Class B digital apparatus complies with the same or equivalent type. CUSTOMERS If the socket...
... on the surface of space above (or below) this unit. - YAMAHA will form when the surrounding temperature changes suddenly. The cabinet should be exposed... turned off and an appropriate 3 pin plug fitted. this manual carefully. Retain this Owner's Manual in this unit to the instructions described below . For details... it in a safe place for future reference. 2 Install this sound system in them, as they may cause fire, damage to this ...force on the rear of the three pin plug. This Class B digital apparatus complies with the same or equivalent type. CUSTOMERS If the socket...
Owner's Manual
Page 8
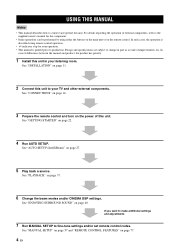
...Run AUTO SETUP. In case of external components, refer to the supplied owner's manual for the component. • Some operations can be performed by using remote control operation. • y indicates a tip for your operation. • This manual is described using either the buttons on the main unit or on page ... fine-tune settings and/or set remote control codes. See "AUTO SETUP (IntelliBeam)" on page 40. See "ENJOYING SURROUND SOUND" on page 27. 5 Play back a source. See "MANUAL SETUP" on page 57 and "REMOTE CONTROL FEATURES" on page 37. 6 Change the beam modes and/or CINEMA DSP ...
...Run AUTO SETUP. In case of external components, refer to the supplied owner's manual for the component. • Some operations can be performed by using remote control operation. • y indicates a tip for your operation. • This manual is described using either the buttons on the main unit or on page ... fine-tune settings and/or set remote control codes. See "AUTO SETUP (IntelliBeam)" on page 40. See "ENJOYING SURROUND SOUND" on page 27. 5 Play back a source. See "MANUAL SETUP" on page 57 and "REMOTE CONTROL FEATURES" on page 37. 6 Change the beam modes and/or CINEMA DSP ...
Owner's Manual
Page 42
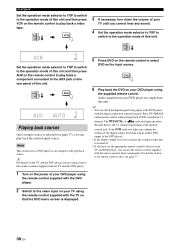
TV/AV YSP AUX VOL Playing back sources Once an input source is selected (see page 77. 2 Switch to the video input on your DVD player are using, refer to the owner's manual supplied with the TV ... from your DVD player using the remote control supplied with the digital connection (optical/coaxial). VOL Set the operation mode selector to YSP to switch to the operation mode of this unit and then ... you have set remote control codes, see page 37), you cannot hear any sound. 4 Set the operation mode selector to YSP to switch to the operation mode of this unit and then press VCR on ...
TV/AV YSP AUX VOL Playing back sources Once an input source is selected (see page 77. 2 Switch to the video input on your DVD player are using, refer to the owner's manual supplied with the TV ... from your DVD player using the remote control supplied with the digital connection (optical/coaxial). VOL Set the operation mode selector to YSP to switch to the operation mode of this unit and then ... you have set remote control codes, see page 37), you cannot hear any sound. 4 Set the operation mode selector to YSP to switch to the operation mode of this unit and then press VCR on ...

Owner's Manual
Page 95
... optimizer microphone. Please read the following order. 1 Audio pin cable (supplied) 2 Optical cable (supplied) 3 OSD (On-Screen Display) video pin cable (supplied) 4 Digital audio pin cable (supplied) 5 DVD video pin cable 6 Subwoofer pin cable (in the exact center of the wall when it on the power of this...your TV, place it is connected to this unit, turn on the top panel of sound beams. Otherwise, the desired surround sound effects may install this unit in parallel with the wall or in the Owner's Manual. You may not be when you have set the optimizer microphone, follow the steps ...
... optimizer microphone. Please read the following order. 1 Audio pin cable (supplied) 2 Optical cable (supplied) 3 OSD (On-Screen Display) video pin cable (supplied) 4 Digital audio pin cable (supplied) 5 DVD video pin cable 6 Subwoofer pin cable (in the exact center of the wall when it on the power of this...your TV, place it is connected to this unit, turn on the top panel of sound beams. Otherwise, the desired surround sound effects may install this unit in parallel with the wall or in the Owner's Manual. You may not be when you have set the optimizer microphone, follow the steps ...
Owner's Manual
Page 96
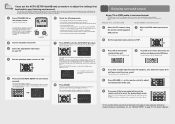
...unit to 30. If necessary, adjust the volume level in surround sound. CH LEVEL MENU TEST ENTER TV/AV YSP RETURN 3 Press TV on your TV or DVD player, refer to the owner's manual supplied with the aid of this unit. on the remote control to...the listening environment parameters manually or make advanced settings for your TV. Measurement takes about 3 minutes. 2 Turn on your listening environment. This unit employs the YAMAHA IntelliBeam technology with each component. To achieve the best results possible, evacuate yourself for speaker positions, sound beams, etc., ...
...unit to 30. If necessary, adjust the volume level in surround sound. CH LEVEL MENU TEST ENTER TV/AV YSP RETURN 3 Press TV on your TV or DVD player, refer to the owner's manual supplied with the aid of this unit. on the remote control to...the listening environment parameters manually or make advanced settings for your TV. Measurement takes about 3 minutes. 2 Turn on your listening environment. This unit employs the YAMAHA IntelliBeam technology with each component. To achieve the best results possible, evacuate yourself for speaker positions, sound beams, etc., ...


