

Reference Manual
Page 2
... of Contents Starting Up 4 Controls 4 LCD screen 4 Adjusting the direction of the built-in microphones (Tilt up 5 Inserting a battery 5 Battery indicator 5 Basic Operations 6 Selecting a menu item 6 Canceling the operation or return to the previous display 6 Using the headphones 6 Using an external stereo microphone 6 Turning the power on or off 6 Auto power off function 6 Hold function 7 Adjusting the volume 7 Date and time settings 7 Recording 9 Recording time 9 Selecting the recording mode 9 Starting recording 10 Stopping recording 11 Pausing recording 11 Inserting...
... of Contents Starting Up 4 Controls 4 LCD screen 4 Adjusting the direction of the built-in microphones (Tilt up 5 Inserting a battery 5 Battery indicator 5 Basic Operations 6 Selecting a menu item 6 Canceling the operation or return to the previous display 6 Using the headphones 6 Using an external stereo microphone 6 Turning the power on or off 6 Auto power off function 6 Hold function 7 Adjusting the volume 7 Date and time settings 7 Recording 9 Recording time 9 Selecting the recording mode 9 Starting recording 10 Stopping recording 11 Pausing recording 11 Inserting...
Reference Manual
Page 3
... [Manual] folder 42 [ALARM] folder 42 [LINE] folder 42 Security setting and removable disk display .. 42 Using the unit as a music player ....43 Recording music files 43 Ripping CDs (transferring music files to your computer 43 Copying data using Explorer 46 (1) Copying files to the unit 46 (2) Copying files to your computer 46 Transferring data using Windows Media Player 47 Creating a Playlist 48 Selecting the Playlist 48 Appendix 49 Troubleshooting 49 FAQ 52 Specifications 53 * The illustrations and LCD screens shown in this manual are for instructional...
... [Manual] folder 42 [ALARM] folder 42 [LINE] folder 42 Security setting and removable disk display .. 42 Using the unit as a music player ....43 Recording music files 43 Ripping CDs (transferring music files to your computer 43 Copying data using Explorer 46 (1) Copying files to the unit 46 (2) Copying files to your computer 46 Transferring data using Windows Media Player 47 Creating a Playlist 48 Selecting the Playlist 48 Appendix 49 Troubleshooting 49 FAQ 52 Specifications 53 * The illustrations and LCD screens shown in this manual are for instructional...

Reference Manual
Page 4
.../Search button (Y) 10 5 Play/Select button (W) 6 Skip/Search button (T) 11 12 7 Volume buttons (VOL +, -) 13 8 Folder/Index button (FOLDER/ INDEX) 1 2 3 4 5 6 14 7 15 8 16 9 LCD screen 10 Delete button (DEL) 17 11 Pause/Record button (PAUSE/REC) 18 12 Menu/Stop button (MENU/STOP) 13 Speaker 14 Headphones socket ( ) 20 19 15 Power/Hold switch (POWER/HOLD) 16 Playback speed control switch (PLAY SPEED) 17 Battery compartment lid 18 USB terminal slide switch 19 USB terminal cover (may be rotated) 20 USB terminal LCD screen 1 Repeat/Random...
.../Search button (Y) 10 5 Play/Select button (W) 6 Skip/Search button (T) 11 12 7 Volume buttons (VOL +, -) 13 8 Folder/Index button (FOLDER/ INDEX) 1 2 3 4 5 6 14 7 15 8 16 9 LCD screen 10 Delete button (DEL) 17 11 Pause/Record button (PAUSE/REC) 18 12 Menu/Stop button (MENU/STOP) 13 Speaker 14 Headphones socket ( ) 20 19 15 Power/Hold switch (POWER/HOLD) 16 Playback speed control switch (PLAY SPEED) 17 Battery compartment lid 18 USB terminal slide switch 19 USB terminal cover (may be rotated) 20 USB terminal LCD screen 1 Repeat/Random...

Reference Manual
Page 10
Recording Starting recording Do not remove the battery during recording. The M folder stores music files transferred from the actual elapsed time. 10 POCKETRAK 2G Reference Manual If you select one folder (A, B, C, D or S). "FILE FULL" appears if you delete some files, the elapsed recording time displayed on the LCD may differ from a computer. Press the PAUSE/REC button. For detailed explanation of them, built-in microphone recordings will be recorded automatically to...
Recording Starting recording Do not remove the battery during recording. The M folder stores music files transferred from the actual elapsed time. 10 POCKETRAK 2G Reference Manual If you select one folder (A, B, C, D or S). "FILE FULL" appears if you delete some files, the elapsed recording time displayed on the LCD may differ from a computer. Press the PAUSE/REC button. For detailed explanation of them, built-in microphone recordings will be recorded automatically to...

Reference Manual
Page 13
... 30). 3. Press the PAUSE/REC button to adjust the microphone sensi- POCKETRAK 2G Reference Manual 13 SP 20 MIC SP 15 MIC · The recorder will remember the specified microphone sensitivity for at least two (2) seconds. 2. Press the MENU/STOP button twice to start recording. Press the PAUSE/REC button to exit from the menu setting mode. SP 20 MIC 2. tivity...
... 30). 3. Press the PAUSE/REC button to adjust the microphone sensi- POCKETRAK 2G Reference Manual 13 SP 20 MIC SP 15 MIC · The recorder will remember the specified microphone sensitivity for at least two (2) seconds. 2. Press the MENU/STOP button twice to start recording. Press the PAUSE/REC button to exit from the menu setting mode. SP 20 MIC 2. tivity...

Reference Manual
Page 17
... XHQ mode. · The unit can record up to select "ON", then press the W button. 5. Note: · The function does not work if the recorder does not recognize a silent pause of at least 2 seconds. 2. POCKETRAK 2G Reference Manual 17 Recording Note: · Audio is automatically recorded in the L (Line) folder. This function is useful when you record to the L folder, MIC ALC is automatically set to select "VOICE...
... XHQ mode. · The unit can record up to select "ON", then press the W button. 5. Note: · The function does not work if the recorder does not recognize a silent pause of at least 2 seconds. 2. POCKETRAK 2G Reference Manual 17 Recording Note: · Audio is automatically recorded in the L (Line) folder. This function is useful when you record to the L folder, MIC ALC is automatically set to select "VOICE...

Reference Manual
Page 18
... Y or T button to resume playback. Playback begins. File number Total file number Note: · A few seconds may be unable to start playback of a file or an extremely large number of the file is reached, the unit starts fast forwarding the next file. 18 POCKETRAK 2G Reference Manual Changing playback speed Use the Playback speed control switch to change the playback speed. • SLOW (Slow speed playback) • NORMAL...
... Y or T button to resume playback. Playback begins. File number Total file number Note: · A few seconds may be unable to start playback of a file or an extremely large number of the file is reached, the unit starts fast forwarding the next file. 18 POCKETRAK 2G Reference Manual Changing playback speed Use the Playback speed control switch to change the playback speed. • SLOW (Slow speed playback) • NORMAL...

Reference Manual
Page 25
... menu setting mode. The minute digits are no files in the ALARM folder. 1. Press the MENU/STOP button twice to select "ALARM", then press the W button. Before you program the timer, place the file to specify the hour, then press the W button. A beep will be played in the ALARM folder. 8. Press the Y or T button to be played through the speaker or headphones. POCKETRAK 2G Reference Manual...
... menu setting mode. The minute digits are no files in the ALARM folder. 1. Press the MENU/STOP button twice to select "ALARM", then press the W button. Before you program the timer, place the file to specify the hour, then press the W button. A beep will be played in the ALARM folder. 8. Press the Y or T button to be played through the speaker or headphones. POCKETRAK 2G Reference Manual...

Reference Manual
Page 31
... "DATE & TIME" ↔ "BATTERY SETTING" ↔ "TIMER & ALARM" ↔ "FORMAT" ↔ "REC LED" ↔ "BACKLIGHT" ↔ "AUTO POWER OFF" ↔ "MENU MODE" ↔ "CONTRAST" ↔ "SECURITY ON" ↔ "USB SETTING" ↔ "VERSION" ↔ "BEEP SOUND" ↔ ... 5. ting, press the MENU/STOP button once during the menu setting procedure. Press the W button. To edit the setting of the menu option hierarchy appears. 2. VOICE: MUSIC: COMMON: Settings for audio recording Settings for setting menu options 1. POCKETRAK 2G Reference Manual 31 MUSIC menu: "SOUND EQ...
... "DATE & TIME" ↔ "BATTERY SETTING" ↔ "TIMER & ALARM" ↔ "FORMAT" ↔ "REC LED" ↔ "BACKLIGHT" ↔ "AUTO POWER OFF" ↔ "MENU MODE" ↔ "CONTRAST" ↔ "SECURITY ON" ↔ "USB SETTING" ↔ "VERSION" ↔ "BEEP SOUND" ↔ ... 5. ting, press the MENU/STOP button once during the menu setting procedure. Press the W button. To edit the setting of the menu option hierarchy appears. 2. VOICE: MUSIC: COMMON: Settings for audio recording Settings for setting menu options 1. POCKETRAK 2G Reference Manual 31 MUSIC menu: "SOUND EQ...

Reference Manual
Page 36
... USB terminal to the computer, make sure to observe the following before turning the power to the unit on again. • Before connecting the USB terminal to the computer, exit from any power-saving mode of the unit off then on your computer. Hint: DRM (Digital Rights Management) 10 is connected to the computer, the unit will operate without consuming battery power. 36 POCKETRAK 2G Reference Manual Connecting...
... USB terminal to the computer, make sure to observe the following before turning the power to the unit on again. • Before connecting the USB terminal to the computer, exit from any power-saving mode of the unit off then on your computer. Hint: DRM (Digital Rights Management) 10 is connected to the computer, the unit will operate without consuming battery power. 36 POCKETRAK 2G Reference Manual Connecting...
Reference Manual
Page 43
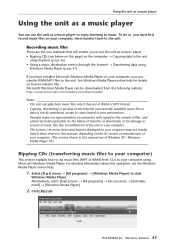
...) • Using a music distribution service through the Internet → Transferring data using Microsoft Windows Media Player. Click POCKETRAK 2G Reference Manual 43 See Windows Media Player online help . 1. To do so, you can use the unit as a music player: • Ripping CDs (see below on this operation, see the Windows Media Player online help for damage or erasure of music files due to malfunction of the unit or your computer. · The screens, the menu items and buttons displayed on your...
...) • Using a music distribution service through the Internet → Transferring data using Microsoft Windows Media Player. Click POCKETRAK 2G Reference Manual 43 See Windows Media Player online help . 1. To do so, you can use the unit as a music player: • Ripping CDs (see below on this operation, see the Windows Media Player online help for damage or erasure of music files due to malfunction of the unit or your computer. · The screens, the menu items and buttons displayed on your...

Reference Manual
Page 46
Using the unit as a music player Copying data using Explorer This section explains how to transfer MP3/WMA files to the USB terminal on your choice on the computer. 2. Note: · If you wish to the unit WMA files purchased via a music distribution service, use Windows Media Player (page 47). 12 46 POCKETRAK 2G Reference Manual Open the "MUSIC" folder in the Removable Disk drive and the "My Music" folder in "My Document...
Using the unit as a music player Copying data using Explorer This section explains how to transfer MP3/WMA files to the USB terminal on your choice on the computer. 2. Note: · If you wish to the unit WMA files purchased via a music distribution service, use Windows Media Player (page 47). 12 46 POCKETRAK 2G Reference Manual Open the "MUSIC" folder in the Removable Disk drive and the "My Music" folder in "My Document...

Reference Manual
Page 47
... programs] → [Windows Media Player] to the unit using Windows Media Player. Click [Sync] tab. Connect the unit to the device. Select [All Music] from the pull-down menu. 5. Never disconnect the unit from your computer during file transfer. The system starts synchronizing to the computer. POCKETRAK 2G Reference Manual 47 Check the box for the songs that you transfer DRM10 content WMA files to the unit, set USB SETTING to...
... programs] → [Windows Media Player] to the unit using Windows Media Player. Click [Sync] tab. Connect the unit to the device. Select [All Music] from the pull-down menu. 5. Never disconnect the unit from your computer during file transfer. The system starts synchronizing to the computer. POCKETRAK 2G Reference Manual 47 Check the box for the songs that you transfer DRM10 content WMA files to the unit, set USB SETTING to...

Reference Manual
Page 49
... Delete music files you modify the file name using different encoder (MP3/WMA conversion) software. Possible cause Internal memory error. No sound. Corrective action Adjust the volume. Correct the file name to play back files in the VOICE (A, B, C, D, S) or L (line) folder cannot be played (correctly or at all). Possible cause The file is set. POCKETRAK 2G Reference Manual 49 Appendix Appendix Troubleshooting...
... Delete music files you modify the file name using different encoder (MP3/WMA conversion) software. Possible cause Internal memory error. No sound. Corrective action Adjust the volume. Correct the file name to play back files in the VOICE (A, B, C, D, S) or L (line) folder cannot be played (correctly or at all). Possible cause The file is set. POCKETRAK 2G Reference Manual 49 Appendix Appendix Troubleshooting...

Reference Manual
Page 50
... The BATTERY SETTING is already taken, so the Removable Disk cannot be created. Corrective action Format (initialize) the built-in the locked S folder" on the PC. If a USB hub is connected to the PC. If a network drive has been assigned, the drive letter (the letters used , reconnect the unit directly to the USB terminal on page 29. See "Playing back a file in memory. Possible cause Connecting the...
... The BATTERY SETTING is already taken, so the Removable Disk cannot be created. Corrective action Format (initialize) the built-in the locked S folder" on the PC. If a USB hub is connected to the PC. If a network drive has been assigned, the drive letter (the letters used , reconnect the unit directly to the USB terminal on page 29. See "Playing back a file in memory. Possible cause Connecting the...

Reference Manual
Page 51
... transfer speed (from PC to play back a file that exceed a specific minimum recording time. Recordings include unwanted noise. Determine the optimum setting for playback (the volume will gradually increase). If you're using DAW software such as Cubase AI, insert a blank space of at least 0.1 seconds at the beginning of the file is connected to the PC. POCKETRAK 2G Reference Manual...
... transfer speed (from PC to play back a file that exceed a specific minimum recording time. Recordings include unwanted noise. Determine the optimum setting for playback (the volume will gradually increase). If you're using DAW software such as Cubase AI, insert a blank space of at least 0.1 seconds at the beginning of the file is connected to the PC. POCKETRAK 2G Reference Manual...
Owners Manual
Page 2
... FCC Regulations, Part 15 for Class "B" digital devices. Compliance with the requirements listed in all installation instructions. If the antenna lead-in the USA. 3. Follow all installations. If you can be determined by turning the unit "OFF" and "ON", please try to eliminate the problem by YAMAHA CORPORATION OF AMERICA. (class B) 2 POCKETRAK 2G Owner's Manual This equipment generates/uses radio frequencies and, if not installed and used . FCC INFORMATION...
... FCC Regulations, Part 15 for Class "B" digital devices. Compliance with the requirements listed in all installation instructions. If the antenna lead-in the USA. 3. Follow all installations. If you can be determined by turning the unit "OFF" and "ON", please try to eliminate the problem by YAMAHA CORPORATION OF AMERICA. (class B) 2 POCKETRAK 2G Owner's Manual This equipment generates/uses radio frequencies and, if not installed and used . FCC INFORMATION...
Owners Manual
Page 5
... Accessories 7 Main Features 8 Precautions 9 Starting Up 13 Controls 13 LCD screen 14 Adjusting the direction of the built-in microphones (Tilt up 14 Inserting a battery 15 Basic Operations 16 Selecting a menu item 16 Using the headphones 16 Turning the power on or off 16 Hold function 17 Adjusting the volume 17 Quick Guide 18 Recording 18 Playback 21 Deleting 22 Connecting to a Computer 23 Connecting the unit to get the...
... Accessories 7 Main Features 8 Precautions 9 Starting Up 13 Controls 13 LCD screen 14 Adjusting the direction of the built-in microphones (Tilt up 14 Inserting a battery 15 Basic Operations 16 Selecting a menu item 16 Using the headphones 16 Turning the power on or off 16 Hold function 17 Adjusting the volume 17 Quick Guide 18 Recording 18 Playback 21 Deleting 22 Connecting to a Computer 23 Connecting the unit to get the...
Owners Manual
Page 11
... it may possibly cause loss of sight or chemical burns. When charging the battery outside this is inserted in use a charger that supports eneloop batteries, and observe the instructions given in flamed when contacted by battery fluid, consult a doctor. (5)-5 3/3 11 POCKETRAK 2G Owner's Manual WARNING • Do not remove the battery while the unit is not to be impossible to do so...
... it may possibly cause loss of sight or chemical burns. When charging the battery outside this is inserted in use a charger that supports eneloop batteries, and observe the instructions given in flamed when contacted by battery fluid, consult a doctor. (5)-5 3/3 11 POCKETRAK 2G Owner's Manual WARNING • Do not remove the battery while the unit is not to be impossible to do so...

Owners Manual
Page 15
... BATTERY." Hint: When you use the DATE & TIME settings. Note: · Dispose of all applicable laws. 15 POCKETRAK 2G Owner's Manual ENGLISH Inserting a battery Turn the power off before you keep using the recorder without recharging the "eneloop" or replacing the battery, the recorder will then go dark. If you replace the battery. Install one eneloop (supplied) or AAA/LR03/HP16 alkaline battery. To do so, press and hold down the MENU/STOP button...
... BATTERY." Hint: When you use the DATE & TIME settings. Note: · Dispose of all applicable laws. 15 POCKETRAK 2G Owner's Manual ENGLISH Inserting a battery Turn the power off before you keep using the recorder without recharging the "eneloop" or replacing the battery, the recorder will then go dark. If you replace the battery. Install one eneloop (supplied) or AAA/LR03/HP16 alkaline battery. To do so, press and hold down the MENU/STOP button...


