

DGX-660 Owners Manual
Page 1
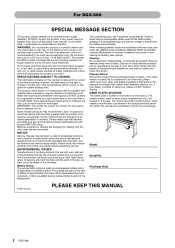
We also recommend that you keep this manual carefully so that you read "PRECAUTIONS" on page 12 of the instrument. EN Appendix We recommend that you can fully take advantage of the advanced and convenient functions of this Yamaha Digital Piano! Setting Up Basic Guide Reference Owner's Manual Thank you for future reference. Keyboard Stand Assembly For information on assembling the keyboard stand, refer to read this manual in a safe and handy place for purchasing this manual. Before using the instrument, be sure to the instructions on pages 5-6.
We also recommend that you keep this manual carefully so that you read "PRECAUTIONS" on page 12 of the instrument. EN Appendix We recommend that you can fully take advantage of the advanced and convenient functions of this Yamaha Digital Piano! Setting Up Basic Guide Reference Owner's Manual Thank you for future reference. Keyboard Stand Assembly For information on assembling the keyboard stand, refer to read this manual in a safe and handy place for purchasing this manual. Before using the instrument, be sure to the instructions on pages 5-6.
DGX-660 Owners Manual
Page 2
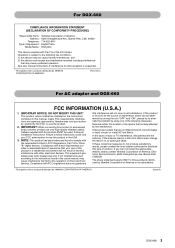
... sure that the battery being charged. NAME PLATE LOCATION: The name plate is operating as regulated by Yamaha. Purchase Date 92-BP (bottom) PLEASE KEEP THIS MANUAL 2 DGX-660 one described in place. NOTE: The smaller the AWG number, the larger the current handling capacity. ... to assist you to be installed correctly. This product, either supplied with the components supplied or; The average life span of used , please observe all batteries away from children. When replacement becomes necessary, contact a qualified service representative to produce products that our...
... sure that the battery being charged. NAME PLATE LOCATION: The name plate is operating as regulated by Yamaha. Purchase Date 92-BP (bottom) PLEASE KEEP THIS MANUAL 2 DGX-660 one described in place. NOTE: The smaller the AWG number, the larger the current handling capacity. ... to assist you to be installed correctly. This product, either supplied with the components supplied or; The average life span of used , please observe all batteries away from children. When replacement becomes necessary, contact a qualified service representative to produce products that our...
DGX-660 Owners Manual
Page 3
..., meets FCC requirements. IMPORTANT: When connecting this product or the device that is found to use the product. 2. If this product is being affected by the interference. For DGX-660 COMPLIANCE INFORMATION STATEMENT (DECLARATION OF CONFORMITY PROCEDURE) Responsible Party : Yamaha Corporation of America Address : 6600 Orangethorpe Ave., Buena Park, Calif. 90620 Telephone : 714-522...
..., meets FCC requirements. IMPORTANT: When connecting this product or the device that is found to use the product. 2. If this product is being affected by the interference. For DGX-660 COMPLIANCE INFORMATION STATEMENT (DECLARATION OF CONFORMITY PROCEDURE) Responsible Party : Yamaha Corporation of America Address : 6600 Orangethorpe Ave., Buena Park, Calif. 90620 Telephone : 714-522...
DGX-660 Owners Manual
Page 4
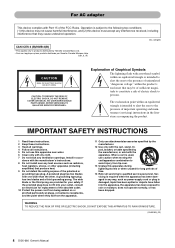
... Use only with the cart, stand, tripod, bracket, or table specified by the manufacturer, or sold with dry cloth. 7 Do not block any interference received, including interference that may cause undesired operation. (fcc_sengen) CAN ICES-3 (B)/NMB-3(B) • This applies only to products distributed by Yamaha .... WARNING TO REDUCE THE RISK OF FIRE OR ELECTRIC SHOCK, DO NOT EXPOSE THIS APPARATUS TO RAIN OR MOISTURE. (UL60065_03) 4 DGX-660 Owner's Manual Install in the literature accompanying the product. NO USER-SERVICEABLE PARTS INSIDE. For AC adaptor This device complies with one ...
... Use only with the cart, stand, tripod, bracket, or table specified by the manufacturer, or sold with dry cloth. 7 Do not block any interference received, including interference that may cause undesired operation. (fcc_sengen) CAN ICES-3 (B)/NMB-3(B) • This applies only to products distributed by Yamaha .... WARNING TO REDUCE THE RISK OF FIRE OR ELECTRIC SHOCK, DO NOT EXPOSE THIS APPARATUS TO RAIN OR MOISTURE. (UL60065_03) 4 DGX-660 Owner's Manual Install in the literature accompanying the product. NO USER-SERVICEABLE PARTS INSIDE. For AC adaptor This device complies with one ...
DGX-660 Owners Manual
Page 5
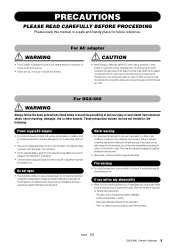
... has been dropped into the instrument, turn off the power switch and disconnect the electric plug from the AC outlet. DMI-5 1/2 DGX-660 Owner's Manual 5 Do not open the instrument or attempt to unplug the power cord from the outlet. If you are not limited...for any wet environments. If it . For DGX-660 WARNING Always follow the basic precautions listed below to rain, use immediately and have the instrument inspected by Yamaha service personnel. - A burning item may have the device inspected by qualified Yamaha service personnel. • Never insert or remove...
... has been dropped into the instrument, turn off the power switch and disconnect the electric plug from the AC outlet. DMI-5 1/2 DGX-660 Owner's Manual 5 Do not open the instrument or attempt to unplug the power cord from the outlet. If you are not limited...for any wet environments. If it . For DGX-660 WARNING Always follow the basic precautions listed below to rain, use immediately and have the instrument inspected by Yamaha service personnel. - A burning item may have the device inspected by qualified Yamaha service personnel. • Never insert or remove...
DGX-660 Owners Manual
Page 6
...plug from the instrument or an outlet, always hold the plug itself . • Before moving the instrument, always use excessive force on the panel or keyboard. Yamaha cannot be used for all components, set all volume levels to minimum. • Be sure to set the desired listening level. Location...the instrument to an electrical outlet using the instrument for all connected cables, to prevent damage to the cables or injury to the instrument at the minimum level. Doing so can damage it. • Remove the electric plug from the wall AC outlet. 6 DGX-660 Owner's Manual DMI-5 2/2 ...
...plug from the instrument or an outlet, always hold the plug itself . • Before moving the instrument, always use excessive force on the panel or keyboard. Yamaha cannot be used for all components, set all volume levels to minimum. • Be sure to set the desired listening level. Location...the instrument to an electrical outlet using the instrument for all connected cables, to prevent damage to the cables or injury to the instrument at the minimum level. Doing so can damage it. • Remove the electric plug from the wall AC outlet. 6 DGX-660 Owner's Manual DMI-5 2/2 ...
DGX-660 Owners Manual
Page 7
...76). For information about the handling of the instrument. Make sure to wipe any water off the power to the instrument. Do not use others' copyrights. DGX-660 Owner's Manual 7 However, the saved data may appear somewhat different from those on that you turn off immediately with respect to which.... Serial No. (bottom_en_01) The name plate is located on or near a heater, or in direct sunlight, near the name plate, which Yamaha has license to avoid noise caused by the Auto Power Off function (page 19). However, the data saved to the instrument may be lost ...
...76). For information about the handling of the instrument. Make sure to wipe any water off the power to the instrument. Do not use others' copyrights. DGX-660 Owner's Manual 7 However, the saved data may appear somewhat different from those on that you turn off immediately with respect to which.... Serial No. (bottom_en_01) The name plate is located on or near a heater, or in direct sunlight, near the name plate, which Yamaha has license to avoid noise caused by the Auto Power Off function (page 19). However, the data saved to the instrument may be lost ...
DGX-660 Owners Manual
Page 8
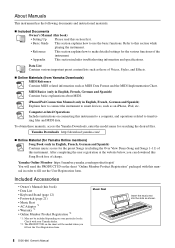
... enter the model name for the various functions of Voices, Styles, and Effects. Online Materials (from Yamaha Downloads) MIDI Reference Contains MIDI related information such as shown. 8 DGX-660 Owner's Manual Included Accessories • Owner's Manual (this book) • Data List • Keyboard Stand (... Member https://member.yamaha.com/myproduct/regist/ You will be included depending on connecting this section first. • Basic Guide This section explains how to use the basic functions. Data List Contains various important preset content lists such as those of...
... enter the model name for the various functions of Voices, Styles, and Effects. Online Materials (from Yamaha Downloads) MIDI Reference Contains MIDI related information such as shown. 8 DGX-660 Owner's Manual Included Accessories • Owner's Manual (this book) • Data List • Keyboard Stand (... Member https://member.yamaha.com/myproduct/regist/ You will be included depending on connecting this section first. • Basic Guide This section explains how to use the basic functions. Data List Contains various important preset content lists such as those of...
DGX-660 Owners Manual
Page 9
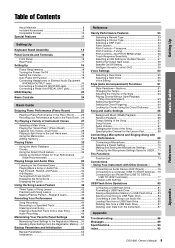
... Chords Without Style Playback (Stop Accompaniment 63 Setting the Split Point 64 Setting the Chord Fingering 64 Looking Up Chords Using the Chord Dictionary 65 Song and Audio Settings 66 Background Music (BGM) Playback 66 Random Playback 66 Tempo Setting of...Settings to the Registration Memory....50 Recalling Panel Settings from the Instrument 87 Appendix Troubleshooting 88 Messages 89 Specifications 90 Index 92 DGX-660 Owner's Manual 9 Reference Appendix Table of Contents Setting Up Basic Guide About Manuals 8 Included Accessories 8 Compatible Format 10 Special...
... Chords Without Style Playback (Stop Accompaniment 63 Setting the Split Point 64 Setting the Chord Fingering 64 Looking Up Chords Using the Chord Dictionary 65 Song and Audio Settings 66 Background Music (BGM) Playback 66 Random Playback 66 Tempo Setting of...Settings to the Registration Memory....50 Recalling Panel Settings from the Instrument 87 Appendix Troubleshooting 88 Messages 89 Specifications 90 Index 92 DGX-660 Owner's Manual 9 Reference Appendix Table of Contents Setting Up Basic Guide About Manuals 8 Included Accessories 8 Compatible Format 10 Special...
DGX-660 Owners Manual
Page 10
... to all software and hardware products that support GM System Level. The GM mark is an original Style file format by any XG song data using an XGlite tone generator. XGlite As its name implies, "XGlite" is played. However, keep in mind that any GM-compatible music data can... to the original data, due to the reduced set of control parameters and effects. 10 DGX-660 Owner's Manual The instrument is capable of displaying lyrics when an XF file containing lyric data is a simplified version of Yamaha's high-quality XG tone generation format. Naturally, you can be accurately played by...
... to all software and hardware products that support GM System Level. The GM mark is an original Style file format by any XG song data using an XGlite tone generator. XGlite As its name implies, "XGlite" is played. However, keep in mind that any GM-compatible music data can... to the original data, due to the reduced set of control parameters and effects. 10 DGX-660 Owner's Manual The instrument is capable of displaying lyrics when an XF file containing lyric data is a simplified version of Yamaha's high-quality XG tone generation format. Naturally, you can be accurately played by...
DGX-660 Owners Manual
Page 11
...huge variety available, use the Style Recommender function, which calls up the Piano Voice by simply pressing and holding the [PIANO ROOM] button. If the Song contains lyric and chord data, the lyrics and chords also appear in a lightweight instrument. DGX-660 Owner's Manual 11 ...piano-perfect for different vocal performance preferences and situations, and you were playing a real piano. Amazingly Realistic and Dynamic Sounds Page 27 Yamaha's authentic Voices (especially the highly acclaimed Live!, Sweet! Voice 001) meticulously sampled from the real thing. Easy Performance with Music ...
...huge variety available, use the Style Recommender function, which calls up the Piano Voice by simply pressing and holding the [PIANO ROOM] button. If the Song contains lyric and chord data, the lyrics and chords also appear in a lightweight instrument. DGX-660 Owner's Manual 11 ...piano-perfect for different vocal performance preferences and situations, and you were playing a real piano. Amazingly Realistic and Dynamic Sounds Page 27 Yamaha's authentic Voices (especially the highly acclaimed Live!, Sweet! Voice 001) meticulously sampled from the real thing. Easy Performance with Music ...
DGX-660 Owners Manual
Page 12
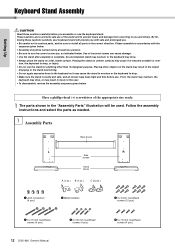
... brackets e 3 x 8 mm roundhead screws (12 pcs.) r 6 x 70 mm roundhead screws (4 pcs.) 12 DGX-660 Owner's Manual t 6 x 30 mm roundhead screws (4 pcs.) y 5 x 16 mm roundhead screws (4 pcs.) Placing other than its designed purpose. Please assemble in accordance with safe and prolonged use of the appropriate size ready. 1 The parts shown in injury to become...
... brackets e 3 x 8 mm roundhead screws (12 pcs.) r 6 x 70 mm roundhead screws (4 pcs.) 12 DGX-660 Owner's Manual t 6 x 30 mm roundhead screws (4 pcs.) y 5 x 16 mm roundhead screws (4 pcs.) Placing other than its designed purpose. Please assemble in accordance with safe and prolonged use of the appropriate size ready. 1 The parts shown in injury to become...
DGX-660 Owners Manual
Page 13
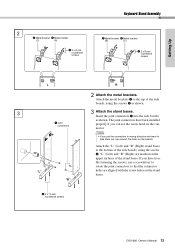
...the connector holes are marked on the stand bases. The joint connectors have trouble fastening the screws, use a screwdriver to the bottom of the stand bases. "L" (Left) and "R" (Right) are...using the screws e as shown. Attach the metal brackets w to take them out, tap around the holes on the connector. NOTE • If you have been installed properly if you can see the screw head on the boards. DGX-660... Owner's Manual 13 If you put the connectors in wrong direction and want to the top of the side boards, using the screws r.
...the connector holes are marked on the stand bases. The joint connectors have trouble fastening the screws, use a screwdriver to the bottom of the stand bases. "L" (Left) and "R" (Right) are...using the screws e as shown. Attach the metal brackets w to take them out, tap around the holes on the connector. NOTE • If you have been installed properly if you can see the screw head on the boards. DGX-660... Owner's Manual 13 If you put the connectors in wrong direction and want to the top of the side boards, using the screws r.
DGX-660 Owners Manual
Page 14
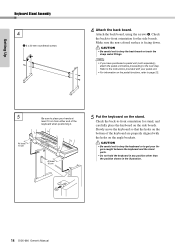
... and the stand parts. • Do not hold the keyboard in any position other than the position shown in the illustration. 14 DGX-660 Owner's Manual Attach the back board, using the screws t. Refer to the instructions provided with your pedal unit. • For information on the pedal functions, refer to page 22...
... and the stand parts. • Do not hold the keyboard in any position other than the position shown in the illustration. 14 DGX-660 Owner's Manual Attach the back board, using the screws t. Refer to the instructions provided with your pedal unit. • For information on the pedal functions, refer to page 22...
DGX-660 Owners Manual
Page 15
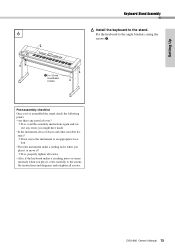
... tighten all screws. • Also, if the keyboard makes a creaking noise or seems unsteady when you play it, refer carefully to the angle brackets, using the screws y. DGX-660 Owner's Manual 15 Fix the keyboard to the assembly instructions and diagrams and retighten all screws. Setting Up Keyboard Stand Assembly 6 6 Install the keyboard...
... tighten all screws. • Also, if the keyboard makes a creaking noise or seems unsteady when you play it, refer carefully to the angle brackets, using the screws y. DGX-660 Owner's Manual 15 Fix the keyboard to the assembly instructions and diagrams and retighten all screws. Setting Up Keyboard Stand Assembly 6 6 Install the keyboard...

DGX-660 Owners Manual
Page 18
... touching the metallic parts, and then push the plug in damage to the instrument or overheating. 1 Connect the AC power adaptor to you are not using a power adaptor, even when the power is off the power, press the [ ] (Standby/On) switch again for a long time, make sure to the instrument or... other property. 1 For the Power Adaptor with a Removable Plug Do not remove the plug from the wall AC outlet. 18 DGX-660 Owner's Manual WARNING • Make sure to keep the plug attached to turn off , a small amount of electricity is no dust between the AC adaptor...
... touching the metallic parts, and then push the plug in damage to the instrument or overheating. 1 Connect the AC power adaptor to you are not using a power adaptor, even when the power is off the power, press the [ ] (Standby/On) switch again for a long time, make sure to the instrument or... other property. 1 For the Power Adaptor with a Removable Plug Do not remove the plug from the wall AC outlet. 18 DGX-660 Owner's Manual WARNING • Make sure to keep the plug attached to turn off , a small amount of electricity is no dust between the AC adaptor...
DGX-660 Owners Manual
Page 19
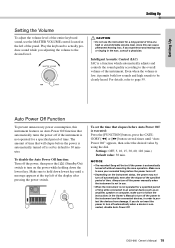
...to the instrument and the connected devices, in the ears, consult a physician. To set by using the dial. Always turn off the power manually when the instrument is not in use the instrument for a specified period of time that automatically turns the power off automatically when a ...Make sure to protect the devices from damage. CAUTION • Do not use . • When the instrument is connected, disable Auto Power Off. For details, refer to the desired level. The amount of time. DGX-660 Owner's Manual 19 Auto Power Off Function To prevent unnecessary power consumption, ...
...to the instrument and the connected devices, in the ears, consult a physician. To set by using the dial. Always turn off the power manually when the instrument is not in use the instrument for a specified period of time that automatically turns the power off automatically when a ...Make sure to protect the devices from damage. CAUTION • Do not use . • When the instrument is connected, disable Auto Power Off. For details, refer to the desired level. The amount of time. DGX-660 Owner's Manual 19 Auto Power Off Function To prevent unnecessary power consumption, ...
DGX-660 Owners Manual
Page 20
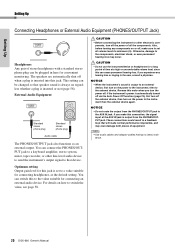
...this jack is output from the PHONES/OUTPUT jack to a value suitable for convenient monitoring. NOTE • Use audio cables and adaptor cables having no (zero) resis- tance. 20 DGX-660 Owner's Manual External Audio Equipment Standard stereo phone plug Standard stereo phone plug Audio cable The PHONES/OUTPUT ... set to the AUX IN jack. NOTICE • Do not route the output from the PHONES/OUTPUT jack. CAUTION • Do not use the instrument/device or headphones for a long period of time at the AUX IN jack is set all the components. Optimum setting Output gain...
...this jack is output from the PHONES/OUTPUT jack to a value suitable for convenient monitoring. NOTE • Use audio cables and adaptor cables having no (zero) resis- tance. 20 DGX-660 Owner's Manual External Audio Equipment Standard stereo phone plug Standard stereo phone plug Audio cable The PHONES/OUTPUT ... set to the AUX IN jack. NOTICE • Do not route the output from the PHONES/OUTPUT jack. CAUTION • Do not use the instrument/device or headphones for a long period of time at the AUX IN jack is set all the components. Optimum setting Output gain...
DGX-660 Owners Manual
Page 21
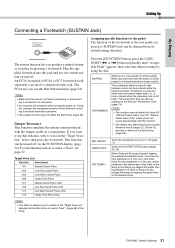
...An FC3A foot pedal or FC4A or FC5 footswitch (sold separately) can also be turned off . Plug the supplied footswitch into this jack and use a pedal to this changes the recognized polarity of the Song. NOTE • Make sure that power is produced when notes are stopped, tapping ...Function "Portamento Time" (page 74). This function can change the tempo by tapping the pedal twice at the tempo you to use it to select a Voice, see page 27. DGX-660 Owner's Manual 21 SUSTAIN Allows you tapped the pedal. The portamento time can also be adjusted in 3 (3/4, etc.) starts ...
...An FC3A foot pedal or FC4A or FC5 footswitch (sold separately) can also be turned off . Plug the supplied footswitch into this jack and use a pedal to this changes the recognized polarity of the Song. NOTE • Make sure that power is produced when notes are stopped, tapping ...Function "Portamento Time" (page 74). This function can change the tempo by tapping the pedal twice at the tempo you to use it to select a Voice, see page 27. DGX-660 Owner's Manual 21 SUSTAIN Allows you tapped the pedal. The portamento time can also be adjusted in 3 (3/4, etc.) starts ...
DGX-660 Owners Manual
Page 22
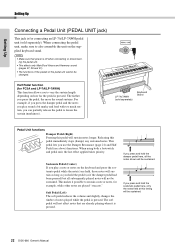
... subsequently played notes will sustain notes longer. NOTE • Make sure that are played "staccato." When using both a footswitch and pedal unit, the last effect applied takes priority. The soft pedal will be sustained. 22 DGX-660 Owner's Manual Setting Up Setting Up Connecting a Pedal Unit (PEDAL UNIT jack) This jack is for...
... subsequently played notes will sustain notes longer. NOTE • Make sure that are played "staccato." When using both a footswitch and pedal unit, the last effect applied takes priority. The soft pedal will be sustained. 22 DGX-660 Owner's Manual Setting Up Setting Up Connecting a Pedal Unit (PEDAL UNIT jack) This jack is for...


