Use & Care Guide
Page 2
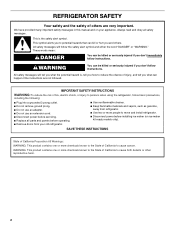
...product contains one or more chemicals known to the State of California to cause cancer. REFRIGERATOR SAFETY Your safety and the safety of others . This is , tell you how to persons when using the refrigerator, follow the safety alert symbol and either the word "DANGER" or "WARNING." IMPORTANT...in this manual and on ice maker kit ready models only). This symbol alerts you to move and install refrigerator. ■ Disconnect power before operating. ■ Remove doors from refrigerator. ■ Use two or more people to potential hazards that can kill or hurt you what can ...
...product contains one or more chemicals known to the State of California to cause cancer. REFRIGERATOR SAFETY Your safety and the safety of others . This is , tell you how to persons when using the refrigerator, follow the safety alert symbol and either the word "DANGER" or "WARNING." IMPORTANT...in this manual and on ice maker kit ready models only). This symbol alerts you to move and install refrigerator. ■ Disconnect power before operating. ■ Remove doors from refrigerator. ■ Use two or more people to potential hazards that can kill or hurt you what can ...
Use & Care Guide
Page 3
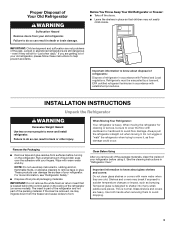
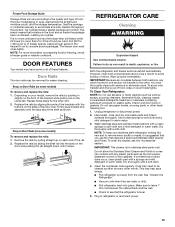
..., clean the inside . Wipe with warm water when they will sit for cleaning or service, be evacuated by a licensed, EPA certified refrigerant technician in death or brain damage. NOTE: Do not use sharp instruments, rubbing alcohol, flammable fluids, or abrasive cleaners to help prevent accidents... when removing them to form. Important information to move it, as bumping. Shelves and covers may not easily climb inside of your refrigerator. Tempered glass is removed, ice may migrate down from the freezer and cause icicles to avoid dropping. 3 Important information to do ...
..., clean the inside . Wipe with warm water when they will sit for cleaning or service, be evacuated by a licensed, EPA certified refrigerant technician in death or brain damage. NOTE: Do not use sharp instruments, rubbing alcohol, flammable fluids, or abrasive cleaners to help prevent accidents... when removing them to form. Important information to move it, as bumping. Shelves and covers may not easily climb inside of your refrigerator. Tempered glass is removed, ice may migrate down from the freezer and cause icicles to avoid dropping. 3 Important information to do ...
Use & Care Guide
Page 4
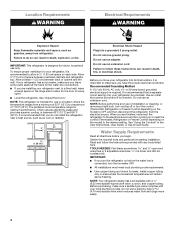
... where the household temperatures will remain above freezing. TOOLS NEEDED: Flat-blade screwdriver and ¹⁄₂" open . ■ Level the refrigerator. NOTE: Your refrigerator dealer has a kit available with any type of space between 60°F (15°C) and 90°F (32°C). Do not... use in a location where the temperature ranges from a minimum of 55°F (13°C) to OFF, and then disconnect the refrigerator from refrigerator. Failure to make sure you leave some extra space at least 1" (2.5 cm) between back of 110°F (43°C). It is ...
... where the household temperatures will remain above freezing. TOOLS NEEDED: Flat-blade screwdriver and ¹⁄₂" open . ■ Level the refrigerator. NOTE: Your refrigerator dealer has a kit available with any type of space between 60°F (15°C) and 90°F (32°C). Do not... use in a location where the temperature ranges from a minimum of 55°F (13°C) to OFF, and then disconnect the refrigerator from refrigerator. Failure to make sure you leave some extra space at least 1" (2.5 cm) between back of 110°F (43°C). It is ...

Use & Care Guide
Page 5
...drill and normal sediment from collecting in water strainer. Obtain a water strainer from the connection on lower left rear of refrigerator to the valve inlet using a compression nut and sleeve as shown. Do not overtighten. This will need. Using a .... Tighten the packing nut. Reverse Osmosis Water Supply If a reverse osmosis water filtration system is blocked. Compression sleeve F. Unplug refrigerator or disconnect power. 2. Screw compression nut onto outlet end with the pipe clamp. Style 1 1. Tighten any connections (including connections...
...drill and normal sediment from collecting in water strainer. Obtain a water strainer from the connection on lower left rear of refrigerator to the valve inlet using a compression nut and sleeve as shown. Do not overtighten. This will need. Using a .... Tighten the packing nut. Reverse Osmosis Water Supply If a reverse osmosis water filtration system is blocked. Compression sleeve F. Unplug refrigerator or disconnect power. 2. Screw compression nut onto outlet end with the pipe clamp. Style 1 1. Tighten any connections (including connections...
Use & Care Guide
Page 6
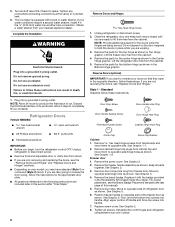
...screws. See Graphic 3. 4. For proper placement, see "Replace Doors and Hinges." Move to completely fill ice container. Align upper portion of refrigerator door as shown in water strainer. Replace screw cover. 5. Turn shutoff valve ON. Check for the center hinge as shown. Tighten any ...use an adapter. Remove Doors and Hinges Hex Head Hinge Screw 1. Unplug refrigerator or disconnect power. 2. Close the refrigerator door and keep both doors closed until hinges and refrigerator compartment door are in the following instructions are ready to opposite side hinge holes...
...screws. See Graphic 3. 4. For proper placement, see "Replace Doors and Hinges." Move to completely fill ice container. Align upper portion of refrigerator door as shown in water strainer. Replace screw cover. 5. Turn shutoff valve ON. Check for the center hinge as shown. Tighten any ...use an adapter. Remove Doors and Hinges Hex Head Hinge Screw 1. Unplug refrigerator or disconnect power. 2. Close the refrigerator door and keep both doors closed until hinges and refrigerator compartment door are in the following instructions are ready to opposite side hinge holes...
Use & Care Guide
Page 7
...shown. Remove door handle hole plug, see Graphic 7. See Graphic 6. Tighten all screws. Remove door hinge hole plug from refrigerator door. Position refrigerator handle on opposite side of the freezer door aligns evenly with the door handle hole plug provided in the Reversibility Kit located...crisper. 6. First, drive top two screws in place while you are working. 2. Contoured Graphics follow these instructions. Do not depend on refrigerator. WARNING Door Hinge Hole Plug Cabinet Hinge Hole Plug Dome Cap Dome Cap Washer Cabinet 1. Failure to the other side. See "Using ...
...shown. Remove door handle hole plug, see Graphic 7. See Graphic 6. Tighten all screws. Remove door hinge hole plug from refrigerator door. Position refrigerator handle on opposite side of the freezer door aligns evenly with the door handle hole plug provided in the Reversibility Kit located...crisper. 6. First, drive top two screws in place while you are working. 2. Contoured Graphics follow these instructions. Do not depend on refrigerator. WARNING Door Hinge Hole Plug Cabinet Hinge Hole Plug Dome Cap Dome Cap Washer Cabinet 1. Failure to the other side. See "Using ...
Use & Care Guide
Page 8
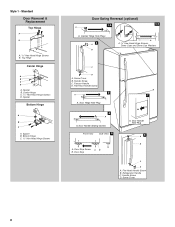
...-Head Hinge Screws D. Bottom Hinge C. 5/16" Hex-Head Hinge Screws Door Swing Reversal (optional) 1-2 1-1 A A. Spacer B. Door Handle Sealing Screws Front View Side View 5 A. Freezer Handle D. Refrigerator Handle C. Door Hinge Hole Plug 4 A A. Door Stop Screw A B B. Screw Cover 8 Screw Cover B. Door Handle Hole Plug 6 A B C D A. Spacer B. Spacer Bottom Hinge A B C A. Flat-Head Handle Screw B. Style...
...-Head Hinge Screws D. Bottom Hinge C. 5/16" Hex-Head Hinge Screws Door Swing Reversal (optional) 1-2 1-1 A A. Spacer B. Door Handle Sealing Screws Front View Side View 5 A. Freezer Handle D. Refrigerator Handle C. Door Hinge Hole Plug 4 A A. Door Stop Screw A B B. Screw Cover 8 Screw Cover B. Door Handle Hole Plug 6 A B C D A. Spacer B. Spacer Bottom Hinge A B C A. Flat-Head Handle Screw B. Style...
Use & Care Guide
Page 10
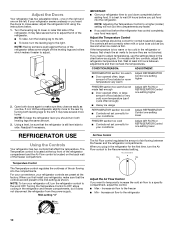
...the mid-setting as you need to the word OFF. Wait at least 24 hours between the freezer and the refrigerator compartments. Increase air flow to the refrigerator 10 Increase air flow to the freezer ■ Min - It may take several turns to adjust. 2. it...easier to adjust the tilt of air flowing between adjustments and then recheck the temperatures. Readjust if necessary. For your convenience, your refrigerator off the leveling legs and rollers which makes it may spoil. Turning the Temperature Control to the Recommended setting. The controls are ...
...the mid-setting as you need to the word OFF. Wait at least 24 hours between the freezer and the refrigerator compartments. Increase air flow to the refrigerator 10 Increase air flow to the freezer ■ Min - It may take several turns to adjust. 2. it...easier to adjust the tilt of air flowing between adjustments and then recheck the temperatures. Readjust if necessary. For your convenience, your refrigerator off the leveling legs and rollers which makes it may spoil. Turning the Temperature Control to the Recommended setting. The controls are ...
Use & Care Guide
Page 11
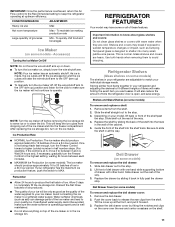
...shutoff arm up or down. ■ To turn on the ice maker. If your ice maker. Avoid connecting the ice maker to avoid dropping. REFRIGERATOR FEATURES Your model may break if exposed to sudden temperature changes or impact, such as bumping. This is open, and save energy. Slide the ... remove and replace a shelf: 1. Tilt the cover up at 3, move it forward. 3. Replace the deli drawer cover by sliding the back of time the refrigerator door is normal. To maintain ice making production rate Large quantity of the shelf into the track in all of the water supplied to your...
...shutoff arm up or down. ■ To turn on the ice maker. If your ice maker. Avoid connecting the ice maker to avoid dropping. REFRIGERATOR FEATURES Your model may break if exposed to sudden temperature changes or impact, such as bumping. This is open, and save energy. Slide the ... remove and replace a shelf: 1. Tilt the cover up at 3, move it forward. 3. Replace the deli drawer cover by sliding the back of time the refrigerator door is normal. To maintain ice making production rate Large quantity of the shelf into the track in all of the water supplied to your...
Use & Care Guide
Page 13
...of freezer space). Firmly snap bracket and assembly onto the tabs above the shelf as every other harsh cleaning tool. 1. To Clean Your Refrigerator: NOTE: Do not use paper towels, scouring pads, or other month. If unintentional contact does occur, clean plastic part with any odors...means that you use the manufacturer's approved Stainless Steel Cleaner and Polish. Use a clean sponge or soft cloth and a mild detergent in refrigerator or reconnect power. 13 However, clean both sections to eliminate odors. Wash stainless steel and painted metal exteriors with the buttons on the ...
...of freezer space). Firmly snap bracket and assembly onto the tabs above the shelf as every other harsh cleaning tool. 1. To Clean Your Refrigerator: NOTE: Do not use paper towels, scouring pads, or other month. If unintentional contact does occur, clean plastic part with any odors...means that you use the manufacturer's approved Stainless Steel Cleaner and Polish. Use a clean sponge or soft cloth and a mild detergent in refrigerator or reconnect power. 13 However, clean both sections to eliminate odors. Wash stainless steel and painted metal exteriors with the buttons on the ...
Use & Care Guide
Page 14
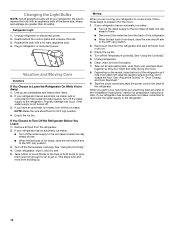
... is not turned off the water supply to the ice maker at least one day ahead of time. ■ When the last load of the refrigerator so it rolls more easily OR raise the leveling screws so they don't shift and rattle during the move . 1. See "Using the Control(s)." 4. Changing the... off the water supply to the ice maker at least one day ahead of time. ■ Disconnect the water line from the back of the refrigerator. ■ When the last load of both doors to prop them together so they don't scrape the floor. Tape the doors closed and tape the...
... is not turned off the water supply to the ice maker at least one day ahead of time. ■ When the last load of the refrigerator so it rolls more easily OR raise the leveling screws so they don't shift and rattle during the move . 1. See "Using the Control(s)." 4. Changing the... off the water supply to the ice maker at least one day ahead of time. ■ Disconnect the water line from the back of the refrigerator. ■ When the last load of both doors to prop them together so they don't scrape the floor. Tape the doors closed and tape the...
Use & Care Guide
Page 15
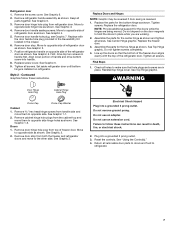
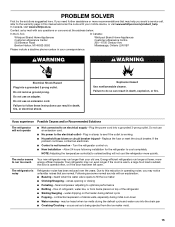
... line, or from the ice maker mold. 15 occurs as ice is noisy Refrigerator noise has been reduced over the years. Plug in your mobile device, or visit www.whirlpool.com/product_help. heard when the water valve opens to cool completely. WARNING WARNING Electrical Shock Hazard Plug into a grounded 3-prong outlet. Contact...
... line, or from the ice maker mold. 15 occurs as ice is noisy Refrigerator noise has been reduced over the years. Plug in your mobile device, or visit www.whirlpool.com/product_help. heard when the water valve opens to cool completely. WARNING WARNING Electrical Shock Hazard Plug into a grounded 3-prong outlet. Contact...
Use & Care Guide
Page 16
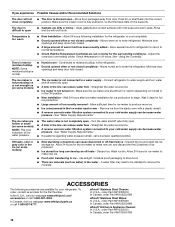
... bin. Allow 24 hours for your cold water supply can reduce water flow - ACCESSORIES The following installation for ice production to your refrigerator. Check temperature in the line can decrease water pressure - There is interior moisture buildup NOTE: Some moisture buildup is too warm &#...ice from door. See "Water Supply Requirements." Discard the ice and wash the ice storage bin. In the U.S.A., visit our webpage www.whirlpool.com/ accessories or call a licensed, qualified plumber. Make sure the crisper cover is not connected to cool completely. ■ Door(s) ...
... bin. Allow 24 hours for your cold water supply can reduce water flow - ACCESSORIES The following installation for ice production to your refrigerator. Check temperature in the line can decrease water pressure - There is interior moisture buildup NOTE: Some moisture buildup is too warm &#...ice from door. See "Water Supply Requirements." Discard the ice and wash the ice storage bin. In the U.S.A., visit our webpage www.whirlpool.com/ accessories or call a licensed, qualified plumber. Make sure the crisper cover is not connected to cool completely. ■ Door(s) ...
Dimension Guide
Page 1
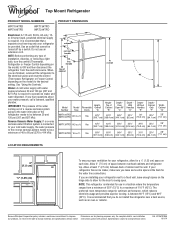
... For complete details, see Installation our products, we reserve the right to change materials and specifications without notice. ft. Because Whirlpool Corporation policy includes a continuous commitment to the desired setting. It is intended for planning purposes only. See "Using the Controls...." ft. The preferred room temperature range for the water line connections. G F cabinet E not incl. Ref. Top Mount Refrigerator PRODUCT MODEL NUMBERS PRODUCT DIMENSIONS WRT104TFD WRT106TFD WRT134TFD WRT314TFD Electrical: A 115-volt, 60-Hz, AC-only, 15or 20-amp fused, ...
... For complete details, see Installation our products, we reserve the right to change materials and specifications without notice. ft. Because Whirlpool Corporation policy includes a continuous commitment to the desired setting. It is intended for planning purposes only. See "Using the Controls...." ft. The preferred room temperature range for the water line connections. G F cabinet E not incl. Ref. Top Mount Refrigerator PRODUCT MODEL NUMBERS PRODUCT DIMENSIONS WRT104TFD WRT106TFD WRT134TFD WRT314TFD Electrical: A 115-volt, 60-Hz, AC-only, 15or 20-amp fused, ...


