Whirlpool WMMF7330RB Support and Manuals
Get Help and Manuals for this Whirlpool item
View All Support Options Below
Free Whirlpool WMMF7330RB manuals!
Problems with Whirlpool WMMF7330RB?
Ask a Question
Free Whirlpool WMMF7330RB manuals!
Problems with Whirlpool WMMF7330RB?
Ask a Question
Popular Whirlpool WMMF7330RB Manual Pages
Bump Out Kit Installation Instructions - Page 1
... bump out mounting kit to the owner manual that comes with the microwave hood combination.
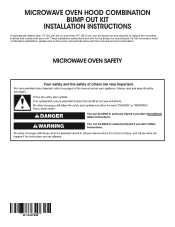
MICROWAVE OVEN SAFETY
W11646788B MICROWAVE OVEN HOOD COMBINATION BUMP OUT KIT
INSTALLATION INSTRUCTIONS
If cabinets are only for the Bump out mounting kit, for full microwave hood combination installation, please refer to replace the mounting bracket that came with your...
Bump Out Kit Installation Instructions - Page 3
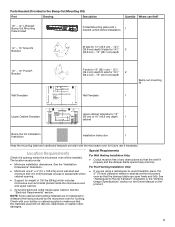
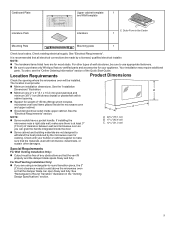
...9632; Support for cooking. The location must be installed. See the "Installation Dimensions...upper cabinet. Parts Needed (Provided in the "Venting Design Specifications" section on the Owner Manual on the ...Part
Drawing
Description
Quantity Where can open freely and fully. See "Rectangular to 16" (40.6 cm) depth
1
cabinet
Bump Out Kit Installation Instruction
Installation Instruction...
Bump Out Kit Installation Instructions - Page 4

... E. 30" (76.2 cm) minimum F. 72" (182.8 cm) recommended 66" (167.6 cm) minimum G. Installation Dimensions
NOTE: The grounded 3 prong outlet must be inside the upper cabinet. Bump out Mounting plate
13 to 133/4" ... the Owner Manual on type of range/cooktop below.
*36" (91.4 cm) is recommended for 72" (182.8 cm) installation height.
**30" (76.2 cm) is typical for 66" (167.6 cm) installation height.
...
Owners Manual - Page 2
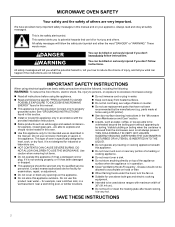
... not use this appliance. Contact nearest authorized service facility for use above ranges with the provided Installation Instructions.
� Some products such as whole eggs and sealed containers for example, near a kitchen sink, in accordance with maximum width of the appliance surface when the appliance is specifically designed to properly grounded outlet. This type...
Owners Manual - Page 3
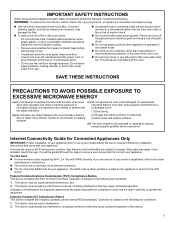
...installation instructions that there is no damage to microwave energy. Data rates may not cause interference. 2. You Will Need: � A home wireless router supporting...adjusted or repaired by the party responsible for your appliance. Internet Connectivity Guide for storage... subject to be guided through the steps to set up a user... except properly qualified service personnel. Operation is...
Owners Manual - Page 6
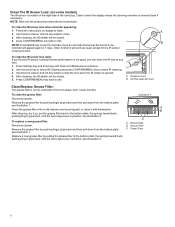
... IR cleaning. 3. Press Settings key and arrow key until...replace a new grease filter: Disconnect power. C
A. Finger Grips
see illustration 1. Replace a new grease filter by pushing finger grips back and then pull down from the bottom plate,
C. Follow the instructions...shows the cleaning reminder or manual clean if necessary. Grease Filter...models)
The IR sensor is located on display to idle.
Owners Manual - Page 7
...Replace the old charcoal filter with a new charcoal filter. Tongues
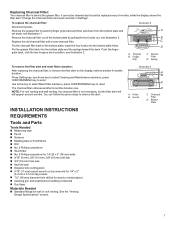
B. You can follow the above steps to enter. INSTALLATION INSTRUCTIONS
REQUIREMENTS
Tools and Parts... set aside, see illustration 2. Press Setting ...Specifications" section.
To replace the charcoal filter: Disconnect power. Finger Grip
C. Spring
To remove the filter alert and reset filters duration: After replacing...
Owners Manual - Page 9
...; Be sure to Round Transition" illustration in the Carton 1
Mounting Pate
Mounting plate
1
Check local codes. For other damages. See the "Electrical Requirements" section. A C
NOTE:
� Some models have a pocket handle.
Outer Form in the "Venting Design Specifications" section.
9 See "Electrical Requirements".
It is at least 3" (7.6 cm) of clearance between wall and...
Owners Manual - Page 11
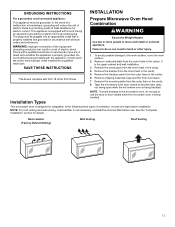
...installed by providing a path of the FCC Rules. SAVE THESE INSTRUCTIONS
This device complies with Part 18 of least resistance for adaptation to whether the appliance is properly installed...use . Recirculation (Factory Default Setting)
Wall Venting
Roof Venting
11...Installation" section for upper-cabinet and wall installation.
3. Check with all local codes and ordinances.
Installation...
Owners Manual - Page 12
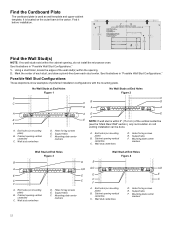
... It is used as wall template and upper-cabinet template. Cabinet opening vertical centerline
C.
Wall stud centerlines
D.
Support tabs F. Cabinet opening , do not install the microwave oven. Holes for lag screws E. Mounting plate center
markers
12 Support tabs F.
Holes for lag screws E. See illustrations in "Possible Wall Stud Configurations." 1.
Wall stud centerlines...
Owners Manual - Page 17
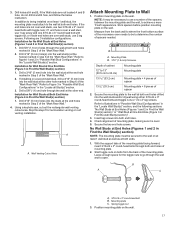
...Wall." Leave enough space for recirculation venting or roof venting installation. Installation for Wall Stud at both end holes. Drill 3/16" ... not drill A and B hole, and follow the below instruction. Wall Venting Cutout Area
Attach Mounting Plate to Figure 3 ... 3. Refer to achieve a more 'Flush' appearance. With the support tabs of the mounting plate facing forward, insert 3/16-24 x ...
Owners Manual - Page 18
... B.
Blower screws
18 4. Securely tighten all lag screws and bolts. If installing on a second wall stud, insert a lag screw into the remaining end hole. 6. Check alignment of microwave oven, set aside. And follow the propriated instruction to open.
3.
Mounting plate C. Drywall 5.
With the support tabs of mounting plate, making sure it is level. 8.
Screw...
Owners Manual - Page 19

... B. A B
8. A
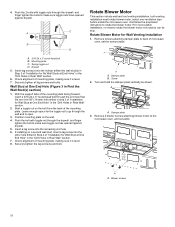
A. Using diagonal wire cutting pliers, gently snip out the rectangular damper vent covers at the perforations. Exhaust ports face the back of microwave oven, and set aside.
Lift blower motor out of the microwave oven. A B
A. A
B
A. Rectangular damper vent cover
7. Blower motor wire
B
A
B
A. Connector 5. Hold the blower motor wire, put the wire...
Owners Manual - Page 22
... tools. Tighten bolts until there is required, rotate microwave oven downward.
Support tabs 4. A
15-20 mm
B
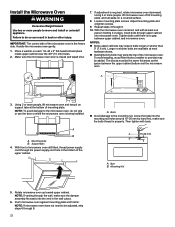
A. Install the Microwave Oven
WARNING
Excessive Weight Hazard Use two or more people to...Using 2 or more people, lift microwave oven and hang it in the bottom of mounting plate, and set aside on each 1/4-20 x 3" flat-head bolt and place
inside upper cabinet near the 3/8" (...
Owners Manual - Page 23
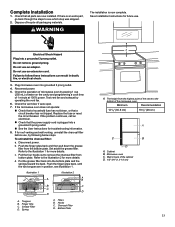
...Installation Instructions for troubleshooting information.
8. Do not use an adapter. Failure to remove the charcoal filter from bottom plate. Check the operation of microwave oven by placing 1 cup (250 mL) of water on the cavity and programming a cook time of the cabinet D. 1/2"-3/4" (1.3-1.9 cm)
23 If the problem... Set aside the grease filter.
Refer to the bottom of /recycle all parts ...
Whirlpool WMMF7330RB Reviews
We have not received any reviews for Whirlpool yet.