
Owners Manual
Page 1
Register your appliance. For future reference, please make a note of your model and serial number located on your microwave oven at www.whirlpool.ca. Always read and obey all instructions before using electrical appliances basic safety precautions should not be heated in accordance...followed. I Read all safety messages. for purchasing this manual and on the front facing of the microwave oven opening, behind the door. Model Number Serial Number MICROWAVE HOOD COMBINATION SAFETY Your safety and the safety of burns, electric shock, fire, injury to persons, or exposure ...
Register your appliance. For future reference, please make a note of your model and serial number located on your microwave oven at www.whirlpool.ca. Always read and obey all instructions before using electrical appliances basic safety precautions should not be heated in accordance...followed. I Read all safety messages. for purchasing this manual and on the front facing of the microwave oven opening, behind the door. Model Number Serial Number MICROWAVE HOOD COMBINATION SAFETY Your safety and the safety of burns, electric shock, fire, injury to persons, or exposure ...

Owners Manual
Page 3
... Padlock icon appears in death, fire, or electrical shock. Required: ■■ A 120-volt, 60 Hz, AC-only, 15- I For all tones back on some models): Set vent fan to run for about 3 seconds until a confirmation tone sounds. OPERATING YOUR MICROWAVE OVEN IMPORTANT: If there are working (12-hour clock is...
... Padlock icon appears in death, fire, or electrical shock. Required: ■■ A 120-volt, 60 Hz, AC-only, 15- I For all tones back on some models): Set vent fan to run for about 3 seconds until a confirmation tone sounds. OPERATING YOUR MICROWAVE OVEN IMPORTANT: If there are working (12-hour clock is...

Owners Manual
Page 4
... (if not 100%), touch number keypads to paper towel ■■ Control panel: sponge or soft cloth and water ■■ Stainless steel (on some models): mild soap and water, then rinse with clean water and dry with soft cloth, or use the dish in ounces: 3.0 or 3.5 (85 or 99 g), then...
... (if not 100%), touch number keypads to paper towel ■■ Control panel: sponge or soft cloth and water ■■ Stainless steel (on some models): mild soap and water, then rinse with clean water and dry with soft cloth, or use the dish in ounces: 3.0 or 3.5 (85 or 99 g), then...
Owners Manual
Page 5
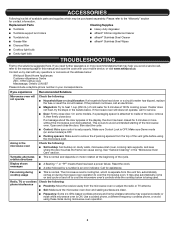
... circuit breaker. It may be purchased separately. Mississauga, Ontario L5N 0B7 Please include a daytime phone number in the bullets below : Whirlpool Brand Home Appliances Customer eXperience Centre 200 - 6750 Century Ave. If water does not heat, try the solutions suggested here. Please...light bulb ■■ Cavity light bulb TROUBLESHOOTING First try the steps in your mobile device, or visit www.whirlpool.ca. Make sure Demo mode (on some models, if a packaging spacer is normal and depends on cavity walls, microwave inlet cover, cooking rack supports, and...
... circuit breaker. It may be purchased separately. Mississauga, Ontario L5N 0B7 Please include a daytime phone number in the bullets below : Whirlpool Brand Home Appliances Customer eXperience Centre 200 - 6750 Century Ave. If water does not heat, try the solutions suggested here. Please...light bulb ■■ Cavity light bulb TROUBLESHOOTING First try the steps in your mobile device, or visit www.whirlpool.ca. Make sure Demo mode (on some models, if a packaging spacer is normal and depends on cavity walls, microwave inlet cover, cooking rack supports, and...
Owners Manual
Page 6
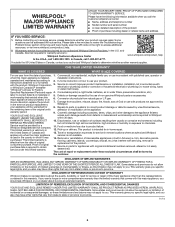
...including REPAIR AS PROVIDED HEREIN. In-home instruction on the right to or furnished with original model/serial numbers removed, altered or not easily determined. Service to Whirlpool REMEDY UNDER THIS LIMITED within 30 days. Specified Replacement Parts and repair 4. Defects or damage ...of merchantability or fitness, so this major appliance, you call 1-800-807-6777. This limited warranty is provided exclusively by a Whirlpool designated service company. 11. Some states and provinces do not allow limitations on the duration of implied warranties of purchase, 1. ...
...including REPAIR AS PROVIDED HEREIN. In-home instruction on the right to or furnished with original model/serial numbers removed, altered or not easily determined. Service to Whirlpool REMEDY UNDER THIS LIMITED within 30 days. Specified Replacement Parts and repair 4. Defects or damage ...of merchantability or fitness, so this major appliance, you call 1-800-807-6777. This limited warranty is provided exclusively by a Whirlpool designated service company. 11. Some states and provinces do not allow limitations on the duration of implied warranties of purchase, 1. ...

Installation Instructions
Page 2
...9632; 3/4" (1.9 cm) hole saw ■■ Caulking gun and weatherproof caulking compound ■■ Duct tape Parts Needed For information on model, charcoal filters may be sure to back of microwave oven) E. 1/4" x 2" lag screws (2) ■■ Cardboard template (part of ... bolts (2) ■■ Upper cabinet template C. See the "Venting Design Specifications" section. 2 See User Instructions.) NOTE: Depending on model, aluminum grease filter and charcoal filter may not be included. NOTE: The hardware items listed here are for wood or metal cabinet ■...
...9632; 3/4" (1.9 cm) hole saw ■■ Caulking gun and weatherproof caulking compound ■■ Duct tape Parts Needed For information on model, charcoal filters may be sure to back of microwave oven) E. 1/4" x 2" lag screws (2) ■■ Cardboard template (part of ... bolts (2) ■■ Upper cabinet template C. See the "Venting Design Specifications" section. 2 See User Instructions.) NOTE: Depending on model, aluminum grease filter and charcoal filter may not be included. NOTE: The hardware items listed here are for wood or metal cabinet ■...

Installation Instructions
Page 3
... do not obstruct top vent airflow. For Roof Venting Installation Only: ■■ If you can open fully. ■■ Some models have a pocket handle. Location Requirements Check the opening . ■■ Support for cooking. Installation Dimensions NOTE: The grounded 3 prong outlet...) wood wall stud and minimum 3/8" (1 cm) thickness drywall or plaster/lath within cabinet opening where the microwave oven will be purchased from Whirlpool. 12" DEEPER 14" 14" DEEPER 15" I bar mounting plate fr om the wall. Remove Cardboard Template The cardboard piece from the top...
... do not obstruct top vent airflow. For Roof Venting Installation Only: ■■ If you can open fully. ■■ Some models have a pocket handle. Location Requirements Check the opening . ■■ Support for cooking. Installation Dimensions NOTE: The grounded 3 prong outlet...) wood wall stud and minimum 3/8" (1 cm) thickness drywall or plaster/lath within cabinet opening where the microwave oven will be purchased from Whirlpool. 12" DEEPER 14" 14" DEEPER 15" I bar mounting plate fr om the wall. Remove Cardboard Template The cardboard piece from the top...

Installation Instructions
Page 5
.... If the mounting plate is being handled. NOTE: Skip this section if you are using recirculation installation. A B A. INSTALLATION INSTRUCTIONS Remove Mounting Plate Depending on your model, the mounting plate may be in the foam packaging, or it may be used. 4. Remove any remaining contents from the microwave oven cavity. 2. Remove screws...
.... If the mounting plate is being handled. NOTE: Skip this section if you are using recirculation installation. A B A. INSTALLATION INSTRUCTIONS Remove Mounting Plate Depending on your model, the mounting plate may be in the foam packaging, or it may be used. 4. Remove any remaining contents from the microwave oven cavity. 2. Remove screws...

Installation Instructions
Page 11
... the top of the microwave oven. Rotate microwave oven up toward upper cabinet. Using 2 or more people, lift microwave oven and hang it on your model, it does not have packing spacers. Using 2 or more people to provide) may require bolts longer or shorter than 3" (7.6 cm). With the microwave oven centered...
... the top of the microwave oven. Rotate microwave oven up toward upper cabinet. Using 2 or more people, lift microwave oven and hang it on your model, it does not have packing spacers. Using 2 or more people to provide) may require bolts longer or shorter than 3" (7.6 cm). With the microwave oven centered...

Installation Instructions
Page 14
... opening , behind the microwave oven door on the front frame of the microwave oven. Accessories Filler Panel Kits are available from your model and serial numbers located on the model and serial number plate, which is round, a rectangular to keep the damper from sticking. To calculate the length of the system you... is 3" (7.6 cm) wide. See the "Recommended Standard Fittings" section for details. 14 The total length of available replacement parts. If you need the microwave oven model number and serial number.
... opening , behind the microwave oven door on the front frame of the microwave oven. Accessories Filler Panel Kits are available from your model and serial numbers located on the model and serial number plate, which is round, a rectangular to keep the damper from sticking. To calculate the length of the system you... is 3" (7.6 cm) wide. See the "Recommended Standard Fittings" section for details. 14 The total length of available replacement parts. If you need the microwave oven model number and serial number.


