Whirlpool WMH53521HZ Support and Manuals
Get Help and Manuals for this Whirlpool item
View All Support Options Below
Free Whirlpool WMH53521HZ manuals!
Problems with Whirlpool WMH53521HZ?
Ask a Question
Free Whirlpool WMH53521HZ manuals!
Problems with Whirlpool WMH53521HZ?
Ask a Question
Popular Whirlpool WMH53521HZ Manual Pages
Owners Manual - Page 1
... burns, electric shock, fire,
injury to persons, or exposure to excessive microwave energy:
I Install or locate the microwave oven only in accordance with the provided Installation Instructions. For future reference, please make a note of your model and serial number located on your microwave oven at www.whirlpool.com.
All safety messages will tell you what the potential hazard...
Owners Manual - Page 2
... of the microwave oven when the microwave oven is in the manual.
If materials inside the oven to facilitate cooking. I Use the microwave oven only for example, near a kitchen sink, in oven.
-
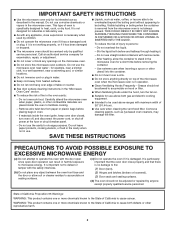
IMPORTANT SAFETY INSTRUCTIONS
I As....
-
Remove wire twist-ties from the microwave oven is specifically designed to be adjusted or repaired by qualified service personnel.
Owners Manual - Page 3
.... Light Timer
Set the cooktop light to cancel Light Timer.
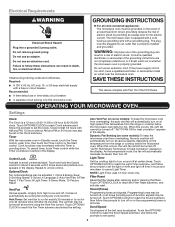
Do not use an extension cord. Required: ■■ A 120 V, 60 Hz, AC-only, 15-
As the temperature cools, the fan will automatically turn on and off after replacing and/or cleaning the filters. The microwave oven is too short, have a qualified electrician or serviceman install an...
Owners Manual - Page 4
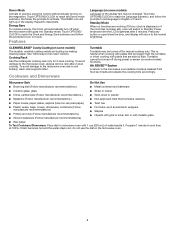
... turning on some models) The durable, nonstick coating resists soil buildup by side. To avoid damage to the microwave oven due to deactivate. Repeat to soil buildup, clean rack supports often.
Press any... be turned off when the microwave oven goes into Standby mode. Features
Language (on Clock. This is displayed or if the clock has not been set language to Standby Power mode and...
Owners Manual - Page 5
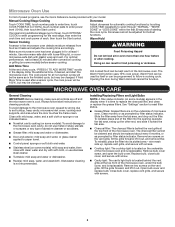
...replaceable.
Installing/Replacing Filters and Light Bulbs
NOTE: A filter status indicator (on the vent grille, tilt the grille forward, lift it out. Remove two screws on some models): mild soap and water, then rinse with clean water and dry with your model. Manual.../ CLOCK to soil buildup, keep cavity, microwave inlet cover, cooking rack supports, and area where the door touches the ...
Owners Manual - Page 6
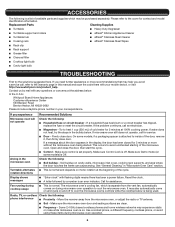
...9632; Rack support
■■ Grease filter
■■ Charcoal filter
■■ Cooktop light bulb
■■ Cavity light bulb
TROUBLESHOOTING
First try the steps in the bullets below :
In the U.S.A.:
Whirlpool Brand Home Appliances Customer eXperience Center 553 Benson Road Benton Harbor, MI 49022-2692
Please include a daytime phone number in the microwave oven
Check...
Owners Manual - Page 7
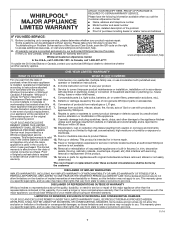
...In-home instruction on the right to review the Troubleshooting or Problem Solver section of non-genuine Whirlpool parts or accessories. Consumable parts (i.e. Defects or damage caused by our authorized Whirlpool Service Providers. In the event of surfaces resulting from defects in fixtures (i.e.
Discoloration, rust or oxidation of product replacement,
7. This limited...
Quick Reference Sheet - Page 1
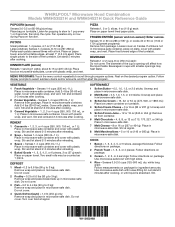
... container. WHIRLPOOL® Microwave Hood Combination Models WMH53521H and WMH54521H Quick Reference Guide
POPCORN (sensor)
Senses 3.0-3.5 oz (85-99 g) size bag: Place bag on microwave-safe plate, cover with plastic wrap, and vent.
Place in microwave-safe dish. Cover with high sides.
4 Rice - Senses 0.5-2.0 cups (125-500 mL) dry, white long grain: Follow measurements on low during...
Quick Reference Sheet - Page 2
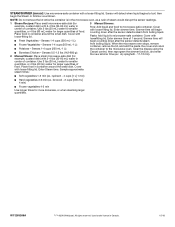
... Enter Steam time. W11265246A
®/™ ©2018 Whirlpool. Place food in Canada.
07/18 Enter simmer time.
Pasta: Add liquid to the microwave oven. Senses 1-4 cups (250 mL-1 L):
■■...around the small dish. Re-cover and return the container to microwave-safe container. Sample approximate steam times:
3 Manual Simmer:
Rice: Add liquid and food to boil, then ...
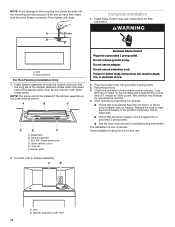
Installation Instructions - Page 2

... template
G. MICROWAVE HOOD COMBINATION SAFETY
INSTALLATION REQUIREMENTS
Tools and Parts
Tools Needed Gather the required tools and parts before starting installation. See User Instructions.)
NOTE: Depending on model, charcoal filters may be included. NOTE: The hardware items listed here are for wall or roof venting. See the "Venting Design Specifications" section.
2
Materials...
Installation Instructions - Page 3

... or cabinet supplier to withstand the heat produced by the microwave oven for use as a rear wall template. 1. Location Requirements
Check the opening .
■■ Support for packing. See the "Electrical Requirements" section. See "Rectangular to it during
the "Mark Rear Wall" part of installation. Installation Dimensions
NOTE: The grounded 3 prong outlet must provide:
■■...
Installation Instructions - Page 5

...microwave oven door closed so that exhaust ports face
the back of the
microwave oven, remove it and set aside. 3. Keep damper plate and screws together and set it may be made to the microwave...door does
not swing open while the microwave oven is being handled. Damper plate 2.
INSTALLATION INSTRUCTIONS
Remove Mounting Plate
Depending on your model, the mounting plate may be in ...
Installation Instructions - Page 12
... tripped. Vent B. Insert damper assembly through the cabinet cutout so that the long tab of the damper assembly slides under vent)
12 Reconnect power. 4. Save Installation Instructions for troubleshooting information. Bolt B. Damper assembly C. #6 x 3/8" Sheet metal screw D.
A
B
C
D
E
F
A. Replace the fuse or reset the circuit breaker.
Installation Instructions - Page 14

... transition piece must be found on the model and serial number plate, which is 3" (7.6 cm) wide. Both numbers can be installed to keep the damper from your authorized dealer or service center. To calculate the length of available replacement parts.
You will need , add the equivalent lengths of the microwave oven opening . The filler panels come...
Dimension Guide - Page 1
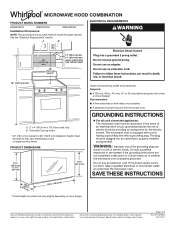
... subject to change materials and specifications without notice.
Grounded 3 prong outlet
* 30" (76.2 cm) is properly installed and grounded.
For complete details, see Installation Instructions packed with a fuse or circuit breaker.
W11087690A 05/17/2017 upper cabinet and side cabinet depth
66" (167.6 cm) min. PRODUCT DIMENSIONS
17¹⁄₈"
(43.5 cm)
(0.5 cm...
Whirlpool WMH53521HZ Reviews
We have not received any reviews for Whirlpool yet.