User Instructions
Page 1
... Serial number Address Phone number Model number Purchase date 8578183 To order parts and accessories, call 1-800-442-9991 or visit our website at the top inside dryer door well. You will need it. You must provide proof of Contents / Índice ASSISTANCE OR SERVICE 1 DRYER SAFETY 2 DRYER USE 4 DRYER CARE 5 TROUBLESHOOTING 6 WARRANTY 8 AYUDA O SERVICIO TÉCNICO 9 SEGURIDAD DE LA SECADORA 9 USO DE LA SECADORA 11 CUIDADO DE LA SECADORA...
... Serial number Address Phone number Model number Purchase date 8578183 To order parts and accessories, call 1-800-442-9991 or visit our website at the top inside dryer door well. You will need it. You must provide proof of Contents / Índice ASSISTANCE OR SERVICE 1 DRYER SAFETY 2 DRYER USE 4 DRYER CARE 5 TROUBLESHOOTING 6 WARRANTY 8 AYUDA O SERVICIO TÉCNICO 9 SEGURIDAD DE LA SECADORA 9 USO DE LA SECADORA 11 CUIDADO DE LA SECADORA...
User Instructions
Page 2
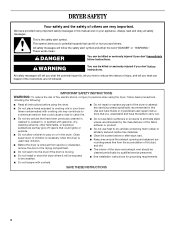
.... s Clean lint screen before using the dryer, follow instructions. s See installation instructions for grounding requirements. DRYER SAFETY Your safety and the safety of others . s Do not allow children to the drying compartment. s Do not repair or replace any part of the dryer or attempt any servicing unless specifically recommended in this manual and on or in published user-repair instructions that could ignite or explode. rounding areas free from service or discarded, remove the door...
.... s Clean lint screen before using the dryer, follow instructions. s See installation instructions for grounding requirements. DRYER SAFETY Your safety and the safety of others . s Do not allow children to the drying compartment. s Do not repair or replace any part of the dryer or attempt any servicing unless specifically recommended in this manual and on or in published user-repair instructions that could ignite or explode. rounding areas free from service or discarded, remove the door...
User Instructions
Page 3
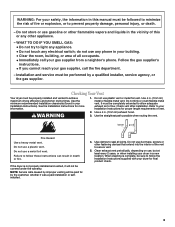
... Installation Instructions for final product check. 3 Use 4 in . (10.2 cm) exhaust hood. 3. It must be covered under the warranty. See the Installation Instructions for by the customer, whether it will be paid for more information. Refer to follow these instructions can result in death or fire. Use clamps to flow. Fire Hazard Use a heavy metal vent. Failure to achieve maximum drying efficiency and shorten drying times. Installation and service...
... Installation Instructions for final product check. 3 Use 4 in . (10.2 cm) exhaust hood. 3. It must be covered under the warranty. See the Installation Instructions for by the customer, whether it will be paid for more information. Refer to follow these instructions can result in death or fire. Use clamps to flow. Fire Hazard Use a heavy metal vent. Failure to achieve maximum drying efficiency and shorten drying times. Installation and service...
User Instructions
Page 4
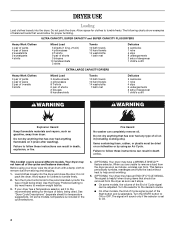
... help avoid wrinkling. 5. (OPTIONAL) Your dryer may not have a WRINKLE SHIELD™ feature selector. Turn the START button to tumble freely. 2. Failure to remove dust from dryer. On some models, the volume of the End of oil on a clothesline or by using your dryer has a Temperature selector, set to the desired volume. Turn the selector to On. 4 ULTRA CAPACITY, SUPER CAPACITY and SUPER CAPACITY PLUS DRYERS Heavy Work Clothes 4 pair...
... help avoid wrinkling. 5. (OPTIONAL) Your dryer may not have a WRINKLE SHIELD™ feature selector. Turn the START button to tumble freely. 2. Failure to remove dust from dryer. On some models, the volume of the End of oil on a clothesline or by using your dryer has a Temperature selector, set to the desired volume. Turn the selector to On. 4 ULTRA CAPACITY, SUPER CAPACITY and SUPER CAPACITY PLUS DRYERS Heavy Work Clothes 4 pair...
User Instructions
Page 5
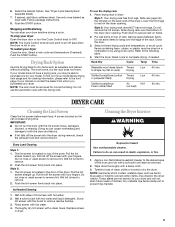
... instructions. 8. Push the START button. NOTE: The Cycle Control knob should point to dry items such as dryer safe. Drying Rack Option Use the Drying Rack to an Off area when the dryer is located on a clothesline or by lint can stop your dryer Open the dryer door or turn the Cycle Control knob to the stained area of clothes. Do not use the automatic cycle with hot water and liquid detergent. Refer to remove. 2. A screen blocked by using an air cycle. s If lint...
... instructions. 8. Push the START button. NOTE: The Cycle Control knob should point to dry items such as dryer safe. Drying Rack Option Use the Drying Rack to an Off area when the dryer is located on a clothesline or by lint can stop your dryer Open the dryer door or turn the Cycle Control knob to the stained area of clothes. Do not use the automatic cycle with hot water and liquid detergent. Refer to remove. 2. A screen blocked by using an air cycle. s If lint...
User Instructions
Page 6
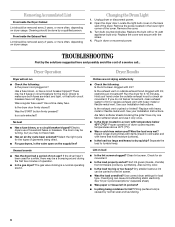
... for load type. Changing the Drum Light 1. Replace the bulb with lint, restricting air movement? Hold your Installation Instructions. s Was a cold rinse water used ? Lint on the supply line? Check for the types of operation. Open the dryer door. Is the dryer door firmly closed? s Has an air dry cycle been selected? Clean lint screen. There may be 2 fuses or circuit breakers for 5-10 minutes. Was the load very wet? Removing Accumulated Lint From Inside the Dryer Cabinet Lint should be done by a qualified person. Cleaning should be turning...
... for load type. Changing the Drum Light 1. Replace the bulb with lint, restricting air movement? Hold your Installation Instructions. s Was a cold rinse water used ? Lint on the supply line? Check for the types of operation. Open the dryer door. Is the dryer door firmly closed? s Has an air dry cycle been selected? Clean lint screen. There may be 2 fuses or circuit breakers for 5-10 minutes. Was the load very wet? Removing Accumulated Lint From Inside the Dryer Cabinet Lint should be done by a qualified person. Cleaning should be turning...
User Instructions
Page 7
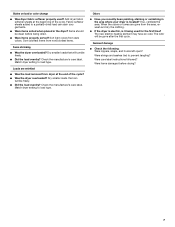
... time? s Did the load overdry? Match dryer setting to load type. s Was the dryer overloaded? When the odors or fumes are wrinkled s Was the load removed from noncolorfast items. Items shrinking s Was the dryer overloaded? Were care label instructions followed? Match dryer setting to load type. If so, ventilate the area. s If the dryer is electric, is located? Were strings and sashes tied to a partially-dried load can tumble freely. The new electric heating element...
... time? s Did the load overdry? Match dryer setting to load type. s Was the dryer overloaded? When the odors or fumes are wrinkled s Was the load removed from noncolorfast items. Items shrinking s Was the dryer overloaded? Were care label instructions followed? Match dryer setting to load type. If so, ventilate the area. s If the dryer is electric, is located? Were strings and sashes tied to a partially-dried load can tumble freely. The new electric heating element...
User Instructions
Page 8
... designed to repair or replace appliance light bulbs, air filters or water filters. After checking "Troubleshooting," additio nal help can be provided by calling Whirlpool. These parts will pay for other than normal, single-family household use FSP® factory specified parts. For information on how to build every new WHIRLPOOL® appliance. Service calls to be repaired in remote locations. 10. The removal and reinstallation of the Use & Care Guide. WHIRLPOOL SHALL...
... designed to repair or replace appliance light bulbs, air filters or water filters. After checking "Troubleshooting," additio nal help can be provided by calling Whirlpool. These parts will pay for other than normal, single-family household use FSP® factory specified parts. For information on how to build every new WHIRLPOOL® appliance. Service calls to be repaired in remote locations. 10. The removal and reinstallation of the Use & Care Guide. WHIRLPOOL SHALL...


