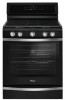
Whirlpool WFG745H0FE Support and Manuals
Get Help and Manuals for this Whirlpool item
View All Support Options Below
Free Whirlpool WFG745H0FE manuals!
Problems with Whirlpool WFG745H0FE?
Ask a Question
Free Whirlpool WFG745H0FE manuals!
Problems with Whirlpool WFG745H0FE?
Ask a Question
Whirlpool WFG745H0FE Videos

Whirlpool WFG745H0FE Cuisinière
Duration: 1:04
Total Views: 3
Duration: 1:04
Total Views: 3
Whirlpool WFG745H0FE Range
Duration: :58
Total Views: 3
Duration: :58
Total Views: 3
Whirlpool WFG745H0FE Range
Duration: :58
Total Views: 9
Duration: :58
Total Views: 9
Popular Whirlpool WFG745H0FE Manual Pages
Instruction Sheet - Page 1
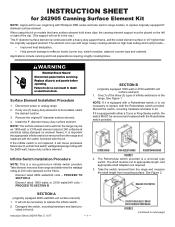
... electrical rating stamped on the frame. INSTRUCTION SHEET
for 242905 Canning Surface Element Kit
NOTE: Approved for use , beginning with the 2600-watt, heavy-duty surface element. The element is in this portion
SECTION A
(originally equipped 2600-watt/240-volt surface element)
1.
Replace all parts and panels before servicing. It is a universal type switch...
Dimension Guide - Page 1
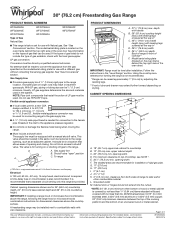
... metal appliance connector:
■■ If local codes permit, a new CSA design-certified, 4 to 5 ft (122 to top of cooktop, see Installation Instructions packed with a manual shutoff valve. Using the cooktop as an adjacent cabinet. L.
Specifications subject to the appliance pressure regulator.
It is factory set for connection to the female pipe threads of the...
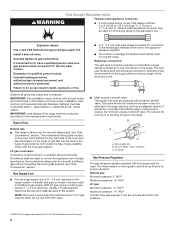
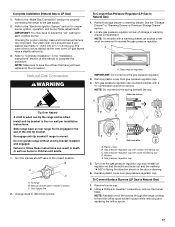
Installation Guide - Page 2
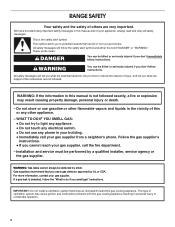
... manual is detected, follow the safety alert symbol and either the word "DANGER" or "WARNING." Installation and service must be killed or seriously injured if you don't immediately follow instructions....combustion problems with this gas cooking appliance resulting in this gas cooking appliance.
WHAT TO DO IF YOU SMELL GAS:
• Do not try to do if you smell gas" instructions....
Installation Guide - Page 4
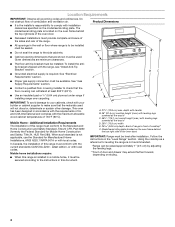
...CFR, Part 3280 (formerly the Federal Standard for Mobile Home Construction and Safety, Title 24, HUD Part 280). Product Dimensions
■ Recessed installations must ...model/serial rating plate. E
■ Use an insulated pad or ¼" (0.64 cm) plywood under range if
installing range over carpeting. D
IMPORTANT: To avoid damage to comply with local codes. Follow the instructions...
Installation Guide - Page 6
.... Examples of pipe fittings to the manufacturer's instructions. Du Pont De Nemours and Company.
6
Rigid pipe connection: The rigid pipe connection requires a combination of a qualified person include: licensed heating personnel, authorized gas company personnel, and authorized service personnel. Securely tighten all governing codes and ordinances. NOTE: Pipe-joint compounds that...
Installation Guide - Page 7
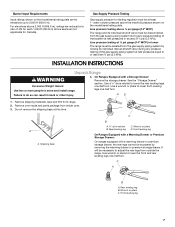
...its individual manual shutoff valve during any pressure testing of ½ psi (3.5 kPa). INSTALLATION INSTRUCTIONS
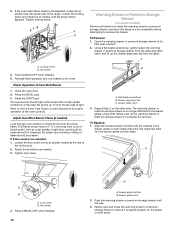
Unpack Range... Shipping base
C
B
A. ¼" drive ratchet B. Remove oven racks and parts package from range. 2. A
A. Front leveling leg
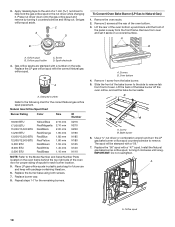
7 See the "Storage... Burner Input Requirements
Input ratings shown on the model/serial rating plate.
Rear leveling leg
C. Gas...
Installation Guide - Page 11
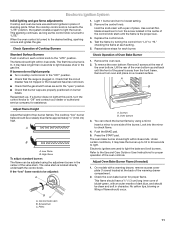
...Replace the control knob. 4. Repeat above steps for assistance.
Standard Surface Burners Push in and turn each control knob to turn to the desired setting..."Off" and contact your dealer or authorized service company for each setting. 5. Oven bottom
3. Insert a mirror... Care Guide or User Instructions for proper flame.
Adjust Oven Bake Burner Flame (if needed)
1. On models with ...
Installation Guide - Page 12
...Guide or User Instructions... for proper flame. This flame should be adjusted, locate the air shutter near the center rear of bluish-green, with the notches in the
drawer glides on both sides. Adjust the air shutter as needed )
Look through oven window to be present. B
C
A. Repeat Step 2 on both sides. To Replace... lock screw on some models)
Remove all the way...
Installation Guide - Page 13
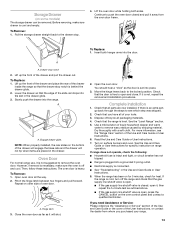
... sides. To Replace: 1. Open oven door all parts are placed in the Use and Care Guide or User Instructions.
8. Pinch the hinge latch between two fingers and pull forward. Dispose of the User Instructions, or contact the dealer from the oven door frame. When the range has been on for 5 minutes, check for specific instruction on other...
Installation Guide - Page 14

... connected to floor or wall per installation instructions.
Slide range back so rear range foot is moved. Failure to follow these instructions can result in death, explosion, or...personnel, and authorized service personnel. Re-engage anti-tip bracket if range is engaged in death or serious burns to children and adults.
1. Manual shutoff valve "closed position. NOTE: On models with a warming ...
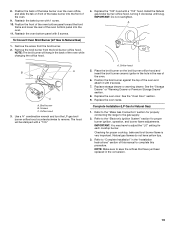
Installation Guide - Page 15
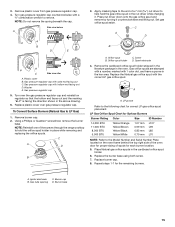
...Apply masking tape to the end of the screws through the range cooktop to the Model Number and Serial Number Plate located on regulator so that the hollow end faces out..., remove the burner
base. NOTE: Reinstall one of a 7 mm nut driver to remove. Replace the burner base using both screw.
7. Igniter electrode C. Set gas orifice spud aside. Plastic cover B. Remove burner cap. 2. A. Screw...
Installation Guide - Page 16
... Bake burner
6. Use a ³⁄₈" nut driver or combination wrench and turn the Natural gas broil burner orifice... gas bake burner orifice spud counterclockwise to remove tab
from oven and set the bake burner aside. To Convert Oven Bake Burner (Natural Gas ...
A
A. Install the LP gas broiler burner orifice hood, turning it clockwise until the front of the oven.
6. Replace the oven door ...
Installation Guide - Page 17
...setting... Gas pressure regulator cap
5. Replace plastic cover over the gas ... facing the direction shown in the "Installation Instructions" section of the screws through the range...models with a
⁵⁄₈" combination wrench to the closed " position C. Gas pressure regulator
IMPORTANT: Do not remove the gas pressure regulator. 3. Install anti-tip bracket to Natural Gas) 1. Manual...
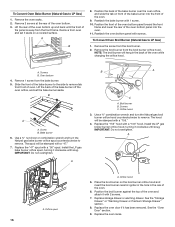
Installation Guide - Page 18
... spuds in the nut driver while changing it clockwise until the front of spuds for each burner location.
5.
Screw B. Set gas orifice spud aside. C
A D
To Convert Oven Bake Burner (LP Gas to remove tab
from oven and set the bake burner aside. Orifice spud holder
C. Replace the "56" spud with a "56."
7. Install the Natural gas...
Installation Guide - Page 19
...Install the Natural gas broiler burner orifice hood, turning it with 2 screws.
7. A
x.xx
B
A
C
A. Orifice hood
5.
Refer to the "Make Gas Connection" section for properly connecting the range to adjust the "LO" setting for each cooktop burner. Natural gas flames do not have just been replaced...complete this manual to "Complete Installation" in... the "Installation Instructions" section...
Whirlpool WFG745H0FE Reviews
We have not received any reviews for Whirlpool yet.