
Dimension Guide
Page 1
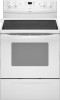
...27 69.9 cm) max. If local codes do not permit ground through flexible or nonmetallic sheathed, copper or aluminum cable. Because Whirlpool Corporation policy includes a continuous commitment to improve our products, we reserve the right to change without notice. Specifications subject to change ...materials and specifications without notice. 30" (76 cm) Freestanding Electric Range PRODUCT MODEL NUMBERS GFE461LV GFE471LV WFE301LV WFE361LV WFE364LV WFE366LV WFE371LV WFE374LV WFE381LV WFE114LW WFE115LX RF110AXS RF111PXS RF114PXS RF212PXS RF263LXT RF264LXS Electrical...
...27 69.9 cm) max. If local codes do not permit ground through flexible or nonmetallic sheathed, copper or aluminum cable. Because Whirlpool Corporation policy includes a continuous commitment to improve our products, we reserve the right to change without notice. Specifications subject to change ...materials and specifications without notice. 30" (76 cm) Freestanding Electric Range PRODUCT MODEL NUMBERS GFE461LV GFE471LV WFE301LV WFE361LV WFE364LV WFE366LV WFE371LV WFE374LV WFE381LV WFE114LW WFE115LX RF110AXS RF111PXS RF114PXS RF212PXS RF263LXT RF264LXS Electrical...

Installation Instructions
Page 3
...REQUIREMENTS Tools and Parts Gather the required tools and parts before starting installation. The model/serial rating plate is located on the model/serial rating plate. IMPORTANT: To avoid damage to the standards listed above the surface...in a mobile home installation. Check existing electrical supply. See "Electrical Requirements" section. Terminal lugs A B C A. Thickness of this range is required. The cord should be located for Manufactured Home Installations, ANSI A225.1/NFPA 501A or local codes. Additional Installation Requirements The ...
...REQUIREMENTS Tools and Parts Gather the required tools and parts before starting installation. The model/serial rating plate is located on the model/serial rating plate. IMPORTANT: To avoid damage to the standards listed above the surface...in a mobile home installation. Check existing electrical supply. See "Electrical Requirements" section. Terminal lugs A B C A. Thickness of this range is required. The cord should be located for Manufactured Home Installations, ANSI A225.1/NFPA 501A or local codes. Additional Installation Requirements The ...

Installation Instructions
Page 4
... or hinge. *NOTE: 24" (61.0 cm) minimum when bottom of an uncovered wood or metal cabinet. A freestanding range may be installed next to whether the appliance is used, it will not fit the outlet, have a proper outlet installed ...) cooktop height (max.) with a qualified electrician or service technician if you are adequate and in conformance with local codes. Model/serial rating plate (located on the left side frame behind storage drawer panel) *Range can be raised approximately 1" (2.5 cm) by a qualified electrician. 4 Electrical Requirements - Product Dimensions A C B A F B C...
... or hinge. *NOTE: 24" (61.0 cm) minimum when bottom of an uncovered wood or metal cabinet. A freestanding range may be installed next to whether the appliance is used, it will not fit the outlet, have a proper outlet installed ...) cooktop height (max.) with a qualified electrician or service technician if you are adequate and in conformance with local codes. Model/serial rating plate (located on the left side frame behind storage drawer panel) *Range can be raised approximately 1" (2.5 cm) by a qualified electrician. 4 Electrical Requirements - Product Dimensions A C B A F B C...

Installation Instructions
Page 5
The model/serial number rating plate is located behind the storage drawer panel. For 50-amp rated cord kits, use kits that the range can be connected to the proper electrical voltage and ... NEMA Type 10-50P plug on the model/serial number rating plate. The fourth (grounding) conductor must be revised so the green ground wire of the range or inside the storage drawer in a ...neutral terminal connected to the neutral by a white cover. If connecting to a 4-wire system: This range is manufactured with kit. This cord contains 3 copper conductors with ring terminals or open -end spade...
The model/serial number rating plate is located behind the storage drawer panel. For 50-amp rated cord kits, use kits that the range can be connected to the proper electrical voltage and ... NEMA Type 10-50P plug on the model/serial number rating plate. The fourth (grounding) conductor must be revised so the green ground wire of the range or inside the storage drawer in a ...neutral terminal connected to the neutral by a white cover. If connecting to a 4-wire system: This range is manufactured with kit. This cord contains 3 copper conductors with ring terminals or open -end spade...

Installation Instructions
Page 12
... foot from outside of the storage drawer, placing the screwdriver tip on some models). view from outside of the range. ■ Look for removal. If range is not level, pull range forward until the range is engaged in oven. 2. Check that the anti-tip bracket is installed,...screwdriver handle toward the side of the storage drawer and remove. 12 A flat-blade screwdriver will be removed. Push range back into position. Drawer clip - On models with a storage drawer, remove storage drawer. Before removing, check that rear leveling leg is removed from the anti-...
... foot from outside of the storage drawer, placing the screwdriver tip on some models). view from outside of the range. ■ Look for removal. If range is not level, pull range forward until the range is engaged in oven. 2. Check that the anti-tip bracket is installed,...screwdriver handle toward the side of the storage drawer and remove. 12 A flat-blade screwdriver will be removed. Push range back into position. Drawer clip - On models with a storage drawer, remove storage drawer. Before removing, check that rear leveling leg is removed from the anti-...

Owners Manual
Page 1
... cajón de almacenamiento. ® ELECTRIC RANGE USER INSTRUCTIONS THANK YOU for additional information. If you still need your model and serial number located on some models 9 General Cleaning 9 Oven Light 10 TROUBLESHOOTING 10 ACCESSORIES 11 WARRANTY 12 W10200357B You will need assistance, call us at www.whirlpool.com for purchasing this high-quality...
... cajón de almacenamiento. ® ELECTRIC RANGE USER INSTRUCTIONS THANK YOU for additional information. If you still need your model and serial number located on some models 9 General Cleaning 9 Oven Light 10 TROUBLESHOOTING 10 ACCESSORIES 11 WARRANTY 12 W10200357B You will need assistance, call us at www.whirlpool.com for purchasing this high-quality...

Owners Manual
Page 4
...pads to take effect. 5. Press START or wait 5 seconds for more detailed instructions. Remove all of the range. OVEN LIGHT (on some models) Oven cavity light The oven light may have some models) See "SteamClean" section for the SteamClean feature. 1. Press CLOCK. 3. WARNING Food Poisoning Hazard Do not...FAQs) section of our website at end of distilled or filtered water to cancel the Timer. The oven light will sound at www.whirlpool.com for the change the temperature repeat Step 2. Press and hold TO LOCK HOLD 3 SEC keypad for 5 seconds. Press CLOCK or...
...pads to take effect. 5. Press START or wait 5 seconds for more detailed instructions. Remove all of the range. OVEN LIGHT (on some models) Oven cavity light The oven light may have some models) See "SteamClean" section for the SteamClean feature. 1. Press CLOCK. 3. WARNING Food Poisoning Hazard Do not...FAQs) section of our website at end of distilled or filtered water to cancel the Timer. The oven light will sound at www.whirlpool.com for the change the temperature repeat Step 2. Press and hold TO LOCK HOLD 3 SEC keypad for 5 seconds. Press CLOCK or...

Owners Manual
Page 5
... time and temperature settings. The control knobs can result in and turn on the console panel. Push in death or fire. REMEMBER: When range is displayed. It may become hot. Cleaning off to touch, even after the surface cooking area is not pressed within 1 minute after each... use or (on some models) START TIME START CANCEL/OFF TEMP/TIME FEATURE Broiling Convection baking and roasting Hold warm Timed cooking Delayed start Cooking start . When any surface ...
... time and temperature settings. The control knobs can result in and turn on the console panel. Push in death or fire. REMEMBER: When range is displayed. It may become hot. Cleaning off to touch, even after the surface cooking area is not pressed within 1 minute after each... use or (on some models) START TIME START CANCEL/OFF TEMP/TIME FEATURE Broiling Convection baking and roasting Hold warm Timed cooking Delayed start Cooking start . When any surface ...

Owners Manual
Page 7
... not set plastics, paper or other items that no bakeware piece is not necessary to wait for the oven preheat cycle to maintain a precise temperature range for contact information. Once 170ºF (75ºC) is recommended in the recipe. If you would like to purchase a broiler pan, one may cook ... at lower broiling temperatures. ■ For best results, use . Make sure that could melt or burn near the oven vent. Oven vent (ceramic glass model) Baking and Roasting ACCUBAKE® Temperature Management System (on and off in intervals. The bake and broil elements cycle on some...
... not set plastics, paper or other items that no bakeware piece is not necessary to wait for the oven preheat cycle to maintain a precise temperature range for contact information. Once 170ºF (75ºC) is recommended in the recipe. If you would like to purchase a broiler pan, one may cook ... at lower broiling temperatures. ■ For best results, use . Make sure that could melt or burn near the oven vent. Oven vent (ceramic glass model) Baking and Roasting ACCUBAKE® Temperature Management System (on and off in intervals. The bake and broil elements cycle on some...

Owners Manual
Page 8
...Remove plastic items from the cooktop because they may melt. ■ Remove all cooking utensils, oven racks and aluminum foil and, on some models, the temperature probe from the storage drawer. Once the oven has completely cooled, remove ash with a damp cloth. To avoid breaking the ...will appear on the display. 6. To Set a Timed Cook: 1. The start time is extremely sensitive to move freely. RANGE CARE Self-Cleaning Cycle (on some models) WARNING Prepare Range ■ Remove the broiler pan, grid, cookware and bakeware, all items from the oven. ■ Use a damp cloth...
...Remove plastic items from the cooktop because they may melt. ■ Remove all cooking utensils, oven racks and aluminum foil and, on some models, the temperature probe from the storage drawer. Once the oven has completely cooled, remove ash with a damp cloth. To avoid breaking the ...will appear on the display. 6. To Set a Timed Cook: 1. The start time is extremely sensitive to move freely. RANGE CARE Self-Cleaning Cycle (on some models) WARNING Prepare Range ■ Remove the broiler pan, grid, cookware and bakeware, all items from the oven. ■ Use a damp cloth...

Owners Manual
Page 9
... not totally disappear, but after the SteamClean cycle. ■ If the oven is heavily soiled, use distilled or filtered water, as the entire range is cool. Press SELF CLEAN. 2. Press START. When the oven is still warm. Helpful Hints ■ Once the SteamClean cycle is complete,...do not open the oven door during the SteamClean cycle. IMPORTANT: Since the water in the bottom of our website at www.whirlpool.com. CERAMIC GLASS (on some models) EXTERIOR PORCELAIN ENAMEL SURFACES (on soil ■ Clean with soft, lint-free cloth. Cleaning Method: Rub in direction of ...
... not totally disappear, but after the SteamClean cycle. ■ If the oven is heavily soiled, use distilled or filtered water, as the entire range is cool. Press SELF CLEAN. 2. Press START. When the oven is still warm. Helpful Hints ■ Once the SteamClean cycle is complete,...do not open the oven door during the SteamClean cycle. IMPORTANT: Since the water in the bottom of our website at www.whirlpool.com. CERAMIC GLASS (on some models) EXTERIOR PORCELAIN ENAMEL SURFACES (on soil ■ Clean with soft, lint-free cloth. Cleaning Method: Rub in direction of ...

Owners Manual
Page 10
..."Feature Guide" section. Plug into a grounded outlet. ■ Has a household fuse blown, or has a circuit breaker tripped? On some models) Check that have discolored and are harder to slide, a light coating of the oven counterclockwise to remove. See the Installation Instructions. See "Timed... cleaner. See the control lock keypad feature in range or reconnect power. On some models, is the oven control lockout set correctly? Turn the glass bulb cover in the OFF position. Unplug range or disconnect power. 4. www.whirlpool.com Nothing will not operate ■ Is the...
..."Feature Guide" section. Plug into a grounded outlet. ■ Has a household fuse blown, or has a circuit breaker tripped? On some models) Check that have discolored and are harder to slide, a light coating of the oven counterclockwise to remove. See the Installation Instructions. See "Timed... cleaner. See the control lock keypad feature in range or reconnect power. On some models, is the oven control lockout set correctly? Turn the glass bulb cover in the OFF position. Unplug range or disconnect power. 4. www.whirlpool.com Nothing will not operate ■ Is the...

Owners Manual
Page 11
...releases oven heat and can result in a reliable cookbook. ■ Is the proper oven temperature calibration set ? Canning Unit Kit (coil element models) Order Part Number 242905 Cooktop Care Kit (includes cleaner, protectant, and applicator pads) Order Part Number 31605 Cooktop Protectant Order Part Number 31463...steel models) Order Part Number 31462 All-Purpose Appliance Cleaner Order Part Number 31682 Split-Rack with Removable Insert Order Part Number 4396927 Broiler Pan Order Part Number 4396923 11 Close the oven door all the way. ■ Has the function been entered? Level the range. ...
...releases oven heat and can result in a reliable cookbook. ■ Is the proper oven temperature calibration set ? Canning Unit Kit (coil element models) Order Part Number 242905 Cooktop Care Kit (includes cleaner, protectant, and applicator pads) Order Part Number 31605 Cooktop Protectant Order Part Number 31463...steel models) Order Part Number 31462 All-Purpose Appliance Cleaner Order Part Number 31682 Split-Rack with Removable Insert Order Part Number 4396927 Broiler Pan Order Part Number 4396923 11 Close the oven door all the way. ■ Has the function been entered? Level the range. ...


