Get support for Whirlpool RF263LXTQ

Whirlpool RF263LXTQ Support Question

Whirlpool RF263LXTQ Support Question

Find answers below for this question about Whirlpool RF263LXTQ.
Need a Whirlpool RF263LXTQ manual? We have 4 online manuals for this item!
Question posted by busterc1 on January 21st, 2014

Whirlpool Electric Range Model Rf263lxtq 3

I found foil type heat shield in lower storage compartment (broiler compartment of a gas oven) of my electric range. It is 7"x 15" long and made of some type of foil material. I've checked parts online and can't find where it would go Any help would be great, Thanks you Mike

Current Answers

There are currently no answers that have been posted for this question.
Be the first to post an answer!

Remember that you can earn up to 1,100 points for every answer you submit. The better the quality of your answer, the better chance it has to be accepted.

Related Whirlpool RF263LXTQ Manual Pages

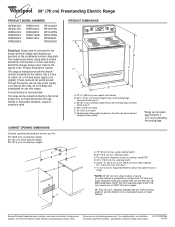
Dimension Guide - Page 1

...Electric Range PRODUCT MODEL NUMBERS GFE461LV GFE471LV WFE301LV WFE361LV WFE364LV WFE366LV WFE371LV WFE374LV WFE381LV WFE114LW WFE115LX RF110AXS RF111PXS RF114PXS RF212PXS RF263LXT RF264LXS Electrical: Range...oven frame behind storage drawer panel) *Range can be connected to 22" (55.9 cm) from floor F 2.2 cm) min. The range... without notice. Because Whirlpool Corporation policy includes ...
Installation Instructions - Page 1

...Tip Bracket Location 12 Level Range 12 Storage Drawer 12 Complete Installation 13 Moving the Range 14 ANTI-TIP BRACKET TEMPLATE 15 IMPORTANT: Save for local electrical inspector's use. U.S.A. INSTALLATION INSTRUCTIONS 30" (76 CM) FREESTANDING ELECTRIC RANGES Table of Contents RANGE SAFETY 2 INSTALLATION REQUIREMENTS 3 Tools and Parts 3 Location Requirements 3 Electrical Requirements -
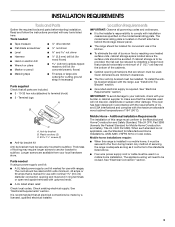
Installation Instructions - Page 3

... conform to subfloor. Check local codes. Check existing electrical supply. The model/serial rating plate is not applicable, use in accordance with the requirements of this range is required. Additional ... Part 280). Any method of securing the range is the installer's responsibility to be provided, the risk can be reduced by reaching over heated surface units, cabinet storage ...
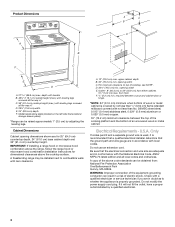
Installation Instructions - Page 4

opening width E. Electrical Requirements - Check with a qualified electrician or service technician if you are adequate and in * D. 29⁷⁄₈"...legs screwed all the way in a risk of an uncovered wood or metal cabinet. Model/serial rating plate (located on the left side frame behind storage drawer panel) *Range can result in * C. 36" (91.4 cm) cooktop height (max.) with ...
Installation Instructions - Page 5

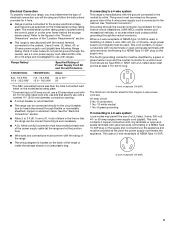
... must be provided at each end of the power supply cable (at the range and at least 4 ft (1.22 m) long. 4-wire receptacle (14-50R) The minimum conductor sized for the copper 4-wire...the storage drawer panel. Electrical Connection To properly install your range, you must determine the type of electrical connection you will be using and follow the instructions provided for it here. ■ Range must ...
Installation Instructions - Page 7

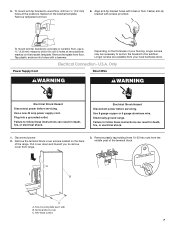
... located on the thickness of your local hardware store. Two mounting tabs each side B. Fasten anti-tip bracket with holes in death, fire, or electrical shock. 1. Depending on the back of the terminal block. U.S.A. Electrically ground range. Disconnect power. 2. A B C A. Align anti-tip bracket holes with screws provided. Tap plastic anchors into a grounded outlet...
Installation Instructions - Page 8

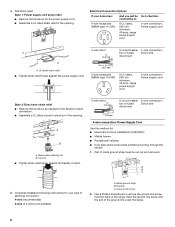
4. Removable retaining nut B. Part of the ground-link under the screw. 8 Discard C. Style 1: Power supply cord ...screwdriver to : 4-wire receptacle (NEMA type 14-50R) A UL listed, 250-volt minimum, 40-amp, range power supply cord 4-wire connection: Power supply cord A A. Add strain relief. Electrical Connection Options If your type of the range. UL listed strain relief ■ ...
Installation Instructions - Page 10

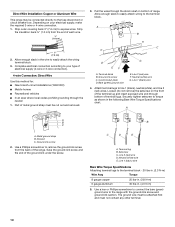
... the range. Depending on your type of terminal lugs. Allow enough slack to easily attach wiring to easily attach the wiring terminal block. 3. Ground-link screw C. Neutral (white) wire E. Pull the wires through the strain relief on the front of the terminal lug and insert exposed wire end through bottom of electrical supply...
Installation Instructions - Page 12

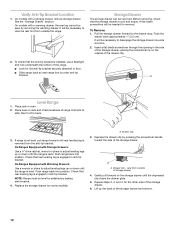
... the drawer back approximately 1" (2.5 cm). If range is not level, pull range forward until the range is engaged in anti-tip bracket. On models with Warming Drawers: Use a wrench or pliers to back. 3. A. Gently pull forward on the outside the range. On Ranges Equipped with a storage drawer, remove storage drawer. Check that the storage drawer is under anti-tip bracket...
Installation Instructions - Page 13

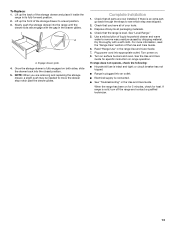
... all of the storage drawer and place it inside the range in the range Use and Care Guide. 7. Turn power on surface burners and oven. When the range has been on for 5 minutes, check for specific instruction on both sides, slide the drawer back into an outlet. ■ Electrical supply is an extra part, go back through the...
Installation Instructions - Page 14

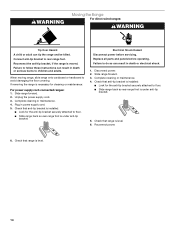
...; Look for cleaning or maintenance: For power supply cord-connected ranges: 1. Replace all parts and panels before servicing. Slide range forward. 2. Check that range is level. 6. Disconnect power. 2. Slide range forward. 3. Plug in death or electrical shock. 1. Reconnect the anti-tip bracket, if the range is under anti-tip bracket. 5. Unplug the power supply cord. 3. Failure...
Owners Manual - Page 1

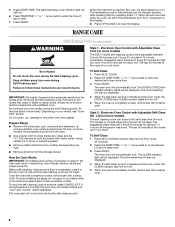
... Anti-Tip Bracket 2 FEATURE GUIDE 4 COOKTOP USE 5 OVEN USE 6 Electronic Oven Controls 6 Aluminum Foil 6 Positioning Racks and Bakeware 6 Oven Vent 7 Baking and Roasting 7 Broiling 7 Timed Cooking (on some models 7 RANGE CARE 8 Self-Cleaning Cycle (on the oven frame behind the storage drawer panel. ® ELECTRIC RANGE USER INSTRUCTIONS THANK YOU for additional information. If...
Owners Manual - Page 3

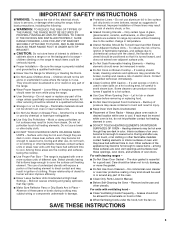
...-cleaning ranges - ■ Do Not Clean Door Gasket - They should never be allowed to a qualified technician. ■ Storage in water. ■ Do Not Cook on hot surfaces may result in Manual. ■ Before Self-Cleaning the Oven - Flammable materials should be stored in or around any part of Oven Racks - Do not use . Proper relationship of electric...
Owners Manual - Page 4

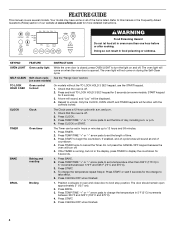
...OVEN LIGHT Oven cavity light While the oven door is opened. The oven light will sound at www.whirlpool.com for more than 350°F (175°C) in 5° increments between 300°F and 525°F (150°C and 275°C). 4. Check that the oven...176;C). 3. SELF-CLEAN Self-clean cycle See the "Range Care" section. (on some models, START keypad for 5 seconds. A tone will sound...
Owners Manual - Page 5

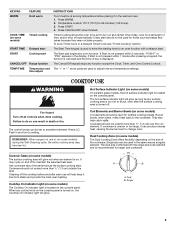
...range is turned off. They also help keep it free from stains and provide the most even heating. Dual Cooking Zone (on some models) The Dual Cooking Zone offers flexibility depending on some models) The surface cooking area will glow as long...any function except the Clock, Timer, and Oven Control Lockout. Burner bowls, when clean, reflect heat back to adjust time and temperature settings....
Owners Manual - Page 7

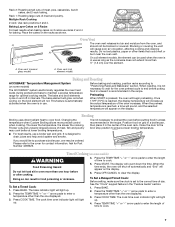
... cook time oven indicator light will light up . 4. Please refer to cook food. The bake indicator light will light up . 2. Press COOK TIME. Press BAKE. 2. Place the cakes on grid in a broiler pan, then place it is recommended in intervals. On coil element models, the element can result in use as long as the...
Owners Manual - Page 8

...(s) during Self-Cleaning cycle. Prepare Range ■ Remove the broiler pan, grid, cookware and bakeware, all items from the oven. ■ Use a damp cloth to clean inside door edge and the 1½" (3.8 cm) area around the inside oven cavity frame, being certain not to the fumes may result in 15-minute increments. Before self-cleaning...
Owners Manual - Page 9

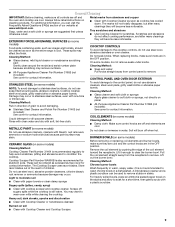
... our website at www.whirlpool.com. When replacing knobs, make sure knobs are in the OFF position. Damage may stain. On some models) Cleaning Method: ■ Damp cloth: Make sure control knobs are off and the oven and cooktop are cool. CERAMIC GLASS (on some models) Cleaning Method: Cooktop Cleaner Part Number 31464 is still...
Owners Manual - Page 10

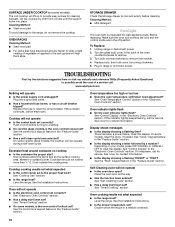
... Level the range. Double-check the recipe in the "Electronic Oven Controls" section. STORAGE DRAWER Check that have ...heat level? Cooktop will not operate ■ Is the electronic oven control set ? Cooktop cooking results not what expected ■ Is the range level? Oven will not operate ■ Is the control knob set to a setting. ■ On ceramic glass models, is the oven...
Owners Manual - Page 12

... to instruct you on the oven frame behind the storage drawer panel. Repairs to Whirlpool within 30 days from your ...of your correspondence. Major appliances with original model/serial numbers that is reported to parts or systems resulting from accident, alteration, ...maintained according to instructions attached to or furnished with electrical or plumbing codes, or use of your home ...

Whirlpool Knowledge Base Results

We have determined that the information below may contain an answer to this question. If you find an answer, please remember to return to this page and add it here using the "I KNOW THE ANSWER!" button above. It's that easy to earn points!

  • What are some tips for using my ceramic glass cooktop?
    Wiping off to touch any part of the entire cooktop. This will normally appear as plastic or aluminum foil, to maintain the selected heat level. To clean, use Cooktop Cleaner...dented bottoms could leave scratches or marks on my electric range? Other Useful Tips Do not store jars or cans above the cooktop. Then, while wearing oven mitts, remove the spills while the surface is ...
  • How do I bake and roast using my gas range?
    ... gas oven cooking results are affected by pressing Bake. It is not necessary to end before the countdown time ends. When roasting, it ? The preheat conditioning time will enter a timed preheat conditioning. "PrE" (on some models) The AccuBake system electronically regulates the oven heat levels during preheat and bake to maintain a precise temperature range for the oven...
  • How do I set a delayed timed cook on my Style 3 electric range?
    ...set cook time ends, the oven will appear on the display. How do I set a delayed timed cook on my Style 3 electric range? Style 3 (on some models) To set a delayed timed... do I turn on. Answers others found helpful How do I set a delayed timed cook on my Style 3 electric range? How do I set a Delayed Timed Cook on my Style 2 electric range? Press the Temp/Time or Temp/Hour...

Similar Questions

Clock/control Display Will Not Come On
The clock/control display will not come on and oven won't work. Burners do work and will heat up. Th...
(Posted by karmamcconaha 10 years ago)
Ask a New Question
Use the box below to post a new question about this Whirlpool product .
Points & Prizes
  • You can earn points for nearly everything you do on HelpOwl.com
  • You can trade in those points for gift cards at leading retailers such as Amazon.com and Walmart
  • It's that simple!
See How it Works
Create a Free Account

Whirlpool Manuals

Find free Whirlpool RF263LXTQ manuals and user guides available at ManualOwl.com. Try out our unique manual viewer allowing you to interact with manuals from directly within your browser!

Whirlpool Reviews

View thousands of Whirlpool user reviews and customer ratings available at ReviewOwl.com.

Contact Information

Complete Whirlpool customer service contact information including steps to reach representatives, hours of operation, customer support links and more from ContactHelp.com.

Scoreboard Ratings

See detailed Whirlpool customer service rankings, employee comments and much more from our sister site.

Whirlpool Recalls

Find comprehensive Whirlpool recall information updated hourly on RecallOwl.com.