Use and Care Guide
Page 2
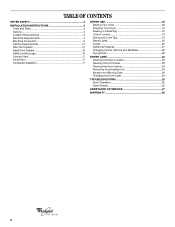
... Connection 9 Venting Requirements 14 Plan Vent System 15 Install Vent System 16 Install Leveling Legs 16 Connect Vent 17 Level Dryer 17 Complete Installation 17 DRYER USE 18 Starting Your Dryer 18 Stopping Your Dryer 19 Pausing or Restarting 19 Control Locked 19 Drying and Cycle Tips 19 Status Lights 20 Cycles 20 Additional Features...
... Connection 9 Venting Requirements 14 Plan Vent System 15 Install Vent System 16 Install Leveling Legs 16 Connect Vent 17 Level Dryer 17 Complete Installation 17 DRYER USE 18 Starting Your Dryer 18 Stopping Your Dryer 19 Pausing or Restarting 19 Control Locked 19 Drying and Cycle Tips 19 Status Lights 20 Cycles 20 Additional Features...
Use and Care Guide
Page 4
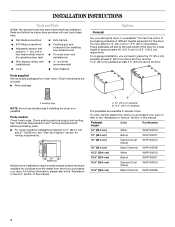
... (direct wire s ¼" nut driver installations) (recommended) s Level s Tape measure Parts supplied Remove parts packages from dryer drum. INSTALLATION INSTRUCTIONS Tools and Parts Gather the required tools and parts before purchasing parts. Read and follow the instructions provided with... any tools listed here. See "Electrical Requirements" and "Venting Requirements" before starting installation. For a garage installation, you purchased your dryer or refer to the total height of this manual. A B A. 10" (25.4 cm) pedestal B. ...
... (direct wire s ¼" nut driver installations) (recommended) s Level s Tape measure Parts supplied Remove parts packages from dryer drum. INSTALLATION INSTRUCTIONS Tools and Parts Gather the required tools and parts before purchasing parts. Read and follow the instructions provided with... any tools listed here. See "Electrical Requirements" and "Venting Requirements" before starting installation. For a garage installation, you purchased your dryer or refer to the total height of this manual. A B A. 10" (25.4 cm) pedestal B. ...

Use and Care Guide
Page 17
... protective film on the corner posts until the diamond marking is clean. Select a Timed Dry heated cycle, and start , check the following : s There may notice a burning odor when the dryer is first used. If the dryer will go back through the steps to adjust the legs up . Use a wrench to see which step...
... protective film on the corner posts until the diamond marking is clean. Select a Timed Dry heated cycle, and start , check the following : s There may notice a burning odor when the dryer is first used. If the dryer will go back through the steps to adjust the legs up . Use a wrench to see which step...
Use and Care Guide
Page 18
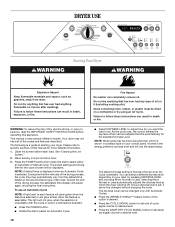
...selected. NOTE: A default time is displayed when an Automatic Cycle is a guide to starting your dryer. Selecting More, Normal or Less automatically adjusts the dryness level at which is shown in dryer and shut door. 3. This manual covers several different models. Please refer to persons,... for the selected Dryness Level. s Press the DAMP DRY CYCLE SIGNAL button to set , it cannot be displayed. DRYER USE WARNING Starting Your Dryer WARNING Explosion Hazard Keep flammable materials and vapors, such as gasoline, away from the default time based on your load,...
...selected. NOTE: A default time is displayed when an Automatic Cycle is a guide to starting your dryer. Selecting More, Normal or Less automatically adjusts the dryness level at which is shown in dryer and shut door. 3. This manual covers several different models. Please refer to persons,... for the selected Dryness Level. s Press the DAMP DRY CYCLE SIGNAL button to set , it cannot be displayed. DRYER USE WARNING Starting Your Dryer WARNING Explosion Hazard Keep flammable materials and vapors, such as gasoline, away from the default time based on your load,...
Use and Care Guide
Page 19
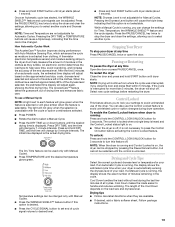
... level. Press DRY TIME, and the time will cause a triple beep, indicating that this option is desired. s Press TEMPERATURE until dryer starts. s Press the CYCLE SIGNAL button to set end of cycle signal volume to help measure the amount of an automatic cycle, the ... key twice to stop the dryer and clear the settings, allowing you close the door and press Start within 5 minutes. s Press and hold START button until dryer starts (about 1 second). s Press and hold START button until dryer starts (about 1 second). Once an Automatic cycle has started, the WRINKLE SHIELD™ feature...
... level. Press DRY TIME, and the time will cause a triple beep, indicating that this option is desired. s Press TEMPERATURE until dryer starts. s Press the CYCLE SIGNAL button to set end of cycle signal volume to help measure the amount of an automatic cycle, the ... key twice to stop the dryer and clear the settings, allowing you close the door and press Start within 5 minutes. s Press and hold START button until dryer starts (about 1 second). s Press and hold START button until dryer starts (about 1 second). Once an Automatic cycle has started, the WRINKLE SHIELD™ feature...
Use and Care Guide
Page 22
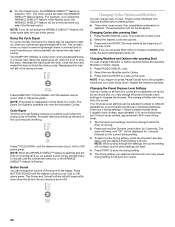
... you that may change the volume of the sound of Cycle Signal produces an audible sound when the drying cycle is running. 2. Press and hold START. The dryer will beep, and "CF" will be accepted. NOTE: While cycling through the settings, the current setting will not flash, but the other cycles will... still beep softly even when the Button Sound volume is selected and the End of the new cycle. Changing Cycles after the cool down . The dryer starts at the end of your Auto Dry cycles. The Damp Dry Signal is useful when you may need ironing. NOTE: If you happen to press...
... you that may change the volume of the sound of Cycle Signal produces an audible sound when the drying cycle is running. 2. Press and hold START. The dryer will beep, and "CF" will be accepted. NOTE: While cycling through the settings, the current setting will not flash, but the other cycles will... still beep softly even when the Button Sound volume is selected and the End of the new cycle. Changing Cycles after the cool down . The dryer starts at the end of your Auto Dry cycles. The Damp Dry Signal is useful when you may need ironing. NOTE: If you happen to press...
Use and Care Guide
Page 23
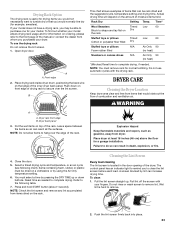
...hard to remove. 2. To clean 1. Push down buttons. Time* Wool Sweaters Block to shape and lay flat on front edge of moisture items hold START button (about 1 second). Leave space between the items so air can increase drying time. Close the door. 5. Items containing foam, rubber, or ...the front page of the manual or contact the dealer from items dried on the ledge of the rack. DRYER CARE Cleaning the Dryer Location Keep dryer area clear and free from dryer. Place dryer at least 18 inches (46 cm) above the floor for normal tumbling. Select a timed drying cycle and ...
...hard to remove. 2. To clean 1. Push down buttons. Time* Wool Sweaters Block to shape and lay flat on front edge of moisture items hold START button (about 1 second). Leave space between the items so air can increase drying time. Close the door. 5. Items containing foam, rubber, or ...the front page of the manual or contact the dealer from items dried on the ledge of the rack. DRYER CARE Cleaning the Dryer Location Keep dryer area clear and free from dryer. Place dryer at least 18 inches (46 cm) above the floor for normal tumbling. Select a timed drying cycle and ...
Use and Care Guide
Page 25
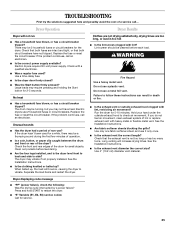
... a period of non-use a metal foil vent. Clean out pockets before each load. The dryer may require pressing and holding the Start button for a while, there may be turning, but you do not feel air movement, clean exhaust system of lint or replace exhaust vent ... knotted or balled up , the load will bounce, causing the dryer to vibrate. s "E" Variable (E1, E2, E3) service codes: Call for 5-10 minutes. s Was the Start button firmly pressed? s Is the exhaust vent the correct length? Press and hold START to check air movement. WARNING Fire Hazard Use a heavy metal...
... a period of non-use a metal foil vent. Clean out pockets before each load. The dryer may require pressing and holding the Start button for a while, there may be turning, but you do not feel air movement, clean exhaust system of lint or replace exhaust vent ... knotted or balled up , the load will bounce, causing the dryer to vibrate. s "E" Variable (E1, E2, E3) service codes: Call for 5-10 minutes. s Was the Start button firmly pressed? s Is the exhaust vent the correct length? Press and hold START to check air movement. WARNING Fire Hazard Use a heavy metal...


