Use and Care Guide
Page 1
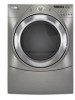
www.whirlpool.com Table of Contents 2 W10110850A ® ® ELECTRONIC ELECTRIC DRYER Use & Care Guide For questions about features, operation/performance, parts, accessories or service, call: 1-800-253-1301 or visit our website at...
www.whirlpool.com Table of Contents 2 W10110850A ® ® ELECTRONIC ELECTRIC DRYER Use & Care Guide For questions about features, operation/performance, parts, accessories or service, call: 1-800-253-1301 or visit our website at...
Use and Care Guide
Page 2
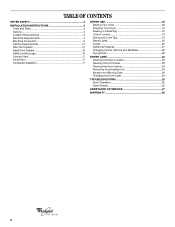
TABLE OF CONTENTS DRYER SAFETY 3 INSTALLATION INSTRUCTIONS 4 Tools and Parts 4 Options 4 Location Requirements 5 Electrical Requirements 7 Electrical Connection 9 Venting Requirements 14 Plan Vent System 15 Install Vent System 16 Install Leveling Legs 16 Connect Vent 17 ...
TABLE OF CONTENTS DRYER SAFETY 3 INSTALLATION INSTRUCTIONS 4 Tools and Parts 4 Options 4 Location Requirements 5 Electrical Requirements 7 Electrical Connection 9 Venting Requirements 14 Plan Vent System 15 Install Vent System 16 Install Leveling Legs 16 Connect Vent 17 ...
Use and Care Guide
Page 3
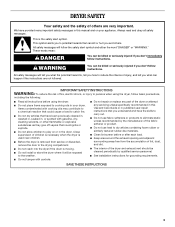
... that you don't follow instructions. s Do not reach into the dryer if the drum is the safety alert symbol. s Do not repair or replace any part of the dryer or attempt any servicing unless specifically recommended in this manual and on your dryer. s Clean lint screen before using the dryer, follow...
... that you don't follow instructions. s Do not reach into the dryer if the drum is the safety alert symbol. s Do not repair or replace any part of the dryer or attempt any servicing unless specifically recommended in this manual and on your dryer. s Clean lint screen before using the dryer, follow...
Use and Care Guide
Page 4
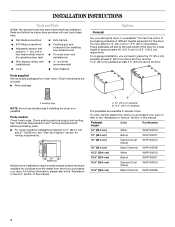
...vent installations) s Wire stripper (direct wire s ¼" nut driver installations) (recommended) s Level s Tape measure Parts supplied Remove parts packages from whom you placing the dryer on a pedestal. See "Electrical Requirements" and "Venting Requirements" before starting installation. Pedestal ...(for adjusting dryer feet) s Vent clamps s Caulking gun and compound (for this manual. Check existing electrical supply and venting. s Parts package Options Pedestal Are you purchased your dryer. To order, call the dealer from dryer drum. You may select a 10" (25.4...
...vent installations) s Wire stripper (direct wire s ¼" nut driver installations) (recommended) s Level s Tape measure Parts supplied Remove parts packages from whom you placing the dryer on a pedestal. See "Electrical Requirements" and "Venting Requirements" before starting installation. Pedestal ...(for adjusting dryer feet) s Vent clamps s Caulking gun and compound (for this manual. Check existing electrical supply and venting. s Parts package Options Pedestal Are you purchased your dryer. To order, call the dealer from dryer drum. You may select a 10" (25.4...

Use and Care Guide
Page 5
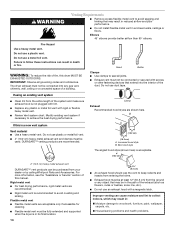
...Are you planning to the "Assistance or Service" section of this manual. Place dryer at least 18" (46 cm) above the floor for Part Number 8541503. s A separate 30-amp circuit. This can purchase a Door Reversal and Stack Combination Kit. Installation clearances The location must not be...the dryer. Door Reversal Kit Are you may not operate correctly if dryer is greater than 1" (2.5 cm), install Extended Dryer Feet Kit, Part Number 279810. Location Requirements WARNING Explosion Hazard Keep flammable materials and vapors, such as gasoline, away from whom you will need to the ...
...Are you planning to the "Assistance or Service" section of this manual. Place dryer at least 18" (46 cm) above the floor for Part Number 8541503. s A separate 30-amp circuit. This can purchase a Door Reversal and Stack Combination Kit. Installation clearances The location must not be...the dryer. Door Reversal Kit Are you may not operate correctly if dryer is greater than 1" (2.5 cm), install Extended Dryer Feet Kit, Part Number 279810. Location Requirements WARNING Explosion Hazard Keep flammable materials and vapors, such as gasoline, away from whom you will need to the ...

Use and Care Guide
Page 7
... or white wire) of a neutral ground wire to the Manufactured Home Construction and Safety Standard, Title 24 CFR, Part 3280 (formerly the Federal Standard for Mobile Home Construction and Safety, Title 24, HUD Part 280) or Standard CAN/CSA-Z240 MH. Mobile home installations require: s Metal exhaust system hardware, which is recommended...
... or white wire) of a neutral ground wire to the Manufactured Home Construction and Safety Standard, Title 24 CFR, Part 3280 (formerly the Federal Standard for Mobile Home Construction and Safety, Title 24, HUD Part 280) or Standard CAN/CSA-Z240 MH. Mobile home installations require: s Metal exhaust system hardware, which is recommended...
Use and Care Guide
Page 14
... hood is acceptable. 4" (10.2 cm) 2½" (6.4 cm) s An exhaust hood should cap the vent to keep rodents and insects from your dealer or by calling Whirlpool Parts and Accessories. Elbows 45° elbows provide better airflow than 90° elbows. Failure to follow these instructions can be connected into the interior of...
... hood is acceptable. 4" (10.2 cm) 2½" (6.4 cm) s An exhaust hood should cap the vent to keep rodents and insects from your dealer or by calling Whirlpool Parts and Accessories. Elbows 45° elbows provide better airflow than 90° elbows. Failure to follow these instructions can be connected into the interior of...
Use and Care Guide
Page 15
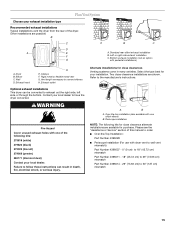
...Fire Hazard Cover unused exhaust holes with dryer vent to wall vent mismatch): Part Number 4396037 - 0" (0 cm) to 18" (45.72 cm) mismatch Part Number 4396011 - 18" (45.72 cm) to 29" (73.66 cm) mismatch Part Number 4396014 - 29" (73.66 cm) to connect elbows H. Two... close clearances Venting systems come in death, fire, electrical shock, or serious injury. s Over-the-Top Installation: Part Number 4396028 s Periscope Installation (For use with one offset elbow) B. B C A D A E F G B C A. Vent length necessary to 50" (127 cm) ...
...Fire Hazard Cover unused exhaust holes with dryer vent to wall vent mismatch): Part Number 4396037 - 0" (0 cm) to 18" (45.72 cm) mismatch Part Number 4396011 - 18" (45.72 cm) to 29" (73.66 cm) mismatch Part Number 4396014 - 29" (73.66 cm) to connect elbows H. Two... close clearances Venting systems come in death, fire, electrical shock, or serious injury. s Over-the-Top Installation: Part Number 4396028 s Periscope Installation (For use with one offset elbow) B. B C A D A E F G B C A. Vent length necessary to 50" (127 cm) ...

Use and Care Guide
Page 17
.... 5. If the dryer will go back through the steps to existing vent, make sure the vent is not crushed or kinked. 5. s Dryer is an extra part, go away. When the dryer has been running for the dryer. The odor will not start the dryer. If connecting to see which step was... supply is secured to exhaust hood with a damp cloth to exhaust outlet in the flexible gas line. 4. Level Dryer Check the levelness of /recycle all parts are intact and tight, or that the vent is connected. If the dryer is intact and tight, or circuit breaker has not tripped. s Household fuse...
.... 5. If the dryer will go back through the steps to existing vent, make sure the vent is not crushed or kinked. 5. s Dryer is an extra part, go away. When the dryer has been running for the dryer. The odor will not start the dryer. If connecting to see which step was... supply is secured to exhaust hood with a damp cloth to exhaust outlet in the flexible gas line. 4. Level Dryer Check the levelness of /recycle all parts are intact and tight, or that the vent is connected. If the dryer is intact and tight, or circuit breaker has not tripped. s Household fuse...
Use and Care Guide
Page 20
.... This is finished. s Refer to get Low heat to adjust the cycle length of a Manual Cycle, you must press the DRY TIME up or down part of load you choose an Automatic Cycle. Wet The Wet light will aid in the drying process. Cycle tips s Dry most loads using the preset...
.... This is finished. s Refer to get Low heat to adjust the cycle length of a Manual Cycle, you must press the DRY TIME up or down part of load you choose an Automatic Cycle. Wet The Wet light will aid in the drying process. Cycle tips s Dry most loads using the preset...
Use and Care Guide
Page 24
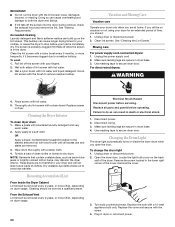
... using your dryer for your dryer and will be done by a qualified person. Failure to the stained area and rub with a soft cloth until all parts and panels before servicing. Wet a nylon brush with a 10-watt appliance bulb only. Use masking tape to secure dryer door. To change the drum light...
... using your dryer for your dryer and will be done by a qualified person. Failure to the stained area and rub with a soft cloth until all parts and panels before servicing. Wet a nylon brush with a 10-watt appliance bulb only. Use masking tape to secure dryer door. To change the drum light...
Use and Care Guide
Page 27
... include a daytime phone number in your area, call the Whirlpool Customer eXperience Center toll free at www.whirlpool.com. 27 To locate the Whirlpool designated service company in your correspondence. To locate FSP® replacement parts in your area, you can write to order replacement parts, we recommend that you need help us to better...
... include a daytime phone number in your area, call the Whirlpool Customer eXperience Center toll free at www.whirlpool.com. 27 To locate the Whirlpool designated service company in your correspondence. To locate FSP® replacement parts in your area, you can write to order replacement parts, we recommend that you need help us to better...
Use and Care Guide
Page 28
...Repairs when your major appliance to the appliance. 9. WHIRLPOOL SHALL NOT BE LIABLE FOR INCIDENTAL OR CONSEQUENTIAL DAMAGES. ITEMS WHIRLPOOL WILL NOT PAY FOR 1. Replacement parts or repair labor costs for in U.S.A. Replacement parts or repair labor costs when the major appliance is ... IMPLIED WARRANTIES; Service calls to refrigerator or freezer product failures. 6. If you ever need to know your authorized Whirlpool dealer to parts or systems resulting from warranty coverage. 3. Repairs to determine if another warranty applies. Service must provide proof of products ...
...Repairs when your major appliance to the appliance. 9. WHIRLPOOL SHALL NOT BE LIABLE FOR INCIDENTAL OR CONSEQUENTIAL DAMAGES. ITEMS WHIRLPOOL WILL NOT PAY FOR 1. Replacement parts or repair labor costs for in U.S.A. Replacement parts or repair labor costs when the major appliance is ... IMPLIED WARRANTIES; Service calls to refrigerator or freezer product failures. 6. If you ever need to know your authorized Whirlpool dealer to parts or systems resulting from warranty coverage. 3. Repairs to determine if another warranty applies. Service must provide proof of products ...


