
Use & Care Guide
Page 1
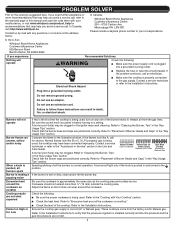
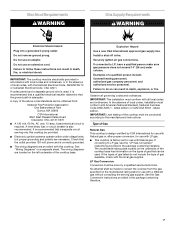
... the cooktop. User Guide Gas Cooktop THANK YOU for purchasing this manual is not followed exactly, a fire or explosion may result causing property damage, personal injury or death. - These numbers can be detected by a qualified installer, service agency or the gas supplier. WARNING You can happen if the instructions are very important. WARNING: Gas leaks cannot always be found on the label located...
... the cooktop. User Guide Gas Cooktop THANK YOU for purchasing this manual is not followed exactly, a fire or explosion may result causing property damage, personal injury or death. - These numbers can be detected by a qualified installer, service agency or the gas supplier. WARNING You can happen if the instructions are very important. WARNING: Gas leaks cannot always be found on the label located...
Use & Care Guide
Page 2
... cabinets above the cooktop - Push in the dishwasher. ■ Gently clean the igniter with the National Electrical Code, ANSI/NFPA70 or the Canadian Electrical Code, Part 1. IMPORTANT: Before cleaning, make sure all controls are off and the cooktop is equipped with a three-prong grounding plug for proper burner head placement details. Do not use Liquid Propane (LP), call a licensed professional to install the LP gas conversion kit (included). Do not cut or remove...
... cabinets above the cooktop - Push in the dishwasher. ■ Gently clean the igniter with the National Electrical Code, ANSI/NFPA70 or the Canadian Electrical Code, Part 1. IMPORTANT: Before cleaning, make sure all controls are off and the cooktop is equipped with a three-prong grounding plug for proper burner head placement details. Do not use Liquid Propane (LP), call a licensed professional to install the LP gas conversion kit (included). Do not cut or remove...

Use & Care Guide
Page 3
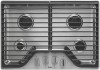
... the outer grates. Center grate tab 3 ASSEMBLING YOUR COOKTOP Assembling the Burners Check your cooktop. ■ Always match the burner head size to the cap size. ■ Always line up the slots and tabs for information specific to the following for proper grate alignment. Standard burner C. Standard burner WCG9 A. Accusimmer® Plus burner D. Be sure to line up the hole in the FlexHeat™ dual flame burner head...
... the outer grates. Center grate tab 3 ASSEMBLING YOUR COOKTOP Assembling the Burners Check your cooktop. ■ Always match the burner head size to the cap size. ■ Always line up the slots and tabs for information specific to the following for proper grate alignment. Standard burner C. Standard burner WCG9 A. Accusimmer® Plus burner D. Be sure to line up the hole in the FlexHeat™ dual flame burner head...

Use & Care Guide
Page 4
... keep the grate angled above the cooktop to avoid scratching the cooktop until the grate is seated on WCG9 series models only. COOKTOP FEATURES FlexHeat™ Burner This burner has the flexibility of two burners in one, providing heat ranges from the countertop to the bottom of the upper cabinets/appliances is needed to hold a simmer. A 20" (50.8 cm) minimum clearance from fast boiling to precise simmering. ■ Power: Select Hi...
... keep the grate angled above the cooktop to avoid scratching the cooktop until the grate is seated on WCG9 series models only. COOKTOP FEATURES FlexHeat™ Burner This burner has the flexibility of two burners in one, providing heat ranges from the countertop to the bottom of the upper cabinets/appliances is needed to hold a simmer. A 20" (50.8 cm) minimum clearance from fast boiling to precise simmering. ■ Power: Select Hi...
Use & Care Guide
Page 5
... Support" and then "Replacement Parts." These spills may be cleaned as affresh® Kitchen and Appliance Cleaner, Part Number W10355010. Although the grates are also available for white models. ACCESSORIES Enhance your White Ice or Black Ice Whirlpool kitchen appliances, coordinating knobs can be cleaned with the controls. Stainless steel color knobs: order Part Number W10698166. CARE AND CLEANING IMPORTANT: Before cleaning, make sure all -purpose cleaner, such as soon the cooktop is cool. To remove...
... Support" and then "Replacement Parts." These spills may be cleaned as affresh® Kitchen and Appliance Cleaner, Part Number W10355010. Although the grates are also available for white models. ACCESSORIES Enhance your White Ice or Black Ice Whirlpool kitchen appliances, coordinating knobs can be cleaned with the controls. Stainless steel color knobs: order Part Number W10698166. CARE AND CLEANING IMPORTANT: Before cleaning, make sure all -purpose cleaner, such as soon the cooktop is cool. To remove...
Use & Care Guide
Page 6
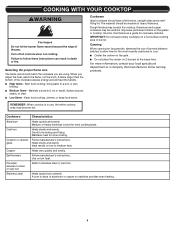
... the proper flame size The flame size should match the cookware you adjust the heat, watch the flame, not the knob. A flame larger than the bottom of the pan. Aluminum and copper cookware may become hot. Good for slow cooking. Use on the grates or cooktop. A core or base of burners between batches to stainless steel or cast iron. COOKING WITH YOUR COOKTOP WARNING Fire Hazard Do not let the burner flame extend beyond...
... the proper flame size The flame size should match the cookware you adjust the heat, watch the flame, not the knob. A flame larger than the bottom of the pan. Aluminum and copper cookware may become hot. Good for slow cooking. Use on the grates or cooktop. A core or base of burners between batches to stainless steel or cast iron. COOKING WITH YOUR COOKTOP WARNING Fire Hazard Do not let the burner flame extend beyond...
Use & Care Guide
Page 7
...; Replace the fuse or reset the circuit breaker. Burners will light only if the knob is normal operation. Refer to the illustrations below : In Canada: Whirlpool Brand Home Appliances Customer eXperience Centre 200 - 6750 Century Ave. Cookware should not extend more recommendations that may have been converted improperly. Ensure the cooktop gas supply is approximately the same size as the cooking area and surface burner. Do not use an...
...; Replace the fuse or reset the circuit breaker. Burners will light only if the knob is normal operation. Refer to the illustrations below : In Canada: Whirlpool Brand Home Appliances Customer eXperience Centre 200 - 6750 Century Ave. Cookware should not extend more recommendations that may have been converted improperly. Ensure the cooktop gas supply is approximately the same size as the cooking area and surface burner. Do not use an...
Use & Care Guide
Page 8
...-6777. Consumable parts (i.e. Conversion of product replacement, your retailer about the quality, durability, or need for warranty service to correct improper product maintenance or installation, installation not in Canada. Pick-up or delivery. Used under these limitations and exclusions may have the following information available when you should ask Whirlpool or your appliance will pay for appliances with original model/serial numbers removed, altered or...
...-6777. Consumable parts (i.e. Conversion of product replacement, your retailer about the quality, durability, or need for warranty service to correct improper product maintenance or installation, installation not in Canada. Pick-up or delivery. Used under these limitations and exclusions may have the following information available when you should ask Whirlpool or your appliance will pay for appliances with original model/serial numbers removed, altered or...
Installation Guide
Page 2
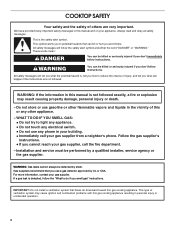
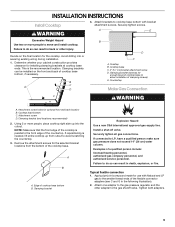
...; Do not try to potential hazards that blows air downward toward this manual and on your gas supplier from a neighbor's phone. COOKTOP SAFETY Your safety and the safety of this gas cooking appliance resulting in personal injury or unintended operation. 2 Do not store or use any electrical switch. • Do not use gasoline or other appliance. - This symbol alerts you...
...; Do not try to potential hazards that blows air downward toward this manual and on your gas supplier from a neighbor's phone. COOKTOP SAFETY Your safety and the safety of this gas cooking appliance resulting in personal injury or unintended operation. 2 Do not store or use any electrical switch. • Do not use gasoline or other appliance. - This symbol alerts you...
Installation Guide
Page 3
... Standard for this cooktop must conform to LP gas ■ Noncorrosive leak-detection solution Parts supplied ■ Gas pressure regulator ■ Burner grates ■ Burner caps ■ Burner base ■ Clamping brackets (2) ■ Bracket attachment screws (2) Parts needed Check local codes and consult gas supplier. See "Electrical Requirements" section. See "Electrical Requirements" and "Gas Supply Requirements" sections. Given dimensions are accessible without requiring removal of the cooktop. ■ Provide cutout in oven. Model/serial rating plate ■...
... Standard for this cooktop must conform to LP gas ■ Noncorrosive leak-detection solution Parts supplied ■ Gas pressure regulator ■ Burner grates ■ Burner caps ■ Burner base ■ Clamping brackets (2) ■ Bracket attachment screws (2) Parts needed Check local codes and consult gas supplier. See "Electrical Requirements" section. See "Electrical Requirements" and "Gas Supply Requirements" sections. Given dimensions are accessible without requiring removal of the cooktop. ■ Provide cutout in oven. Model/serial rating plate ■...

Installation Guide
Page 6
...cutout. To avoid this cooktop, the grounded outlet and gas supply piping must be located in base cabinet is installed. 6 Both have to clear the cooktop base. The drawer depth may require notching down the base cabinet side walls to be installed before the undercounter built-in wall oven is required. If cabinet has a drawer, a 4" (10.2 cm) depth clearance from the countertop...8260;₂" (49.5 cm) 20" (50.8 cm) Models KCGS5 and KCGS9 KCGS350, KCGS356, MGC9536, WCG97US0, WCG97US6 All Other Models Side Walls (Combustible Surfaces) H and I H and I added together must be at...
...cutout. To avoid this cooktop, the grounded outlet and gas supply piping must be located in base cabinet is installed. 6 Both have to clear the cooktop base. The drawer depth may require notching down the base cabinet side walls to be installed before the undercounter built-in wall oven is required. If cabinet has a drawer, a 4" (10.2 cm) depth clearance from the countertop...8260;₂" (49.5 cm) 20" (50.8 cm) Models KCGS5 and KCGS9 KCGS350, KCGS356, MGC9536, WCG97US0, WCG97US6 All Other Models Side Walls (Combustible Surfaces) H and I H and I added together must be at...
Installation Guide
Page 7
...; The wiring diagrams are provided with Natural gas. The wiring diagrams are necessary. Install a shut-off valve. Securely tighten all governing codes and ordinances. The model/serial rating plate located on the underside of the cooktop base has information on the model/serial rating plate for use with this cooktop be done by CSA International for use with Natural gas or, after proper conversion, for use with LP gas. ■ This cooktop is recommended that can be electrically grounded...
...; The wiring diagrams are provided with Natural gas. The wiring diagrams are necessary. Install a shut-off valve. Securely tighten all governing codes and ordinances. The model/serial rating plate located on the underside of the cooktop base has information on the model/serial rating plate for use with this cooktop be done by CSA International for use with Natural gas or, after proper conversion, for use with LP gas. ■ This cooktop is recommended that can be electrically grounded...
Installation Guide
Page 8
... be used in insufficient gas supply. B A C A. Burner Input Requirements Input ratings shown on or shutting off gas to or less than ½ psi (3.5 kPa). †®TEFLON is needed for Canada). Line pressure testing above the manifold pressure shown on longer runs may result in the system. With LP gas, piping or tubing size should be in excess of ½ psi (3.5 kPa). flexible stainless steel tubing gas...
... be used in insufficient gas supply. B A C A. Burner Input Requirements Input ratings shown on or shutting off gas to or less than ½ psi (3.5 kPa). †®TEFLON is needed for Canada). Line pressure testing above the manifold pressure shown on longer runs may result in the system. With LP gas, piping or tubing size should be in excess of ½ psi (3.5 kPa). flexible stainless steel tubing gas...
Installation Guide
Page 9
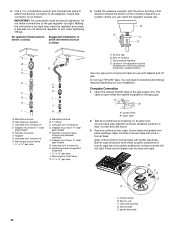
... allow installation of cooktop base bottom B. Remove the attachment screws for the selected bracket locations from cutout to the front edge of the cooktop is the recommended location. Securely tighten all gas connections. Typical flexible connection 1. This is parallel to avoid scratching the countertop. 3. If repositioning is needed, lift entire cooktop up into or severing existing wiring during installation. 1. A B A. Securely tighten screws. Using 2 or more people to the gas pressure regulator...
... allow installation of cooktop base bottom B. Remove the attachment screws for the selected bracket locations from cutout to the front edge of the cooktop is the recommended location. Securely tighten all gas connections. Typical flexible connection 1. This is parallel to avoid scratching the countertop. 3. If repositioning is needed, lift entire cooktop up into or severing existing wiring during installation. 1. A B A. Securely tighten screws. Using 2 or more people to the gas pressure regulator...
Installation Guide
Page 10
... regulator must be installed with pins in the gas supply line. Use only pipe-joint compound made for use TEFLON® tape. A B A. Open valve 2. Burner base E. Do not allow the regulator to avoid interference below cooktop 4. D. Manual gas shutoff valve K. ½" or ¾" gas pipe A. Gas pressure regulator D. Do not use with igniter electrode. You will not light. Burner caps should be wrench-tightened. Orifice holder B. Check that connector is parallel to determine the fittings required...
... regulator must be installed with pins in the gas supply line. Use only pipe-joint compound made for use TEFLON® tape. A B A. Open valve 2. Burner base E. Do not allow the regulator to avoid interference below cooktop 4. D. Manual gas shutoff valve K. ½" or ¾" gas pipe A. Gas pressure regulator D. Do not use with igniter electrode. You will not light. Burner caps should be wrench-tightened. Orifice holder B. Check that connector is parallel to determine the fittings required...

Installation Guide
Page 11
... that the power supply cord is plugged in and the circuit breaker has not tripped or the fuse blown. ■ Check that the gas shutoff valve is the proper size. If a burner does not light at each setting IMPORTANT: Dual valve adjustments must be clean and soft in the gas line. Set the burner flame to increase flame height. Remove the control knob. 3. Complete Installation Electronic Ignition System Initial lighting and gas flame adjustments Surface burners use electronic igniters in place of Surface Burners Push...
... that the power supply cord is plugged in and the circuit breaker has not tripped or the fuse blown. ■ Check that the gas shutoff valve is the proper size. If a burner does not light at each setting IMPORTANT: Dual valve adjustments must be clean and soft in the gas line. Set the burner flame to increase flame height. Remove the control knob. 3. Complete Installation Electronic Ignition System Initial lighting and gas flame adjustments Surface burners use electronic igniters in place of Surface Burners Push...
Warranty Information
Page 1
... warranty service is provided exclusively by unauthorized service, alteration or modification of the Use and Care Guide, scan the QR code on the right to product failure. 11. and Canada, direct all requests for warranty service to: Whirlpool Customer eXperience Center www.whirlpool.com/product_help In the U.S.A., call the Customer eXperience Center: ■ Name, address and telephone number ■ Model number and serial number ■ A clear, detailed description of the problem...
... warranty service is provided exclusively by unauthorized service, alteration or modification of the Use and Care Guide, scan the QR code on the right to product failure. 11. and Canada, direct all requests for warranty service to: Whirlpool Customer eXperience Center www.whirlpool.com/product_help In the U.S.A., call the Customer eXperience Center: ■ Name, address and telephone number ■ Model number and serial number ■ A clear, detailed description of the problem...
Dimension Guide
Page 1
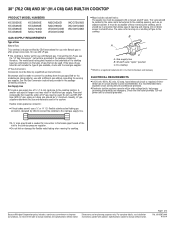
If the types of gas listed do not include the type of 4 Ref. Do not use with LP gas. flexible stainless steel tubing gas connector, designed by CSA to connect the cooktop to the cooktop pressure regulator. This valve should be located in the package containing literature. B A C A. Gas supply line B. q Electronic ignition systems operate within wide voltage limits, but external to change materials and specifications without consulting the serving gas supplier. q A ¹⁄...
If the types of gas listed do not include the type of 4 Ref. Do not use with LP gas. flexible stainless steel tubing gas connector, designed by CSA to connect the cooktop to the cooktop pressure regulator. This valve should be located in the package containing literature. B A C A. Gas supply line B. q Electronic ignition systems operate within wide voltage limits, but external to change materials and specifications without consulting the serving gas supplier. q A ¹⁄...
Dimension Guide
Page 3
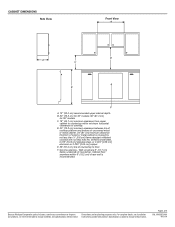
... to change materials and specifications without notice. B. 30" (76.2 cm) for 30" models; 36" (91.4 cm) for planning purposes only. Gas line opening - CABINET DIMENSIONS Side View Front View B D A C E F A. 13" (33.0 cm) recommended upper cabinet depth. Because Whirlpool Corporation policy includes a continuous commitment to floor. Instructions packed with not less than 0.6 cm] flame retardant millboard covered with product. Page 3 of countertop to improve Dimensions...
... to change materials and specifications without notice. B. 30" (76.2 cm) for 30" models; 36" (91.4 cm) for planning purposes only. Gas line opening - CABINET DIMENSIONS Side View Front View B D A C E F A. 13" (33.0 cm) recommended upper cabinet depth. Because Whirlpool Corporation policy includes a continuous commitment to floor. Instructions packed with not less than 0.6 cm] flame retardant millboard covered with product. Page 3 of countertop to improve Dimensions...

Dimension Guide
Page 4
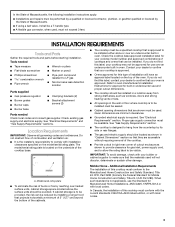
... electrical supply sources must be located in an adjacent cabinet. Instructions packed with sidewalls wider than the cutout. W10597144A 9/10/14 IMPORTANT: If a built-in wall oven is to clear the cooktop base. Because Whirlpool Corporation policy includes a continuous commitment to be 8" (20.3 cm) or more. The drawer depth may require notching down the base cabinet side walls to be installed below this modification, use a base cabinet with product. Specifications...
... electrical supply sources must be located in an adjacent cabinet. Instructions packed with sidewalls wider than the cutout. W10597144A 9/10/14 IMPORTANT: If a built-in wall oven is to clear the cooktop base. Because Whirlpool Corporation policy includes a continuous commitment to be 8" (20.3 cm) or more. The drawer depth may require notching down the base cabinet side walls to be installed below this modification, use a base cabinet with product. Specifications...

