Whirlpool GJD3044RB - ELECTRIC DOWNDRAFTS Support and Manuals
Get Help and Manuals for this Whirlpool item
View All Support Options Below
Free Whirlpool GJD3044RB manuals!
Problems with Whirlpool GJD3044RB?
Ask a Question
Free Whirlpool GJD3044RB manuals!
Problems with Whirlpool GJD3044RB?
Ask a Question
Popular Whirlpool GJD3044RB Manual Pages
Use and Care Guide - Page 2
... you what the potential hazard is the safety alert symbol. TABLE OF CONTENTS
COOKTOP SAFETY 2 PARTS AND FEATURES 4 COOKTOP USE 5
Cooktop Controls 5 Ceramic Glass 6 Dual Size Element 6 Downdraft Vent System 7 Home Canning 7 Cookware 7 COOKTOP CARE 8 General Cleaning 8 TROUBLESHOOTING 8 ASSISTANCE OR SERVICE 9 In the U.S.A 9 In Canada 9 WARRANTY 10
TABLE DES MATIÈRES
SÉ...
Use and Care Guide - Page 3
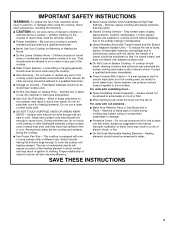
... be careful to cause burns.
s Do Not Soak Removable Heating Elements - Children should never be stored near surface units may result in the manual. They should not be worn while using the cooktop, follow basic precautions, including the following:
s CAUTION: Do not store items of clothing. Do not repair or replace any part of a utensil should...
Use and Care Guide - Page 5
... butter.
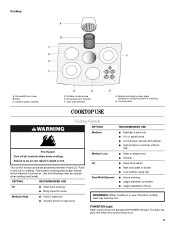
Push in use, the entire cooktop area may become hot.
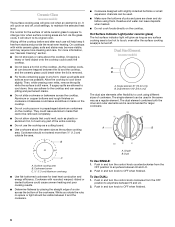
Use the following chart as a guide when setting heat levels. SETTING
RECOMMENDED USE
HI
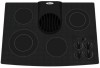
s Start food cooking....s Stew or steam food. Downdraft vent location F. Model and serial number plate (located on outside bottom of food. s Large-diameter cookware. Ceramic glass cooktop
G
D
D. Surface cooking ...
Use and Care Guide - Page 6
... the straight edge of a ruler across the cooktop.
s Do not leave a hot lid on the cooktop.
Dual
To Use SINGLE: 1. On cooktops with rounded, warped, ribbed or dented bottoms could crack the cooktop. Push in prepackaged aluminum containers on . Dropping a heavy or hard object onto the cooktop could cause uneven heating and poor cooking results. s Do...
Use and Care Guide - Page 7
... the cooktop. On electric cooktops, canners should be shortened. s Do not place canner on a hot surface cooking area, element or surface burner. See "Assistance or Service" for...'s instructions.
Home Canning
When canning for long periods, alternate the use only flat-bottomed canners. s On coil element models, the installation of medium-to the desired setting. Cookware...
Use and Care Guide - Page 8

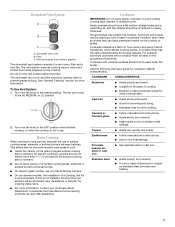
... or has a circuit breaker tripped? See "Cooktop Controls" section. s Is the appliance level? See the Installation Instructions.
8 A Cooktop Scraper is the "Cooktop Lockout" set correctly? Light to moderate soil
s Paper towels or clean damp sponge:
Clean while the cooktop is still warm. Continue rubbing until white film disappears.
On some models)
Heavy soil, dark streaks, specks and...
Use and Care Guide - Page 9
... in Canada. FSP® replacement parts will help , follow the instructions below. s Accessory and repair parts sales. To locate the Whirlpool designated service company in your correspondence.
9
Canning Unit Kit (coil element models) Order Part Number 242905
Cooktop Cleaner (ceramic glass models) Order Part Number 31464
Cooktop Protectant Order Part Number 31463
Cooktop Care Kit (includes...
Use and Care Guide - Page 10
... replace or repair house fuses, or to correct the installation of the Use & Care Guide.
THIS WARRANTY GIVES YOU SPECIFIC LEGAL RIGHTS, AND YOU MAY ALSO HAVE OTHER RIGHTS WHICH VARY FROM STATE TO STATE OR PROVINCE TO PROVINCE.
You can find
additional help you obtain assistance or service if you ever need service, first see the "Troubleshooting...
Installation Instructions - Page 1
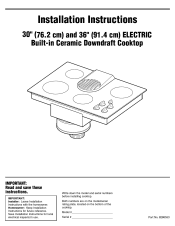
... Serial # _____ Part No. 8286553 IMPORTANT: Installer: Leave Installation Instructions with the homeowner. Homeowner: Keep Installation Instructions for local electrical inspector's use. Both numbers are on the model/serial rating plate, located on the bottom of the cooktop. Installation Instructions
30" (76.2 cm) and 36" (91.4 cm) ELECTRIC Built-in Ceramic Downdraft Cooktop
IMPORTANT: Read...
Installation Instructions - Page 2
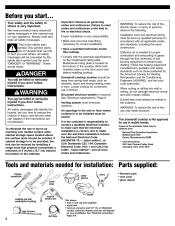
.... If cabinet storage is Not approved for correct installation. • Have a qualified technician install this manual and on the bottom of the cabinets. See "Electrical connection," Pages 6-8. We have everything necessary for use only metal ductwork. All safety messages will depend on the model/serial rating plate. This downdraft cooktop is to be provided, the risk can...
Installation Instructions - Page 3
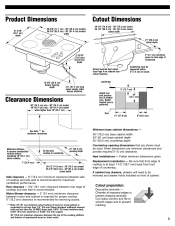
...) depth 30-3/8" (77.1 cm) - 30" (76.2 cm) models 36-3/8" (92.3 cm) - 36" (91.4 cm) models width
Cutout Dimensions
29-1/2" (74.9 cm) - 30" (76.2 cm) model 35-1/2" (90.2 cm) - 36" (91.4 cm) model cutout width
21" (53.3 cm) cutout depth
2-15/16" (74.6 mm) burner box depth Select required duct cutout (see Page 4 for maximum ventilation performance.
Replacement installation - Darker...
Installation Instructions - Page 4

...vent is set to vent straight out the back from the cooktop. Do ... exhaust air into spaces within the wall or floor for installation are not supplied. See "Venting methods," below . This downdraft cooktop is proper clearance within walls or ceilings or into attics,...right, see "Installation," Step 2, Page 6. Do Not cut , then a supporting frame must terminate to vent air outside .
Installation Instructions - Page 6
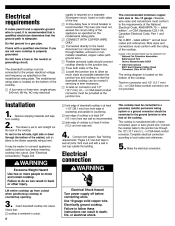
... and frequency as specified on the bottom of the cooktop. The model/serial rating plate is adequate. The downdraft cooktop must be connected to a gas pipe. Do Not have a fuse in the neutral or grounding circuit. Electrical requirements
If codes permit and a separate ground wire is used, it is recommended that a qualified electrician determine that the ground...
Installation Instructions - Page 7

... junction box using a U.L.- Replace the junction box cover. Connect the flexible, armored cable from the cooktop to the junction box using a U.L.- listed
For all cooktop models with three-wire cable from the cooktop:
Where local codes Do Not permit connecting the frameground conductor to the neutral (white) junction box wire. (Used for Canadian installations):
red wires 4-wire...
Installation Instructions - Page 8
... the two white wires together using a U.L.- Replace the junction box cover.
Keep Installation Instructions and Guide close to the neutral (white) junction box wire:
1. Disconnect vent system. 3. Connect electrical supply.
Household - The dealer is parallel to front edge of countertop to neutral (white) wire in the Yellow Pages of cooktop burner box. Remove the junction box...
Whirlpool GJD3044RB Reviews
We have not received any reviews for Whirlpool yet.