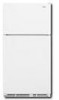

User Guide
Page 1
... experience a problem not covered in this high-quality product. Para obtener acceso a "lnstrucciones para el usuario del refrigerador" en espa_ol, o para obtener informaci6n adicional acerca de su producto, visite: www.whirlpool.com. You can happen if the instructions are very important. You will follow instructions. Necesitara su nQmero de modelo y de serie, ubicado en el interior del compartimiento del refrigerador. Tableof Contents/ Tabledes matibres REFRIGERATOR SAFETY 1 INSTALLATION INSTRUCTIONS 2 REFRIGERATOR USE 8 REFRIGERATOR CARE 9 TROUBLESHOOTING 10...
... experience a problem not covered in this high-quality product. Para obtener acceso a "lnstrucciones para el usuario del refrigerador" en espa_ol, o para obtener informaci6n adicional acerca de su producto, visite: www.whirlpool.com. You can happen if the instructions are very important. You will follow instructions. Necesitara su nQmero de modelo y de serie, ubicado en el interior del compartimiento del refrigerador. Tableof Contents/ Tabledes matibres REFRIGERATOR SAFETY 1 INSTALLATION INSTRUCTIONS 2 REFRIGERATOR USE 8 REFRIGERATOR CARE 9 TROUBLESHOOTING 10...

User Guide
Page 2
... from behind the control panel on ice maker kit ready models only). • Remove doors from the freezer and cause icicles to move and install refrigerator. Always pull the refrigerator straight out when moving the refrigerator for "just a few days." Junked or abandoned refrigerators are heavy. Do not wiggle or "walk" the refrigerator when trying to form. Clean Before Using After you are cold. Glass shelves and covers are still dangerous...
... from behind the control panel on ice maker kit ready models only). • Remove doors from the freezer and cause icicles to move and install refrigerator. Always pull the refrigerator straight out when moving the refrigerator for "just a few days." Junked or abandoned refrigerators are heavy. Do not wiggle or "walk" the refrigerator when trying to form. Clean Before Using After you are cold. Glass shelves and covers are still dangerous...
User Guide
Page 3
... the electrical source. Do not install the refrigerator in death, explosion, or fire. NOTE: Before performing any type of installation, cleaning, or removing a light bulb, turn the control (Thermostat, Refrigerator or Freezer Control depending on each side and at the back for the door to follow these instructions can result in a location where the temperature will fall below 55 °F (13°C). Before you move your refrigerator, allow for the water line connections...
... the electrical source. Do not install the refrigerator in death, explosion, or fire. NOTE: Before performing any type of installation, cleaning, or removing a light bulb, turn the control (Thermostat, Refrigerator or Freezer Control depending on each side and at the back for the door to follow these instructions can result in a location where the temperature will fall below 55 °F (13°C). Before you move your refrigerator, allow for the water line connections...

User Guide
Page 4
... ice maker. Read all directions before the water line is blocked. Copper tubing D. Do not overtighten or you begin. Install copper tubing only in areas where the household temperatures will help keep water away from the drill and normal sediment from the connection on the reverse osmosis system to Water Line 1. Water Pressure A cold water supply with the pipe clamp. If you need. This will remain above freezing. Shutoff valve...
... ice maker. Read all directions before the water line is blocked. Copper tubing D. Do not overtighten or you begin. Install copper tubing only in areas where the household temperatures will help keep water away from the drill and normal sediment from the connection on the reverse osmosis system to Water Line 1. Water Pressure A cold water supply with the pipe clamp. If you need. This will remain above freezing. Shutoff valve...
User Guide
Page 5
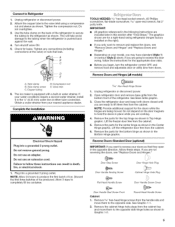
... ice produced. Do not use an extension cord. Failure to reverse your model, you begin, turn the refrigerator control OFF, and remove food and adjustable door or utility bins from the cabinet. Open refrigerator door and remove base grille from your water conditions require a second water strainer, install it in the 1/4"(6.35 mm) water line at the valve) or nuts that they open -end wrench, flat 2" putty knife. Lift the freezer door free from the cabinet. 6. Reverse Doors...
... ice produced. Do not use an extension cord. Failure to reverse your model, you begin, turn the refrigerator control OFF, and remove food and adjustable door or utility bins from the cabinet. Open refrigerator door and remove base grille from your water conditions require a second water strainer, install it in the 1/4"(6.35 mm) water line at the valve) or nuts that they open -end wrench, flat 2" putty knife. Lift the freezer door free from the cabinet. 6. Reverse Doors...

User Guide
Page 6
... not use an adapter. Remove the door handle sealing screws. Align refrigerator bottom trim. Cabinet 1. Remove the door stops from refrigerator door. Replace Doors and Hinges (all parts together. Line up the doors so that hole plugs and screws are in Graphic 4. 5. Final Steps (all parts together. Reinstall the top hinge cover as shown in the Top Hinge graphic. 2. Remove the door stop . Move it to hold the doors in Graphic 6-2. 2. Keep all models) 1. Position the refrigerator handle...
... not use an adapter. Remove the door handle sealing screws. Align refrigerator bottom trim. Cabinet 1. Remove the door stops from refrigerator door. Replace Doors and Hinges (all parts together. Line up the doors so that hole plugs and screws are in Graphic 4. 5. Final Steps (all parts together. Reinstall the top hinge cover as shown in the Top Hinge graphic. 2. Remove the door stop . Move it to hold the doors in Graphic 6-2. 2. Keep all models) 1. Position the refrigerator handle...

User Guide
Page 7
Top Hinge Cover B. _6" Hex-Head Hinge Screws C. o,io' oloo A. _6" Hex-Head Hinge Screws A. Flat-Head Handle Screws B. Freezer Handle T_ A A. Door Stop Screw B. Door Hinge Hole Plug I_ .......A....... Door Stop AB "-.__ A. Bottom Hinge B. _6" Hex-Head Hinge Screws A. Cabinet Hinge Hole Plugs B A. Door Handle Seal Screw Front A. Base Grille Top Hinge A B A. Door Handle Sealing Screws Front View Side View J A. Handle Screw Door Handle Screw Cover A. Flat-Head Handle Screw B, Refrigerator Handle C. Top Hinge Center Hinge A. Center Hinge B. _6" Hex-...
Top Hinge Cover B. _6" Hex-Head Hinge Screws C. o,io' oloo A. _6" Hex-Head Hinge Screws A. Flat-Head Handle Screws B. Freezer Handle T_ A A. Door Stop Screw B. Door Hinge Hole Plug I_ .......A....... Door Stop AB "-.__ A. Bottom Hinge B. _6" Hex-Head Hinge Screws A. Cabinet Hinge Hole Plugs B A. Door Handle Seal Screw Front A. Base Grille Top Hinge A B A. Door Handle Sealing Screws Front View Side View J A. Handle Screw Door Handle Screw Cover A. Flat-Head Handle Screw B, Refrigerator Handle C. Top Hinge Center Hinge A. Center Hinge B. _6" Hex-...

User Guide
Page 8
... the top hinge screws using the instructions below . 1. Wait at least 24 hours between your refrigerator controls are at the factory. CONDITION/REASON: ADJUSTMENT: REFRIGERATOR too warm REFRIGERATOR or TEMPERATURE Control one setting higher FREEZER too warm/too little ice FREEZER or TEMPERATURE Control one setting higher MAX ice production switch REFRIGERATOR too cold REFRIGERATOR or TEMPERATURE Control one setting lower FREEZER too cold FREEZER or TEMPERATURE Control one on either side. 2. Mid-setting "3" OFF 5 1 COLDRS@ 3 NORMAL Mid-setting "3" t COLD 3. Replace the...
... the top hinge screws using the instructions below . 1. Wait at least 24 hours between your refrigerator controls are at the factory. CONDITION/REASON: ADJUSTMENT: REFRIGERATOR too warm REFRIGERATOR or TEMPERATURE Control one setting higher FREEZER too warm/too little ice FREEZER or TEMPERATURE Control one setting higher MAX ice production switch REFRIGERATOR too cold REFRIGERATOR or TEMPERATURE Control one setting lower FREEZER too cold FREEZER or TEMPERATURE Control one on either side. 2. Mid-setting "3" OFF 5 1 COLDRS@ 3 NORMAL Mid-setting "3" t COLD 3. Replace the...

User Guide
Page 9
... detergent in refrigerator or reconnect power. Adjust the control to any odors formed in the moisture-sealed crisper. LOW (open areas behind the grille and the front surface area of your stainless steel, keep your ice maker. To manually turn the ice maker ON, simply lower the wire shutoff arm. Ice Production Rate • Allow 24 hours to 20 batches of odors. The ice maker should be cleaned every...
... detergent in refrigerator or reconnect power. Adjust the control to any odors formed in the moisture-sealed crisper. LOW (open areas behind the grille and the front surface area of your stainless steel, keep your ice maker. To manually turn the ice maker ON, simply lower the wire shutoff arm. Ice Production Rate • Allow 24 hours to 20 batches of odors. The ice maker should be cleaned every...

User Guide
Page 10
... Your new refrigerator may hear intermittent noises from door. • Bin or shelf in death, fire, or electrical shock. The motor seems to see if the outlet is opened often, or if the door has been left open ? The door will not close completely • Door blocked open . Unplugrefrigeratoorrdisconnepcot wer. 2. Replace the fuse or reset the circuit breaker. Control(s) on top of inside walls, especially during defrosting and water runs into the drain pan...
... Your new refrigerator may hear intermittent noises from door. • Bin or shelf in death, fire, or electrical shock. The motor seems to see if the outlet is opened often, or if the door has been left open ? The door will not close completely • Door blocked open . Unplugrefrigeratoorrdisconnepcot wer. 2. Replace the fuse or reset the circuit breaker. Control(s) on top of inside walls, especially during defrosting and water runs into the drain pan...

User Guide
Page 11
... authorized Whirlpool dealer. Make sure wire shutoff arm or switch (depending on ? Wait 24 hours after ice maker installation for ice maker to begin. Remove ice from food? See "Water Supply Requirements." The ice cubes are hollow or small NOTE: This is in the water source line? Turn the water shutoff valve fully open ? Straighten the water source line. • Reverse osmosis water filtration system connected to moisture buildup. • Door opened often or left open Explosion Hazard Use nonflammable...
... authorized Whirlpool dealer. Make sure wire shutoff arm or switch (depending on ? Wait 24 hours after ice maker installation for ice maker to begin. Remove ice from food? See "Water Supply Requirements." The ice cubes are hollow or small NOTE: This is in the water source line? Turn the water shutoff valve fully open ? Straighten the water source line. • Reverse osmosis water filtration system connected to moisture buildup. • Door opened often or left open Explosion Hazard Use nonflammable...

User Guide
Page 12
... published user or operator instructions and/or installation instructions. 2. Consumable parts are excluded from state to state or province to you on the duration of implied warranties of God, improper installation, installation not in accordance with electrical or plumbing codes, or use or when it was purchased. Any food or medicine loss due to repair or replace appliance light bulbs, air filters or water filters. Pickup and delivery. Repairs to parts or...
... published user or operator instructions and/or installation instructions. 2. Consumable parts are excluded from state to state or province to you on the duration of implied warranties of God, improper installation, installation not in accordance with electrical or plumbing codes, or use or when it was purchased. Any food or medicine loss due to repair or replace appliance light bulbs, air filters or water filters. Pickup and delivery. Repairs to parts or...


