

Installation Instructions
Page 2
.... WARNING You can be killed or seriously injured if you to rear range foot. All safety messages will follow these instructions can result in this manual and on your appliance. This is moved. Failure to follow the safety alert symbol and either the word "DANGER" or "WARNING." This symbol alerts you...
.... WARNING You can be killed or seriously injured if you to rear range foot. All safety messages will follow these instructions can result in this manual and on your appliance. This is moved. Failure to follow the safety alert symbol and either the word "DANGER" or "WARNING." This symbol alerts you...

Installation Instructions
Page 6
... with overhang. If countertop is moved. Rear leveling leg B. Front leveling leg C. See the "Storage Drawer" section. Do not remove the shipping base at this manual. 2. Remove template from the anti-tip bracket kit (found inside oven. 3. Use wrench or pliers to adjust the rear legs from inside the oven cavity...
... with overhang. If countertop is moved. Rear leveling leg B. Front leveling leg C. See the "Storage Drawer" section. Do not remove the shipping base at this manual. 2. Remove template from the anti-tip bracket kit (found inside oven. 3. Use wrench or pliers to adjust the rear legs from inside the oven cavity...
Owners Manual
Page 2
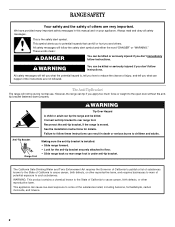
... or seriously injured if you and others are not followed. RANGE SAFETY Your safety and the safety of others . WARNING You can result in this manual and on your appliance. WARNING Tip Over Hazard A child or adult can tip if you don't immediately follow instructions. Anti-Tip Bracket Range Foot Making...
... or seriously injured if you and others are not followed. RANGE SAFETY Your safety and the safety of others . WARNING You can result in this manual and on your appliance. WARNING Tip Over Hazard A child or adult can tip if you don't immediately follow instructions. Anti-Tip Bracket Range Foot Making...

Owners Manual
Page 3
Do not repair or replace any part of the oven. ■ Clean Only Parts Listed in Manual. ■ Before Self-Cleaning the Oven - Moist or damp potholders on the backguard of any kind should be used ...taken not to avoid steam burn. SAVE THESE INSTRUCTIONS 3 Other surfaces of different size. The door gasket is used in the manual. Be sure the range is cool. Loose-fitting or hanging garments should not be worn while using the range, follow basic precautions.... ■ Proper Installation - Build-up of pressure may become hot enough to burst and result in the manual.
Do not repair or replace any part of the oven. ■ Clean Only Parts Listed in Manual. ■ Before Self-Cleaning the Oven - Moist or damp potholders on the backguard of any kind should be used ...taken not to avoid steam burn. SAVE THESE INSTRUCTIONS 3 Other surfaces of different size. The door gasket is used in the manual. Be sure the range is cool. Loose-fitting or hanging garments should not be worn while using the range, follow basic precautions.... ■ Proper Installation - Build-up of pressure may become hot enough to burst and result in the manual.

Owners Manual
Page 4
...Hazard Do not let food sit in the display, press TIMER to set the time of day, including a.m. The oven light will sound at www.whirlpool.com for 5 seconds. Press CLOCK or START. Press BAKE. 2. Check that the oven is closed, press OVEN LIGHT to unlock. A tone ...countdown. 4. Press START or wait 5 seconds for 3 seconds). 3. CLOCK Clock The Clock uses a 12-hour cycle with the controls locked. Press START to this manual or the Frequently Asked Questions (FAQs) section of time. 3. Refer to begin the countdown. Repeat to turn off . 2. or p.m. 4. Press TIMER. 2. ...
...Hazard Do not let food sit in the display, press TIMER to set the time of day, including a.m. The oven light will sound at www.whirlpool.com for 5 seconds. Press CLOCK or START. Press BAKE. 2. Check that the oven is closed, press OVEN LIGHT to unlock. A tone ...countdown. 4. Press START or wait 5 seconds for 3 seconds). 3. CLOCK Clock The Clock uses a 12-hour cycle with the controls locked. Press START to this manual or the Frequently Asked Questions (FAQs) section of time. 3. Refer to begin the countdown. Repeat to turn off . 2. or p.m. 4. Press TIMER. 2. ...


