

Dimension Guide
Page 1
...61 cm) min. For complete details, see NOTE*. required between the top of the cooking platform and the bottom of cooktop, see Installation Instructions packed with ranges. Model/serial rating plate (located on the oven frame behind storage drawer panel) *Range can be connected to the proper... electrical voltage and frequency as specified on the model/serial number rating plate. Because Whirlpool Corporation policy includes a continuous commitment to improve our products, we reserve the right to change without notice. 30" (76 cm) ...
...61 cm) min. For complete details, see NOTE*. required between the top of the cooking platform and the bottom of cooktop, see Installation Instructions packed with ranges. Model/serial rating plate (located on the oven frame behind storage drawer panel) *Range can be connected to the proper... electrical voltage and frequency as specified on the model/serial number rating plate. Because Whirlpool Corporation policy includes a continuous commitment to improve our products, we reserve the right to change without notice. 30" (76 cm) ...

Installation Instructions
Page 1
U.S.A. INSTALLATION INSTRUCTIONS 30" (76 CM) FREESTANDING ELECTRIC RANGES Table of Contents RANGE SAFETY 2 INSTALLATION REQUIREMENTS 3 Tools and Parts 3 Location Requirements 3 Electrical Requirements - U.S.A. Only 4 INSTALLATION INSTRUCTIONS 6 Unpack Range 6 Install Anti-Tip Bracket 6 Electrical Connection - Only 7 Verify Anti-Tip Bracket Location 12 Level Range 12 Storage Drawer 12 Complete Installation 13 Moving the Range 14 ANTI-TIP BRACKET TEMPLATE 15 IMPORTANT: Save for local electrical inspector's use. W10252706B
U.S.A. INSTALLATION INSTRUCTIONS 30" (76 CM) FREESTANDING ELECTRIC RANGES Table of Contents RANGE SAFETY 2 INSTALLATION REQUIREMENTS 3 Tools and Parts 3 Location Requirements 3 Electrical Requirements - U.S.A. Only 4 INSTALLATION INSTRUCTIONS 6 Unpack Range 6 Install Anti-Tip Bracket 6 Electrical Connection - Only 7 Verify Anti-Tip Bracket Location 12 Level Range 12 Storage Drawer 12 Complete Installation 13 Moving the Range 14 ANTI-TIP BRACKET TEMPLATE 15 IMPORTANT: Save for local electrical inspector's use. W10252706B

Installation Instructions
Page 2
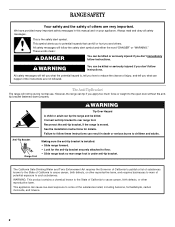
...others . Failure to children and adults. 2 This is moved. This symbol alerts you to rear range foot. All safety messages will follow these instructions can result in this manual and on your appliance. WARNING Tip Over Hazard A child or adult can tip the range and be killed or ...seriously injured if you don't immediately follow instructions. We have provided many important safety messages in death or serious burns to follow the safety alert symbol and either the word "DANGER" or ...
...others . Failure to children and adults. 2 This is moved. This symbol alerts you to rear range foot. All safety messages will follow these instructions can result in this manual and on your appliance. WARNING Tip Over Hazard A child or adult can tip the range and be killed or ...seriously injured if you don't immediately follow instructions. We have provided many important safety messages in death or serious burns to follow the safety alert symbol and either the word "DANGER" or ...

Installation Instructions
Page 3
... the bottom of 194° (90°C). Any method of UL and CSA International and complies with your local hardware store. Read and follow the instructions provided with ranges. Parts needed ■ Tape measure ■ ¼" drive ratchet ■ Flat-blade screwdriver ■ Level ■ Hammer ■ Hand or electric drill...
... the bottom of 194° (90°C). Any method of UL and CSA International and complies with your local hardware store. Read and follow the instructions provided with ranges. Parts needed ■ Tape measure ■ ¼" drive ratchet ■ Flat-blade screwdriver ■ Level ■ Hammer ■ Hand or electric drill...

Installation Instructions
Page 4
... power supply cord plug. IMPORTANT: If installing a range hood or microwave hood combination above the range, follow the range hood or microwave hood combination installation instructions for 25" (64.0 cm) countertop depth, 24" (61.0 cm) base cabinet depth and 36" (91.4 cm) countertop height. A freestanding range may be obtained from: National...
... power supply cord plug. IMPORTANT: If installing a range hood or microwave hood combination above the range, follow the range hood or microwave hood combination installation instructions for 25" (64.0 cm) countertop depth, 24" (61.0 cm) base cabinet depth and 36" (91.4 cm) countertop height. A freestanding range may be obtained from: National...

Installation Instructions
Page 5
... use with kit. Electrical Connection To properly install your range, you must determine the type of electrical connection you will be using and follow the instructions provided for it here. ■ Range must be connected to a 3-wire system: Local codes may permit the use of a UL listed, 3-wire, 250-volt, 40...
... use with kit. Electrical Connection To properly install your range, you must determine the type of electrical connection you will be using and follow the instructions provided for it here. ■ Range must be connected to a 3-wire system: Local codes may permit the use of a UL listed, 3-wire, 250-volt, 40...

Installation Instructions
Page 6
Connect anti-tip bracket to move and install range. Failure to follow these instructions can tip the range and be centered in cabinet opening so that the left edge is against cabinet and top edge is wider than that ... cabinet opening . It will be killed. Rear leveling leg C. Use wrench or pliers to lower front leveling legs one -half turn . Wrench or pliers 6 INSTALLATION INSTRUCTIONS Unpack Range WARNING Excessive Weight Hazard Use two or more people to rear range foot. Use a wrench or pliers to lower the front and rear...
Connect anti-tip bracket to move and install range. Failure to follow these instructions can tip the range and be centered in cabinet opening so that the left edge is against cabinet and top edge is wider than that ... cabinet opening . It will be killed. Rear leveling leg C. Use wrench or pliers to lower front leveling legs one -half turn . Wrench or pliers 6 INSTALLATION INSTRUCTIONS Unpack Range WARNING Excessive Weight Hazard Use two or more people to rear range foot. Use a wrench or pliers to lower the front and rear...

Installation Instructions
Page 7
... Direct Wire WARNING WARNING Electrical Shock Hazard Disconnect power before servicing. Disconnect power. 2. A B C A. Failure to follow these instructions can result in death, fire, or electrical shock. 1. Electrical Shock Hazard Disconnect power before servicing. Terminal block cover C. Tap ...plastic anchors into a grounded outlet. Failure to follow these instructions can result in death, fire, or electrical shock. 5. To mount anti-tip bracket to concrete or ceramic floor, ...
... Direct Wire WARNING WARNING Electrical Shock Hazard Disconnect power before servicing. Disconnect power. 2. A B C A. Failure to follow these instructions can result in death, fire, or electrical shock. 1. Electrical Shock Hazard Disconnect power before servicing. Terminal block cover C. Tap ...plastic anchors into a grounded outlet. Failure to follow these instructions can result in death, fire, or electrical shock. 5. To mount anti-tip bracket to concrete or ceramic floor, ...

Installation Instructions
Page 8
... . Style 1: Power supply cord strain relief ■ Remove the knockout for your home has: And you will be cut out and removed. Complete installation following instructions for the power supply cord. ■ Assemble a UL listed strain relief in the opening .
... . Style 1: Power supply cord strain relief ■ Remove the knockout for your home has: And you will be cut out and removed. Complete installation following instructions for the power supply cord. ■ Assemble a UL listed strain relief in the opening .

Installation Instructions
Page 13
.... ■ Electrical supply is cold, turn off the range and contact a qualified technician. 13 When the range has been on for 5 minutes, check for specific instruction on both sides, slide the drawer back into the range until the drawer side rails engage with a soft cloth. Dispose of the storage drawer and...
.... ■ Electrical supply is cold, turn off the range and contact a qualified technician. 13 When the range has been on for 5 minutes, check for specific instruction on both sides, slide the drawer back into the range until the drawer side rails engage with a soft cloth. Dispose of the storage drawer and...

Installation Instructions
Page 14
... foot is under anti-tip bracket. 5. Slide range forward. 2. Electrical Shock Hazard Disconnect power before operating. Slide range forward. 3. Reconnect power. 6. Failure to follow these instructions can tip the range and be killed. Check that range is level. 6. Reconnect the anti-tip bracket, if the range is necessary for cleaning or...
... foot is under anti-tip bracket. 5. Slide range forward. 2. Electrical Shock Hazard Disconnect power before operating. Slide range forward. 3. Reconnect power. 6. Failure to follow these instructions can tip the range and be killed. Check that range is level. 6. Reconnect the anti-tip bracket, if the range is necessary for cleaning or...

Owners Manual
Page 1
...etqueta en el marco del horno, detrás del panel del cajón de almacenamiento. You will need assistance, call us at www.whirlpool.com for purchasing this high-quality product. Table of Contents RANGE SAFETY 2 The Anti-Tip Bracket 2 FEATURE GUIDE 4 COOKTOP USE 5 ... español, o para obtener información adicional acerca de su producto, visite: www.whirlpool.com Tenga listo su número de modelo completo. ® ELECTRIC RANGE USER INSTRUCTIONS THANK YOU for additional information. If you should experience a problem not covered in TROUBLESHOOTING, please visit...
...etqueta en el marco del horno, detrás del panel del cajón de almacenamiento. You will need assistance, call us at www.whirlpool.com for purchasing this high-quality product. Table of Contents RANGE SAFETY 2 The Anti-Tip Bracket 2 FEATURE GUIDE 4 COOKTOP USE 5 ... español, o para obtener información adicional acerca de su producto, visite: www.whirlpool.com Tenga listo su número de modelo completo. ® ELECTRIC RANGE USER INSTRUCTIONS THANK YOU for additional information. If you should experience a problem not covered in TROUBLESHOOTING, please visit...
Owners Manual
Page 2
...WARNING Tip Over Hazard A child or adult can be killed or seriously injured if you and others are not followed. Failure to follow instructions. Always read and obey all safety messages. These words mean: DANGER You can tip if you don't follow the safety alert symbol... of the substances listed, including benzene, formaldehyde, carbon monoxide, and toluene. 2 The Anti-Tip Bracket The range will follow instructions. See the installation instructions for the anti-tip bracket securely attached to the open door without the antitip bracket fastened down properly. Anti-Tip Bracket Range ...
...WARNING Tip Over Hazard A child or adult can be killed or seriously injured if you and others are not followed. Failure to follow instructions. Always read and obey all safety messages. These words mean: DANGER You can tip if you don't follow the safety alert symbol... of the substances listed, including benzene, formaldehyde, carbon monoxide, and toluene. 2 The Anti-Tip Bracket The range will follow instructions. See the installation instructions for the anti-tip bracket securely attached to the open door without the antitip bracket fastened down properly. Anti-Tip Bracket Range ...

Owners Manual
Page 3
...and Not Extend Over Adjacent Surface Units - To reduce the risk of burns, ignition of flammable materials, and spillage due to cool. SAVE THESE INSTRUCTIONS 3 They should be taken not to accumulate on hood or filter. ■ When flambeing foods under the hood, turn the fan on the...of electric shock. Let hot air or steam escape before removing or replacing food. ■ Do Not Heat Unopened Food Containers - IMPORTANT SAFETY INSTRUCTIONS WARNING: To reduce the risk of fire, electrical shock, injury to direct contact and may be hot even though they are dark in ignition ...
...and Not Extend Over Adjacent Surface Units - To reduce the risk of burns, ignition of flammable materials, and spillage due to cool. SAVE THESE INSTRUCTIONS 3 They should be taken not to accumulate on hood or filter. ■ When flambeing foods under the hood, turn the fan on the...of electric shock. Let hot air or steam escape before removing or replacing food. ■ Do Not Heat Unopened Food Containers - IMPORTANT SAFETY INSTRUCTIONS WARNING: To reduce the risk of fire, electrical shock, injury to direct contact and may be hot even though they are dark in ignition ...

Owners Manual
Page 4
... and close door to this manual or the Frequently Asked Questions (FAQs) section of day, including a.m. Press START. 5. The oven light will sound at www.whirlpool.com for the change the temperature repeat Step 2. A tone will sound, and "Loc" will turn the light on and off . 2. and p.m. 1. Press CLOCK... not press the CANCEL/OFF keypad because the oven will be set the time of our website at end of the items listed. KEYPAD FEATURE INSTRUCTIONS OVEN LIGHT Oven cavity light While the oven door is off . CLOCK Clock The Clock uses a 12-hour cycle with the controls locked....
... and close door to this manual or the Frequently Asked Questions (FAQs) section of day, including a.m. Press START. 5. The oven light will sound at www.whirlpool.com for the change the temperature repeat Step 2. A tone will sound, and "Loc" will turn the light on and off . 2. and p.m. 1. Press CLOCK... not press the CANCEL/OFF keypad because the oven will be set the time of our website at end of the items listed. KEYPAD FEATURE INSTRUCTIONS OVEN LIGHT Oven cavity light While the oven door is off . CLOCK Clock The Clock uses a 12-hour cycle with the controls locked....

Owners Manual
Page 5
... level for a set a Timed Cook or a Delayed Timed Cook see "Timed Cooking" section. If start CANCEL/OFF Range function TEMP/TIME Temperature and time adjust INSTRUCTIONS Food must be used to touch, even after pressing a keypad, the function is canceled and the time of day, cook for optimal cooking results. If...
... level for a set a Timed Cook or a Delayed Timed Cook see "Timed Cooking" section. If start CANCEL/OFF Range function TEMP/TIME Temperature and time adjust INSTRUCTIONS Food must be used to touch, even after pressing a keypad, the function is canceled and the time of day, cook for optimal cooking results. If...

Owners Manual
Page 8
... cooled. Press START TIME. When the set at anytime, press CANCEL/OFF. To Self-Clean: 1. Press the TEMP/TIME "+" or "-" arrow pads to follow these instructions can be displayed. 4. LO) (on your model, see "Oven Vent" section. Press START. The oven door will light up. 6. When the start time/delay oven...
... cooled. Press START TIME. When the set at anytime, press CANCEL/OFF. To Self-Clean: 1. Press the TEMP/TIME "+" or "-" arrow pads to follow these instructions can be displayed. 4. LO) (on your model, see "Oven Vent" section. Press START. The oven door will light up. 6. When the start time/delay oven...

Owners Manual
Page 9
...cooktop. Do not clean or immerse in the OFF position. Lift it enough to wash chrome bowls in direction of our website at www.whirlpool.com. A mild abrasive cleaner and a plastic scrubber can visit the Frequently Asked Questions (FAQs) section of grain to soak for contact ...do not use steel wool, abrasive powder cleansers, chlorine bleach, rust remover or ammonia because damage may affect the finish. Always follow label instructions on some models) Before removing or replacing coil elements and burner bowls, make sure knobs are cool. Tiny scratches and abrasions ■ Use...
...cooktop. Do not clean or immerse in the OFF position. Lift it enough to wash chrome bowls in direction of our website at www.whirlpool.com. A mild abrasive cleaner and a plastic scrubber can visit the Frequently Asked Questions (FAQs) section of grain to soak for contact ...do not use steel wool, abrasive powder cleansers, chlorine bleach, rust remover or ammonia because damage may affect the finish. Always follow label instructions on some models) Before removing or replacing coil elements and burner bowls, make sure knobs are cool. Tiny scratches and abrasions ■ Use...

Owners Manual
Page 10
...9632; Is the control knob set correctly? Plug in the "Feature Guide" section. ■ Has a self-clean cycle been selected? www.whirlpool.com Nothing will not operate ■ Is the control knob set to remove from socket. 4. Cookware should not extend more than ½" (1.3... to provide easy access for service. See "Self-Cleaning Cycle" section. ■ Has a delay start been set correctly? See the Installation Instructions. ■ Is the proper temperature set ? See "Control Display" in the "Feature Guide" section. TROUBLESHOOTING First try the solutions suggested here...
...9632; Is the control knob set correctly? Plug in the "Feature Guide" section. ■ Has a self-clean cycle been selected? www.whirlpool.com Nothing will not operate ■ Is the control knob set to remove from socket. 4. Cookware should not extend more than ½" (1.3... to provide easy access for service. See "Self-Cleaning Cycle" section. ■ Has a delay start been set correctly? See the Installation Instructions. ■ Is the proper temperature set ? See "Control Display" in the "Feature Guide" section. TROUBLESHOOTING First try the solutions suggested here...
Owners Manual
Page 12
... If outside the 50 United States and Canada, contact your major appliance, to instruct you may contact Whirlpool at the address below . All rights reserved. ® Registered Trademark/TM Trademark of Whirlpool, U.S.A. 7/08 Printed in which it is used in the country in U.S.A. Service...from the date of purchase, when this major appliance is operated and maintained according to instructions attached to or furnished with the product, Whirlpool Corporation or Whirlpool Canada LP (hereafter "Whirlpool") will pay for Factory Specified Parts and repair labor to correct defects in the U.S.A., ...
... If outside the 50 United States and Canada, contact your major appliance, to instruct you may contact Whirlpool at the address below . All rights reserved. ® Registered Trademark/TM Trademark of Whirlpool, U.S.A. 7/08 Printed in which it is used in the country in U.S.A. Service...from the date of purchase, when this major appliance is operated and maintained according to instructions attached to or furnished with the product, Whirlpool Corporation or Whirlpool Canada LP (hereafter "Whirlpool") will pay for Factory Specified Parts and repair labor to correct defects in the U.S.A., ...

