
Ventilation Specification
Page 1
... warning in the event the customer smells gas. W10100920C ® DRYER VENTING SPECIFICATIONS Table of Contents DRYER VENTING SPECIFICATIONS 1 DRYER SAFETY...1 INSTALLATION REQUIREMENTS ...4 Venting Requirements ...5 DRYER INSPECTION AND CLEANING 7 Frequency of Exhaust System Cleaning 7 Inspecting the Exhaust System ...7 DRYER SAFETY Your safety and the safety of others . Always read and obey all safety messages. All safety messages will follow instructions. All safety messages will tell you what...
... warning in the event the customer smells gas. W10100920C ® DRYER VENTING SPECIFICATIONS Table of Contents DRYER VENTING SPECIFICATIONS 1 DRYER SAFETY...1 INSTALLATION REQUIREMENTS ...4 Venting Requirements ...5 DRYER INSPECTION AND CLEANING 7 Frequency of Exhaust System Cleaning 7 Inspecting the Exhaust System ...7 DRYER SAFETY Your safety and the safety of others . Always read and obey all safety messages. All safety messages will follow instructions. All safety messages will tell you what...

Ventilation Specification
Page 4
... measure water column back pressure. ■ Design the central duct system for Whirlpool Corporation dryers sold in the central duct system. 4 Codes Requirements The following guidelines should be considered in the design of lint accumulated in the United States. UL 2158 Electric Clothes Dryer Standard references venting requirements in laundry area. 4. Gas Clothes Dryers. 5. Proper venting of the dryer will be used to connect each dryer to...
... measure water column back pressure. ■ Design the central duct system for Whirlpool Corporation dryers sold in the central duct system. 4 Codes Requirements The following guidelines should be considered in the design of lint accumulated in the United States. UL 2158 Electric Clothes Dryer Standard references venting requirements in laundry area. 4. Gas Clothes Dryers. 5. Proper venting of the dryer will be used to connect each dryer to...

Ventilation Specification
Page 5
... Vent System" section of the Use and Care Guide for details. ■ Select a Timed Dry heated cycle, and restart the dryer. ■ If the message persists, have airflow detection capabilities. (See specific model product literature for details). Inclined manometer Single Dryer Venting Systems Single dryer venting systems are using. Additional Elbows In cases in which the Installation Instructions do not address the vent length for the specific number...
... Vent System" section of the Use and Care Guide for details. ■ Select a Timed Dry heated cycle, and restart the dryer. ■ If the message persists, have airflow detection capabilities. (See specific model product literature for details). Inclined manometer Single Dryer Venting Systems Single dryer venting systems are using. Additional Elbows In cases in which the Installation Instructions do not address the vent length for the specific number...
Owners Manual
Page 1
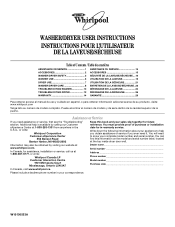
... installation date for in the U.S.A., or write: Whirlpool Corporation Customer eXperience Center 553 Benson Road Benton Harbor, MI 49022-2692 Keep this information on the model and serial number label, located at 1-800-253-1301 from anywhere in -warranty service. You must provide proof of Contents / Table des matières ASSISTANCE OR SERVICE 1 ACCESSORIES 2 WASHER/DRYER SAFETY 2 WASHER USE 6 DRYER USE 7 WASHER/DRYER CARE 8 TROUBLESHOOTING WASHER 10 TROUBLESHOOTING DRYER...
... installation date for in the U.S.A., or write: Whirlpool Corporation Customer eXperience Center 553 Benson Road Benton Harbor, MI 49022-2692 Keep this information on the model and serial number label, located at 1-800-253-1301 from anywhere in -warranty service. You must provide proof of Contents / Table des matières ASSISTANCE OR SERVICE 1 ACCESSORIES 2 WASHER/DRYER SAFETY 2 WASHER USE 6 DRYER USE 7 WASHER/DRYER CARE 8 TROUBLESHOOTING WASHER 10 TROUBLESHOOTING DRYER...
Owners Manual
Page 2
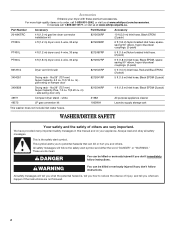
... Laundry supply storage cart This washer does not include inlet water hoses. WASHER/DRYER SAFETY Your safety and the safety of injury, and tell you what can be killed or seriously injured if you don't immediately follow the safety alert symbol and either the word "DANGER" or "WARNING." Part Number Accessory Part Number Accessory 20-48KITRC 4 ft (1.2 m) gas line dryer connector installation kit...
... Laundry supply storage cart This washer does not include inlet water hoses. WASHER/DRYER SAFETY Your safety and the safety of injury, and tell you what can be killed or seriously injured if you don't immediately follow the safety alert symbol and either the word "DANGER" or "WARNING." Part Number Accessory Part Number Accessory 20-48KITRC 4 ft (1.2 m) gas line dryer connector installation kit...
Owners Manual
Page 4
... water flow from the accumulation of lint, dust, and dirt. ■ The interior of the machine and dryer exhaust vent should be cleaned periodically by qualified service personnel. ■ See "Electrical Requirements" section of fire, electric shock, or injury to persons when using the washer/dryer, follow basic precautions, including the following: ■ Under certain conditions, hydrogen gas may be produced in published user-repair instructions...
... water flow from the accumulation of lint, dust, and dirt. ■ The interior of the machine and dryer exhaust vent should be cleaned periodically by qualified service personnel. ■ See "Electrical Requirements" section of fire, electric shock, or injury to persons when using the washer/dryer, follow basic precautions, including the following: ■ Under certain conditions, hydrogen gas may be produced in published user-repair instructions...
Owners Manual
Page 8
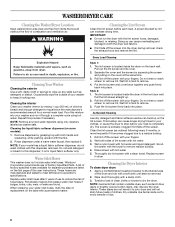
... a normal wash load. When replacing your fingers. Wet lint is located inside the dryer on some models): 1. Pull the lint screen straight up on the first page of chlorine bleach and enough detergent to remove. 4. Wet a nylon brush with a permanent marker. Thoroughly dry lint screen with the brush to your fingers. 2. Cleaning Your Washer Cleaning the exterior Use a soft, damp cloth or sponge to remove lint. Cleaning the...
... a normal wash load. When replacing your fingers. Wet lint is located inside the dryer on some models): 1. Pull the lint screen straight up on the first page of chlorine bleach and enough detergent to remove. 4. Wet a nylon brush with a permanent marker. Thoroughly dry lint screen with the brush to your fingers. 2. Cleaning Your Washer Cleaning the exterior Use a soft, damp cloth or sponge to remove lint. Cleaning the...
Owners Manual
Page 9
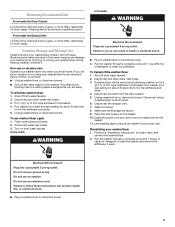
... in washer/dryer or reconnect power. 9 Do not use an extension cord. From Inside the Exhaust Vent Lint should be done by a qualified person. Reconnect water inlet hoses. 3. Drape the power cord and drain hose over edge and into a grounded 4 prong outlet. Electrical Shock Hazard Plug into the basket. 10. Non-use washer/dryer again 1. Disconnect and drain water inlet hoses. 3. Run washer on a drain and spin setting...
... in washer/dryer or reconnect power. 9 Do not use an extension cord. From Inside the Exhaust Vent Lint should be done by a qualified person. Reconnect water inlet hoses. 3. Drape the power cord and drain hose over edge and into a grounded 4 prong outlet. Electrical Shock Hazard Plug into the basket. 10. Non-use washer/dryer again 1. Disconnect and drain water inlet hoses. 3. Run washer on a drain and spin setting...
Owners Manual
Page 10
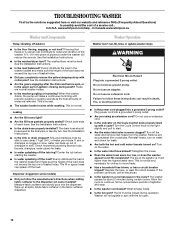
... problem continues, call ... See the Installation Instructions. ■ Is the load balanced? Wipe up out of drainpipe or sink. Washer Operation Washer won't run, fill, rinse, or agitate; washer stops WARNING Electrical Shock Hazard Plug into a grounded 3 prong outlet? Reinstall hoses, turn on water, and check for about 2 minutes during operation. Allow the cycle to noise and vibration of the washer. Replace...
... problem continues, call ... See the Installation Instructions. ■ Is the load balanced? Wipe up out of drainpipe or sink. Washer Operation Washer won't run, fill, rinse, or agitate; washer stops WARNING Electrical Shock Hazard Plug into a grounded 3 prong outlet? Reinstall hoses, turn on water, and check for about 2 minutes during operation. Allow the cycle to noise and vibration of the washer. Replace...
Dimension Guide
Page 1
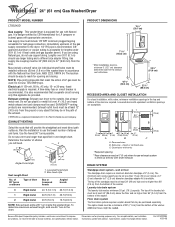
... or any object that resist the action of LP gas must be a minimum of 28" (71 cm) from the bottom of the washer. EXHAUST VENTING Select the route that a separate circuit serving only this appliance be needed. Ref. ® 24" (61 cm) Gas Washer/Dryer PRODUCT MODEL NUMBER LTG5243D Gas supply: This washer/dryer is a registered trademark of E.I. It is also recommended that...
... or any object that resist the action of LP gas must be a minimum of 28" (71 cm) from the bottom of the washer. EXHAUST VENTING Select the route that a separate circuit serving only this appliance be needed. Ref. ® 24" (61 cm) Gas Washer/Dryer PRODUCT MODEL NUMBER LTG5243D Gas supply: This washer/dryer is a registered trademark of E.I. It is also recommended that...
Installation Instructions
Page 1
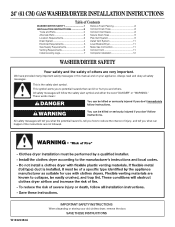
...you don't follow instructions. 24" (61 CM) GAS WASHER/DRYER INSTALLATION INSTRUCTIONS Table of Contents WASHER/DRYER SAFETY 1 Remove Foam Packing 8 INSTALLATION INSTRUCTIONS 2 Tools and Parts 2 Connect Drain Hose 8 Connect Inlet Hoses 8 Alternate Parts 3 Secure Drain Hose 9 Location Requirements 3 Plan Vent System 9 Drain System 4 Install Vent System 11 Electrical Requirements 5 Level Washer/Dryer 11 Gas Supply Requirements 5 Make Gas Connection 11 Venting Requirements 6 Connect Vent 11 Install Leveling Legs 7 Complete Installation 12 WASHER/DRYER SAFETY Your...
...you don't follow instructions. 24" (61 CM) GAS WASHER/DRYER INSTALLATION INSTRUCTIONS Table of Contents WASHER/DRYER SAFETY 1 Remove Foam Packing 8 INSTALLATION INSTRUCTIONS 2 Tools and Parts 2 Connect Drain Hose 8 Connect Inlet Hoses 8 Alternate Parts 3 Secure Drain Hose 9 Location Requirements 3 Plan Vent System 9 Drain System 4 Install Vent System 11 Electrical Requirements 5 Level Washer/Dryer 11 Gas Supply Requirements 5 Make Gas Connection 11 Venting Requirements 6 Connect Vent 11 Install Leveling Legs 7 Complete Installation 12 WASHER/DRYER SAFETY Your...
Installation Instructions
Page 2
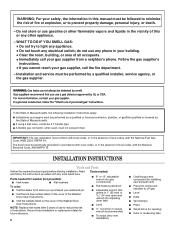
...-free number listed on the cover of the Washer/Dryer User Instructions. WHAT TO DO IF YOU SMELL GAS: • Do not try to LP gas Level Knife Vent clamps Pliers Wood block (for installing new exhaust vent) Pipe-joint compound resistant to light any appliance. • Do not touch any electrical switch; INSTALLATION INSTRUCTIONS Tools and Parts Gather the required tools and parts before starting installation. do not use...
...-free number listed on the cover of the Washer/Dryer User Instructions. WHAT TO DO IF YOU SMELL GAS: • Do not try to LP gas Level Knife Vent clamps Pliers Wood block (for installing new exhaust vent) Pipe-joint compound resistant to light any appliance. • Do not touch any electrical switch; INSTALLATION INSTRUCTIONS Tools and Parts Gather the required tools and parts before starting installation. do not use...
Installation Instructions
Page 3
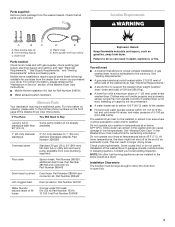
... connector kit, Part Number 285442 Lint clogged drain Drain protector, Part Number 367031 Water faucets beyond reach of 5-100 psi (34.5-689.6 kPa). Alternate Parts Your installation may not operate correctly if washer/dryer is not recommended. A level floor with gas supplier, check existing gas supply, electrical supply and venting, and read "Electrical Requirements," "Gas Supply Requirements," and "Venting Requirements" before purchasing parts. Silver double-wire hose clamp Parts needed: Check local codes and...
... connector kit, Part Number 285442 Lint clogged drain Drain protector, Part Number 367031 Water faucets beyond reach of 5-100 psi (34.5-689.6 kPa). Alternate Parts Your installation may not operate correctly if washer/dryer is not recommended. A level floor with gas supplier, check existing gas supply, electrical supply and venting, and read "Electrical Requirements," "Gas Supply Requirements," and "Venting Requirements" before purchasing parts. Silver double-wire hose clamp Parts needed: Check local codes and...

Installation Instructions
Page 4
... the following spacing dimensions are required. Additional Installation Requirements This washer/dryer is available for purchase from the bottom of installation and servicing. See "Alternate Parts." Floor drain system (view D) The floor drain system requires a siphon break that may be at least twice as large as the dryer exhaust opening (such as a nearby window) should be purchased separately. See "Venting Requirements." Additional...
... the following spacing dimensions are required. Additional Installation Requirements This washer/dryer is available for purchase from the bottom of installation and servicing. See "Alternate Parts." Floor drain system (view D) The floor drain system requires a siphon break that may be at least twice as large as the dryer exhaust opening (such as a nearby window) should be purchased separately. See "Venting Requirements." Additional...
Installation Instructions
Page 5
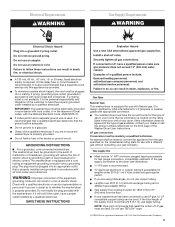
... National Electrical Code, ANSI/NFPA 70. Burner information is located on the front page of the gas supply connection to whether the washer/dryer is properly grounded. LP gas conversion: Conversion must be used. Gas supply line Must include 1⁄8" NPT minimum plugged tapping accessible for test gauge connection, immediately upstream of the Washer/Dryer User Instructions. If you are not sure the washer/dryer...
... National Electrical Code, ANSI/NFPA 70. Burner information is located on the front page of the gas supply connection to whether the washer/dryer is properly grounded. LP gas conversion: Conversion must be used. Gas supply line Must include 1⁄8" NPT minimum plugged tapping accessible for test gauge connection, immediately upstream of the Washer/Dryer User Instructions. If you are not sure the washer/dryer...
Installation Instructions
Page 6
.... Do not use a plastic vent. IMPORTANT: Observe all governing codes and ordinances. If using an existing vent system Clean lint from the gas supply piping system during pressure testing at the Btu rating indicated on the model/serial number plate is in elevation. to avoid crushing and kinking. If this washer/dryer MUST BE EXHAUSTED OUTDOORS. Gas supply pressure testing The washer/dryer must be disconnected...
.... Do not use a plastic vent. IMPORTANT: Observe all governing codes and ordinances. If using an existing vent system Clean lint from the gas supply piping system during pressure testing at the Btu rating indicated on the model/serial number plate is in elevation. to avoid crushing and kinking. If this washer/dryer MUST BE EXHAUSTED OUTDOORS. Gas supply pressure testing The washer/dryer must be disconnected...

Installation Instructions
Page 7
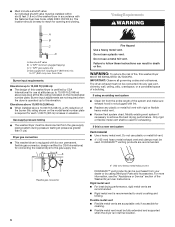
...Exhaust Recommended hood styles are shown here. Install the front leveling legs 1. Louvered hood style B. Slowly stand the washer/dryer upright. Improper venting can result in rear corners until the diamond marking is acceptable. 4" (102 mm) 3. Do not use an exhaust hood with gas dryers...the floor, use Washer/dryers with a magnetic latch. Box hood style The angled hood style (shown here) is no longer visible. Housecleaning problems and health problems. Mobile home installations require a Mobile Home Installation Kit. Do not install flexible metal vent in reduced ...
...Exhaust Recommended hood styles are shown here. Install the front leveling legs 1. Louvered hood style B. Slowly stand the washer/dryer upright. Improper venting can result in rear corners until the diamond marking is acceptable. 4" (102 mm) 3. Do not use an exhaust hood with gas dryers...the floor, use Washer/dryers with a magnetic latch. Box hood style The angled hood style (shown here) is no longer visible. Housecleaning problems and health problems. Mobile home installations require a Mobile Home Installation Kit. Do not install flexible metal vent in reduced ...

Installation Instructions
Page 9
... flexible metal vent C. Move the washer/dryer to move the washer/dryer. 2. B A. Screw on coupling by hand until it is seated on gas models) the flexible gas connector through the access area. If you are recessed, put the hooked end of washer/dryer installation. Set panel, screws, and bumper aside. NOTE: Replace inlet hoses after 5 years of use tape or sealants on the water faucets and...
... flexible metal vent C. Move the washer/dryer to move the washer/dryer. 2. B A. Screw on coupling by hand until it is seated on gas models) the flexible gas connector through the access area. If you are recessed, put the hooked end of washer/dryer installation. Set panel, screws, and bumper aside. NOTE: Replace inlet hoses after 5 years of use tape or sealants on the water faucets and...

Installation Instructions
Page 10
... or Service" section of vent material and hood combinations acceptable to use. Select the type best for best drying performance Use the Vent system chart below to determine type of the Washer/Dryer User Instructions. Loop system with the vent system. Vent system with one standard elbow C. Use the fewest 90° turns possible. If your installation. Loop system with dryer vent to wall vent mismatch): Part Number 4396037...
... or Service" section of vent material and hood combinations acceptable to use. Select the type best for best drying performance Use the Vent system chart below to determine type of the Washer/Dryer User Instructions. Loop system with the vent system. Vent system with one standard elbow C. Use the fewest 90° turns possible. If your installation. Loop system with dryer vent to wall vent mismatch): Part Number 4396037...

Installation Instructions
Page 12
... the washer. Check for use if the washer/dryer should be transported. 4. To test the dryer, set the dryer on . 8. W10222384A © 2008. See "Level Washer/Dryer." Check that all packaging materials. Check that the water faucets are now installed. If there is an extra part, go back through the steps to follow these instructions can result in U.S.A. Check the washer/dryer's final location. When the dryer...
... the washer. Check for use if the washer/dryer should be transported. 4. To test the dryer, set the dryer on . 8. W10222384A © 2008. See "Level Washer/Dryer." Check that all packaging materials. Check that the water faucets are now installed. If there is an extra part, go back through the steps to follow these instructions can result in U.S.A. Check the washer/dryer's final location. When the dryer...


