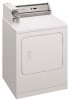
Installation Instructions
Page 5
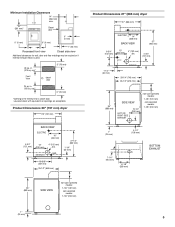
... EXHAUST 27-1/4" (692 mm) 1-1/4" (32 mm) 18-3/8" (467 mm) 25-1/2" (648 mm) 35" (889 mm) SIDE VIEW non-coin-operated models: 7-1/8" (181 mm) coin-operated models: 7-7/8" (200 mm) Product Dimensions 27" (686 mm) dryer 27" (686 mm) ELECTRIC 14" (356 mm) BACK VIEW 37" (940 mm) 6-3/4" (152 mm) 13" (330 mm) GAS 4" (102 mm) dia. 4-3/4" (121...
... EXHAUST 27-1/4" (692 mm) 1-1/4" (32 mm) 18-3/8" (467 mm) 25-1/2" (648 mm) 35" (889 mm) SIDE VIEW non-coin-operated models: 7-1/8" (181 mm) coin-operated models: 7-7/8" (200 mm) Product Dimensions 27" (686 mm) dryer 27" (686 mm) ELECTRIC 14" (356 mm) BACK VIEW 37" (940 mm) 6-3/4" (152 mm) 13" (330 mm) GAS 4" (102 mm) dia. 4-3/4" (121...
Installation Instructions
Page 15
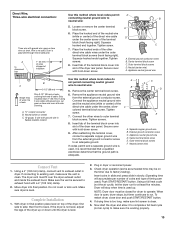
...102 mm) clamp, connect vent to outer terminal block screws. With dryer in dryer. Using a full heat cycle (not the air cycle), let the dryer run . To restart dryer, close door and push START/RESTART button. 4. Direct Wire, Three-wire electrical connection: Three wire with a 4" (102 mm) clamp. 2. ... dryer operation (some accumulated time may be closed for at least five minutes. Insert coins in slide and press slide in dryer or reconnect power. 3. Dryer will accumulate per number of coins and type of wires into final position. NOTE: Dryer door must fit over the dryer exhaust...
...102 mm) clamp, connect vent to outer terminal block screws. With dryer in dryer. Using a full heat cycle (not the air cycle), let the dryer run . To restart dryer, close door and push START/RESTART button. 4. Direct Wire, Three-wire electrical connection: Three wire with a 4" (102 mm) clamp. 2. ... dryer operation (some accumulated time may be closed for at least five minutes. Insert coins in slide and press slide in dryer or reconnect power. 3. Dryer will accumulate per number of coins and type of wires into final position. NOTE: Dryer door must fit over the dryer exhaust...


