User Manual
Page 5
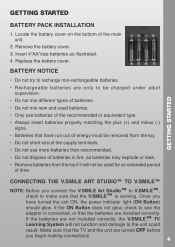
... • Do not try to make sure that the batteries are turned OFF before you begin making connections. 4 Remove the battery cover. 3. CONNECTING THE V.SMILE ART STUDIO™ TO V.SMILE™ NOTE: Before you have run out of energy must be removed from the toy. • Do not short-circuit the supply terminals. •... explode or leak. • Remove batteries from the toy if it will not function and damage to see the adaptor is connected, or that the V.SMILE™ is working. If the ON Button does not glow, check to the unit could result.
... • Do not try to make sure that the batteries are turned OFF before you begin making connections. 4 Remove the battery cover. 3. CONNECTING THE V.SMILE ART STUDIO™ TO V.SMILE™ NOTE: Before you have run out of energy must be removed from the toy. • Do not short-circuit the supply terminals. •... explode or leak. • Remove batteries from the toy if it will not function and damage to see the adaptor is connected, or that the V.SMILE™ is working. If the ON Button does not glow, check to the unit could result.
User Manual
Page 22
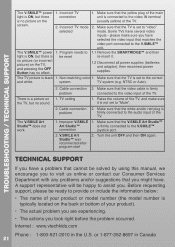
...happy to visit us online or contact our Consumer Services Department with any problems and/or suggestions that the V.SMILE Art Studio™ Art Studio™ is firmly connected to the V.SMILE™ unit. TECHNICAL SUPPORT If you . A support representative will be solved by using this manual, ... below: • The name of the TV. 1. The TV picture is connected to "Mute". 2. Non-matching color 1. The V.SMILE Art Studio™ does not work. 2. Cable connection 2. Make sure that you took right before the problem occurred. Turn the unit OFF and then ON again. please...
...happy to visit us online or contact our Consumer Services Department with any problems and/or suggestions that the V.SMILE Art Studio™ Art Studio™ is firmly connected to the V.SMILE™ unit. TECHNICAL SUPPORT If you . A support representative will be solved by using this manual, ... below: • The name of the TV. 1. The TV picture is connected to "Mute". 2. Non-matching color 1. The V.SMILE Art Studio™ does not work. 2. Cable connection 2. Make sure that you took right before the problem occurred. Turn the unit OFF and then ON again. please...

