Camera Manual
Page 1
ViviCam S137 Digital Camera User Manual © 2009-2012 Sakar International, Inc. All rights reserved. Windows and the Windows logo are the property of Microsoft Corporation. All other trademarks are registered trademarks of their respective companies.
ViviCam S137 Digital Camera User Manual © 2009-2012 Sakar International, Inc. All rights reserved. Windows and the Windows logo are the property of Microsoft Corporation. All other trademarks are registered trademarks of their respective companies.
Camera Manual
Page 2
... the Computer 60 Getting Photos and Videos from Your Camera to Your Computer 61 Get Started! ...62 Transferring Images from my Camera to my Computer Manually 62 Camera Maintenance...64 Sakar Warranty Card ...64 Technical Support ...65 Troubleshooting ...65 1
... the Computer 60 Getting Photos and Videos from Your Camera to Your Computer 61 Get Started! ...62 Transferring Images from my Camera to my Computer Manually 62 Camera Maintenance...64 Sakar Warranty Card ...64 Technical Support ...65 Troubleshooting ...65 1
Camera Manual
Page 3
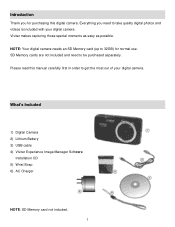
What's Included 1) Digital Camera 2) Lithium Battery 3) USB cable 4) Vivitar Experience Image Manager Software Installation CD 5) Wrist Strap 6) AC Charger NOTE: SD Memory card not included. 2 Introduction Thank you need to be purchased separately. SD ...Memory cards are not included and need to take quality digital photos and videos is included with your digital camera. Vivitar makes capturing those special moments as easy as possible. Everything you for normal use. NOTE: Your digital camera needs an SD Memory card (up to...
What's Included 1) Digital Camera 2) Lithium Battery 3) USB cable 4) Vivitar Experience Image Manager Software Installation CD 5) Wrist Strap 6) AC Charger NOTE: SD Memory card not included. 2 Introduction Thank you need to be purchased separately. SD ...Memory cards are not included and need to take quality digital photos and videos is included with your digital camera. Vivitar makes capturing those special moments as easy as possible. Everything you for normal use. NOTE: Your digital camera needs an SD Memory card (up to...
Camera Manual
Page 8
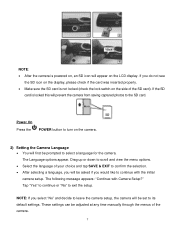
... card. Power On Press the POWER button to turn on the LCD display. The Language options appear. These settings can be adjusted at any time manually through the menus of the SD card). If you select "No" and decide to leave the camera setup, the camera will prevent the camera from...
... card. Power On Press the POWER button to turn on the LCD display. The Language options appear. These settings can be adjusted at any time manually through the menus of the SD card). If you select "No" and decide to leave the camera setup, the camera will prevent the camera from...
Camera Manual
Page 17
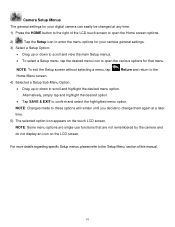
... made to these options will remain until you decide to change them again at any time. 1) Press the HOME button to the right of this manual. 16 For more details regarding specific Setup menus, please refer to the 'Setup Menu' section of the LCD touch screen to open the various options...
... made to these options will remain until you decide to change them again at any time. 1) Press the HOME button to the right of this manual. 16 For more details regarding specific Setup menus, please refer to the 'Setup Menu' section of the LCD touch screen to open the various options...
Camera Manual
Page 19
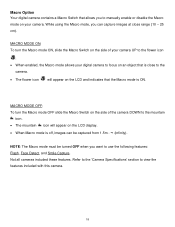
... the flower icon . When enabled, the Macro mode allows your camera. While using the Macro mode, you can be turned OFF when you to manually enable or disable the Macro mode on your digital camera to the camera. The flower icon will appear on the LCD display. When...
... the flower icon . When enabled, the Macro mode allows your camera. While using the Macro mode, you can be turned OFF when you to manually enable or disable the Macro mode on your digital camera to the camera. The flower icon will appear on the LCD display. When...
Camera Manual
Page 22
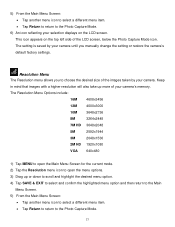
Resolution Menu The Resolution menu allows you manually change the setting or restore the camera's default factory settings. The Resolution Menu Options include: 16M 4608x3456 12M 4000x3000 10M 3648x2736 8M 3264x2448 7M HD ...
Resolution Menu The Resolution menu allows you manually change the setting or restore the camera's default factory settings. The Resolution Menu Options include: 16M 4608x3456 12M 4000x3000 10M 3648x2736 8M 3264x2448 7M HD ...
Camera Manual
Page 23
... to open the menu options. 3) Drag up more memory on the bottom of the LCD screen. The setting is saved by your camera until you manually change the setting or restore the camera's default factory settings. 22 Keep in mind that images with a higher image quality level will also take up... Mode. 6) An icon reflecting your camera until you to the right of the images taken by your camera. Quality Menu The Quality menu allows you manually change the setting or restore the camera's default factory settings. This icon appears on the top left of the LCD screen, to select the desired...
... to open the menu options. 3) Drag up more memory on the bottom of the LCD screen. The setting is saved by your camera until you manually change the setting or restore the camera's default factory settings. 22 Keep in mind that images with a higher image quality level will also take up... Mode. 6) An icon reflecting your camera until you to the right of the images taken by your camera. Quality Menu The Quality menu allows you manually change the setting or restore the camera's default factory settings. This icon appears on the top left of the LCD screen, to select the desired...
Camera Manual
Page 24
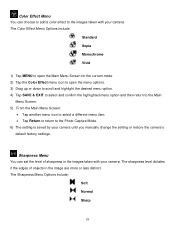
...select a different menu item. Tap Return to return to the Photo Capture Mode. 6) An icon reflecting your choice with the accompanying Vivitar Experience Image Manager application. The setting is saved by your camera until you to quickly and easily upload your camera's photos and videos to open... the Main Menu Screen for Photos) The ViviLink technology allows you manually change the setting or restore the camera's default factory settings. 23 This icon appears on the top left side of your selection displays ...
...select a different menu item. Tap Return to return to the Photo Capture Mode. 6) An icon reflecting your choice with the accompanying Vivitar Experience Image Manager application. The setting is saved by your camera until you to quickly and easily upload your camera's photos and videos to open... the Main Menu Screen for Photos) The ViviLink technology allows you manually change the setting or restore the camera's default factory settings. 23 This icon appears on the top left side of your selection displays ...
Camera Manual
Page 25
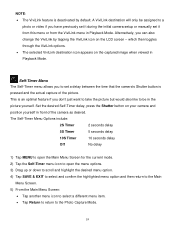
... but would also like to be assigned to the Photo Capture Mode. 24 Alternatively, you have previously set it during the initial camera setup or manually set a delay between the time that the camera's Shutter button is deactivated by tapping the ViviLink icon on your camera and position yourself in Playback...
... but would also like to be assigned to the Photo Capture Mode. 24 Alternatively, you have previously set it during the initial camera setup or manually set a delay between the time that the camera's Shutter button is deactivated by tapping the ViviLink icon on your camera and position yourself in Playback...
Camera Manual
Page 26
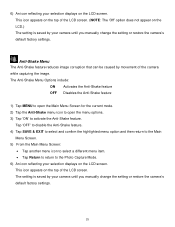
... not appear on the LCD screen. Anti-Shake Menu The Anti-Shake feature reduces image corruption that can be caused by your camera until you manually change the setting or restore the camera's default factory settings. Tap 'OFF' to disable the Anti-Shake feature. 4) Tap SAVE & EXIT to ...on the LCD.) The setting is saved by movement of the camera while capturing the image. The setting is saved by your camera until you manually change the setting or restore the camera's default factory settings. 25 This icon appears on the LCD screen. 6) An icon reflecting your selection ...
... not appear on the LCD screen. Anti-Shake Menu The Anti-Shake feature reduces image corruption that can be caused by your camera until you manually change the setting or restore the camera's default factory settings. Tap 'OFF' to disable the Anti-Shake feature. 4) Tap SAVE & EXIT to ...on the LCD.) The setting is saved by movement of the camera while capturing the image. The setting is saved by your camera until you manually change the setting or restore the camera's default factory settings. 25 This icon appears on the LCD screen. 6) An icon reflecting your selection ...
Camera Manual
Page 28
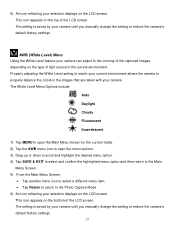
... to return to the coloring of the LCD screen. This icon appears on the LCD screen. The setting is saved by your camera until you manually change the setting or restore the camera's default factory settings. 27 The setting is saved by your camera until you... manually change the setting or restore the camera's default factory settings. 6) An icon reflecting your selection displays on the type of light source in the images ...
... to return to the coloring of the LCD screen. This icon appears on the LCD screen. The setting is saved by your camera until you manually change the setting or restore the camera's default factory settings. 27 The setting is saved by your camera until you... manually change the setting or restore the camera's default factory settings. 6) An icon reflecting your selection displays on the type of light source in the images ...
Camera Manual
Page 29
... Screen: Tap another menu icon to select a different menu item. Tap Return to return to the images taken with your camera until you manually change the setting or restore the camera's default factory settings.
... Screen: Tap another menu icon to select a different menu item. Tap Return to return to the images taken with your camera until you manually change the setting or restore the camera's default factory settings.

Camera Manual
Page 30
... is saved by your camera. The setting is needed , reduce the exposure setting (by using the negative - Exposure Menu The Light Exposure setting helps you manually change the setting or restore the camera's default factory settings. 1) Tap MENU to open the Main Menu Screen for the current mode. 2) Tap the Exposure...
... is saved by your camera. The setting is needed , reduce the exposure setting (by using the negative - Exposure Menu The Light Exposure setting helps you manually change the setting or restore the camera's default factory settings. 1) Tap MENU to open the Main Menu Screen for the current mode. 2) Tap the Exposure...
Camera Manual
Page 31
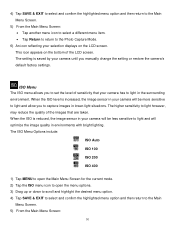
.... The setting is increased, the image sensor in your camera has to light in environments with bright lighting. ISO Menu The ISO menu allows you manually change the setting or restore the camera's default factory settings. When the ISO is reduced, the image sensor in your camera until you to set...
.... The setting is increased, the image sensor in your camera has to light in environments with bright lighting. ISO Menu The ISO menu allows you manually change the setting or restore the camera's default factory settings. When the ISO is reduced, the image sensor in your camera until you to set...
Camera Manual
Page 32
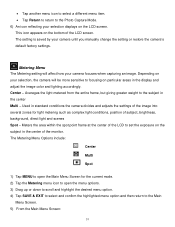
... of the LCD to the subject in the center of the monitor. Depending on your selection, the camera will affect how your camera until you manually change the setting or restore the camera's default factory settings. Metering Menu The Metering setting will be more sensitive to the Main Menu Screen. 5) From...
... of the LCD to the subject in the center of the monitor. Depending on your selection, the camera will affect how your camera until you manually change the setting or restore the camera's default factory settings. Metering Menu The Metering setting will be more sensitive to the Main Menu Screen. 5) From...

Camera Manual
Page 33
... the Photo Capture Mode. 6) An icon reflecting your selection displays on the LCD screen. Multi Shot Menu When enabled, the Multi SnapShots feature allows you manually change the setting or restore the camera's default factory settings. The setting is saved by your camera until you...
... the Photo Capture Mode. 6) An icon reflecting your selection displays on the LCD screen. Multi Shot Menu When enabled, the Multi SnapShots feature allows you manually change the setting or restore the camera's default factory settings. The setting is saved by your camera until you...
Camera Manual
Page 42
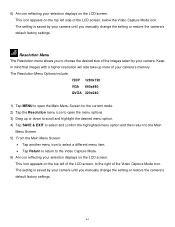
6) An icon reflecting your camera until you manually change the setting or restore the camera's default factory settings. 41 The setting is saved by your selection displays on the top left side of ... Return to return to choose the desired size of the LCD screen, below the Video Capture Mode icon. Resolution Menu The Resolution menu allows you manually change the setting or restore the camera's default factory settings. This icon appears on the LCD screen. The Resolution Menu Options include: 720P 1280x720 VGA...
6) An icon reflecting your camera until you manually change the setting or restore the camera's default factory settings. 41 The setting is saved by your selection displays on the top left side of ... Return to return to choose the desired size of the LCD screen, below the Video Capture Mode icon. Resolution Menu The Resolution menu allows you manually change the setting or restore the camera's default factory settings. This icon appears on the LCD screen. The Resolution Menu Options include: 720P 1280x720 VGA...
Camera Manual
Page 43
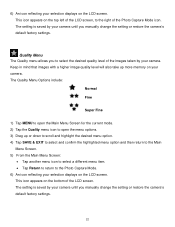
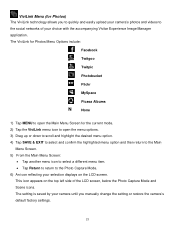
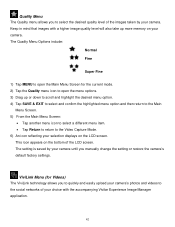
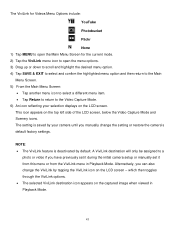
The Quality Menu Options include: Normal Fine Super Fine 1) Tap MENU to open the Main Menu Screen for Videos) The ViviLink technology allows you manually change the setting or restore the camera's default factory settings. The setting is saved by your camera. ViviLink Menu (for the current mode. 2) Tap the ... and videos to the Video Capture Mode. 6) An icon reflecting your selection displays on the LCD screen. Keep in mind that images with the accompanying Vivitar Experience Image Manager application. 42 This icon appears on your camera.
The Quality Menu Options include: Normal Fine Super Fine 1) Tap MENU to open the Main Menu Screen for Videos) The ViviLink technology allows you manually change the setting or restore the camera's default factory settings. The setting is saved by your camera. ViviLink Menu (for the current mode. 2) Tap the ... and videos to the Video Capture Mode. 6) An icon reflecting your selection displays on the LCD screen. Keep in mind that images with the accompanying Vivitar Experience Image Manager application. 42 This icon appears on your camera.
Camera Manual
Page 44
... also change the setting or restore the camera's default factory settings. Alternatively, you have previously set it during the initial camera setup or manually set it from this menu or from the ViviLink menu in Playback Mode. 43 which then toggles through the ViviLink options. The... is saved by default. A ViviLink destination will only be assigned to the Video Capture Mode. 6) An icon reflecting your camera until you manually change the ViviLink by tapping the ViviLink icon on the LCD screen - The setting is deactivated by your selection displays on the top left ...
... also change the setting or restore the camera's default factory settings. Alternatively, you have previously set it during the initial camera setup or manually set it from this menu or from the ViviLink menu in Playback Mode. 43 which then toggles through the ViviLink options. The... is saved by default. A ViviLink destination will only be assigned to the Video Capture Mode. 6) An icon reflecting your camera until you manually change the ViviLink by tapping the ViviLink icon on the LCD screen - The setting is deactivated by your selection displays on the top left ...


