
Camera Manual
Page 12
... the SET button to open the menus for the current mode. 2) Press the LEFT or RIGHT direction control buttons to scroll between the various menus for the current mode. 3) Press the UP or DOWN direction control buttons to highlight the desired menu selection. 4) Press the SET button to confirm and save the...
... the SET button to open the menus for the current mode. 2) Press the LEFT or RIGHT direction control buttons to scroll between the various menus for the current mode. 3) Press the UP or DOWN direction control buttons to highlight the desired menu selection. 4) Press the SET button to confirm and save the...

Camera Manual
Page 13
... capture pictures with your digital camera. Taking a Picture 1) While in Photo Capture mode, use the LCD display on the right side of the camera to direct the camera at the scene you press the Zoom buttons, a bar indicator moves up and down the rectangular box on the back of the LCD...
... capture pictures with your digital camera. Taking a Picture 1) While in Photo Capture mode, use the LCD display on the right side of the camera to direct the camera at the scene you press the Zoom buttons, a bar indicator moves up and down the rectangular box on the back of the LCD...

Camera Manual
Page 14
Photo Capture Mode Quick Function Buttons Your digital camera has a four-directional pad that functions as desired. 1) Hold the MODE button for 2 seconds to hide the display of the icons on the screen. 2) Press the MODE button ... menu options for Photo Capture Mode Saves your selected menu option Note: To navigate through the Menus, use the Left, Up, Right, and Down directions control buttons. Toggles between the Photo Capture Mode , Video Capture Mode and Playback Mode Exits the menu screen Zooms In Zooms Out Hide...
Photo Capture Mode Quick Function Buttons Your digital camera has a four-directional pad that functions as desired. 1) Hold the MODE button for 2 seconds to hide the display of the icons on the screen. 2) Press the MODE button ... menu options for Photo Capture Mode Saves your selected menu option Note: To navigate through the Menus, use the Left, Up, Right, and Down directions control buttons. Toggles between the Photo Capture Mode , Video Capture Mode and Playback Mode Exits the menu screen Zooms In Zooms Out Hide...
Camera Manual
Page 17
... Press the SET button to open the menus for the current mode. 2) Press the LEFT or RIGHT direction control buttons to scroll and select the Image Resolution menu. 3) Press the UP or DOWN direction control buttons to scroll through the menu options. 4) Press the SET button to select and save the ... 1) Press the SET button to open the menus for the current mode. 2) Press the LEFT or RIGHT direction control buttons to scroll and select the Scene menu. 3) Press the UP or DOWN direction control buttons to scroll through the menu options. 4) Press the SET button to select and save the desired...
... Press the SET button to open the menus for the current mode. 2) Press the LEFT or RIGHT direction control buttons to scroll and select the Image Resolution menu. 3) Press the UP or DOWN direction control buttons to scroll through the menu options. 4) Press the SET button to select and save the ... 1) Press the SET button to open the menus for the current mode. 2) Press the LEFT or RIGHT direction control buttons to scroll and select the Scene menu. 3) Press the UP or DOWN direction control buttons to scroll through the menu options. 4) Press the SET button to select and save the desired...
Camera Manual
Page 18
... Press the SET button to open the menus for the current mode. 2) Press the LEFT or RIGHT direction control buttons to scroll and select the Image Quality menu. 3) Press the UP or DOWN direction control buttons to scroll through the menu options. 17 Keep in mind that this setting will be saved...1) Press the SET button to open the menus for the current mode. 2) Press the LEFT or RIGHT direction control buttons to scroll and select the Self-Timer menu. 3) Press the UP or DOWN direction control buttons to set the desired Self-Timer delay, press the Shutter button on the LCD screen. 9) ...
... Press the SET button to open the menus for the current mode. 2) Press the LEFT or RIGHT direction control buttons to scroll and select the Image Quality menu. 3) Press the UP or DOWN direction control buttons to scroll through the menu options. 17 Keep in mind that this setting will be saved...1) Press the SET button to open the menus for the current mode. 2) Press the LEFT or RIGHT direction control buttons to scroll and select the Self-Timer menu. 3) Press the UP or DOWN direction control buttons to set the desired Self-Timer delay, press the Shutter button on the LCD screen. 9) ...
Camera Manual
Page 19
.... 1) Press the SET button to open the menus for the current mode. 2) Press the LEFT or RIGHT direction control buttons to scroll and select the Anti-Shake menu. 3) Press the UP or DOWN direction control buttons to scroll through the menu options. 4) Press the SET button to select and save the desired...
.... 1) Press the SET button to open the menus for the current mode. 2) Press the LEFT or RIGHT direction control buttons to scroll and select the Anti-Shake menu. 3) Press the UP or DOWN direction control buttons to scroll through the menu options. 4) Press the SET button to select and save the desired...

Camera Manual
Page 20
... the camera and the face must hold the pose for the current mode. 2) Press the LEFT or RIGHT direction control buttons to scroll and select the Face Detect menu. 3) Press the UP or DOWN direction control buttons to scroll through the menu options. 4) Press the SET button to select and save the...
... the camera and the face must hold the pose for the current mode. 2) Press the LEFT or RIGHT direction control buttons to scroll and select the Face Detect menu. 3) Press the UP or DOWN direction control buttons to scroll through the menu options. 4) Press the SET button to select and save the...
Camera Manual
Page 21
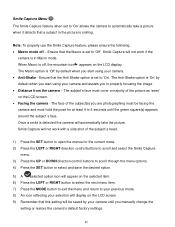
...;. The subject‟s face must hold the pose for the current mode. 2) Press the LEFT or RIGHT direction control buttons to scroll and select the Smile Capture menu. 3) Press the UP or DOWN direction control buttons to scroll through the menu options. 4) Press the SET button to select and save the desired...
...;. The subject‟s face must hold the pose for the current mode. 2) Press the LEFT or RIGHT direction control buttons to scroll and select the Smile Capture menu. 3) Press the UP or DOWN direction control buttons to scroll through the menu options. 4) Press the SET button to select and save the desired...

Camera Manual
Page 22
... indicates that are taken with your camera. 1) Press the SET button to open the menus for the current mode. 2) Press the LEFT or RIGHT direction control buttons to scroll and select the White Balance menu. 21 To return to match your current environment will be saved by your camera until...;s default factory settings. When Macro mode is ON. will appear on the 2) Press the LEFT or RIGHT direction control buttons to scroll and select the Macro menu. 3) Press the UP or DOWN direction control buttons to scroll through the menu options. 4) Press the SET button to select and save the desired...
... indicates that are taken with your camera. 1) Press the SET button to open the menus for the current mode. 2) Press the LEFT or RIGHT direction control buttons to scroll and select the White Balance menu. 21 To return to match your current environment will be saved by your camera until...;s default factory settings. When Macro mode is ON. will appear on the 2) Press the LEFT or RIGHT direction control buttons to scroll and select the Macro menu. 3) Press the UP or DOWN direction control buttons to scroll through the menu options. 4) Press the SET button to select and save the desired...

Camera Manual
Page 23
... Press the SET button to open the menus for the current mode. 2) Press the LEFT or RIGHT direction control buttons to scroll and select the Color Effect menu. 3) Press the UP or DOWN direction control buttons to scroll through the menu options. 4) Press the SET button to select and save the ...Press the SET button to open the menus for the current mode. 2) Press the LEFT or RIGHT direction control buttons to scroll and select the Multi SnapShots menu. 22 3) Press the UP or DOWN direction control buttons to scroll through the menu options. 4) Press the SET button to select and save the...
... Press the SET button to open the menus for the current mode. 2) Press the LEFT or RIGHT direction control buttons to scroll and select the Color Effect menu. 3) Press the UP or DOWN direction control buttons to scroll through the menu options. 4) Press the SET button to select and save the ...Press the SET button to open the menus for the current mode. 2) Press the LEFT or RIGHT direction control buttons to scroll and select the Multi SnapShots menu. 22 3) Press the UP or DOWN direction control buttons to scroll through the menu options. 4) Press the SET button to select and save the...

Camera Manual
Page 24
3) Press the UP or DOWN direction control buttons to scroll through the menu options. 4) Press the SET button to select and save the desired option. 5) A selected option icon will appear on .... 1) Press the SET button to open the menus for the current mode. 2) Press the LEFT or RIGHT direction control buttons to scroll and select the Image Sharpness menu. 3) Press the UP or DOWN direction control buttons to scroll through the menu options. 4) Press the SET button to select and save the desired...
3) Press the UP or DOWN direction control buttons to scroll through the menu options. 4) Press the SET button to select and save the desired option. 5) A selected option icon will appear on .... 1) Press the SET button to open the menus for the current mode. 2) Press the LEFT or RIGHT direction control buttons to scroll and select the Image Sharpness menu. 3) Press the UP or DOWN direction control buttons to scroll through the menu options. 4) Press the SET button to select and save the desired...

Camera Manual
Page 25
... Press the SET button to open the menus for the current mode. 2) Press the LEFT or RIGHT direction control buttons to scroll and select the Light Exposure menu. 3) Press the UP or DOWN direction control buttons to scroll through the menu options. 4) Press the SET button to capture images in lower-... 1) Press the SET button to open the menus for the current mode. 2) Press the LEFT or RIGHT direction control buttons to scroll and select the ISO menu. 3) Press the UP or DOWN direction control buttons to scroll through the menu options. 4) Press the SET button to select and save the desired...
... Press the SET button to open the menus for the current mode. 2) Press the LEFT or RIGHT direction control buttons to scroll and select the Light Exposure menu. 3) Press the UP or DOWN direction control buttons to scroll through the menu options. 4) Press the SET button to capture images in lower-... 1) Press the SET button to open the menus for the current mode. 2) Press the LEFT or RIGHT direction control buttons to scroll and select the ISO menu. 3) Press the UP or DOWN direction control buttons to scroll through the menu options. 4) Press the SET button to select and save the desired...
Camera Manual
Page 26
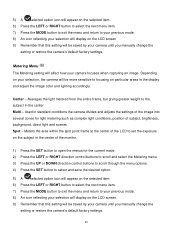
... Press the SET button to open the menus for the current mode. 2) Press the LEFT or RIGHT direction control buttons to scroll and select the Metering menu. 3) Press the UP or DOWN direction control buttons to scroll through the menu options. 4) Press the SET button to select and save the ... setting will be saved by your camera focuses when capturing an image. Depending on the subject in the center of subject, brightness, background, direct light and scenes Spot - Metering Menu The Metering setting will be saved by your camera until you manually change the setting or restore the ...
... Press the SET button to open the menus for the current mode. 2) Press the LEFT or RIGHT direction control buttons to scroll and select the Metering menu. 3) Press the UP or DOWN direction control buttons to scroll through the menu options. 4) Press the SET button to select and save the ... setting will be saved by your camera focuses when capturing an image. Depending on the subject in the center of subject, brightness, background, direct light and scenes Spot - Metering Menu The Metering setting will be saved by your camera until you manually change the setting or restore the ...

Camera Manual
Page 27
Language Menu You can also disable the timestamp for the current mode. 2) Press the LEFT or RIGHT direction control buttons to scroll and select the Language menu. 3) Press the UP or DOWN direction control buttons to scroll through the menu options. 4) Press the SET button to select and save the desired option... the SET button to open the menus for the current mode. 2) Press the LEFT or RIGHT direction control buttons to scroll and select the Date/Time menu. 3) Press the UP or DOWN direction control buttons to scroll through the menu options. 4) Press the SET button to select and save the...
Language Menu You can also disable the timestamp for the current mode. 2) Press the LEFT or RIGHT direction control buttons to scroll and select the Language menu. 3) Press the UP or DOWN direction control buttons to scroll through the menu options. 4) Press the SET button to select and save the desired option... the SET button to open the menus for the current mode. 2) Press the LEFT or RIGHT direction control buttons to scroll and select the Date/Time menu. 3) Press the UP or DOWN direction control buttons to scroll through the menu options. 4) Press the SET button to select and save the...
Camera Manual
Page 28
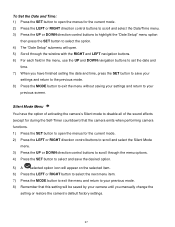
...to disable all of the sound effects (except for the current mode. 2) Press the LEFT or RIGHT direction control buttons to scroll and select the Silent Mode menu. 3) Press the UP or DOWN direction control buttons to scroll through the window with the RIGHT and LEFT navigation buttons. 6) For each field ... Press the SET button to open the menus for the current mode. 2) Press the LEFT or RIGHT direction control buttons to scroll and select the Date/Time menu. 3) Press the UP or DOWN direction control buttons to highlight the "Date Setup" menu option then press the SET button to select the option...
...to disable all of the sound effects (except for the current mode. 2) Press the LEFT or RIGHT direction control buttons to scroll and select the Silent Mode menu. 3) Press the UP or DOWN direction control buttons to scroll through the window with the RIGHT and LEFT navigation buttons. 6) For each field ... Press the SET button to open the menus for the current mode. 2) Press the LEFT or RIGHT direction control buttons to scroll and select the Date/Time menu. 3) Press the UP or DOWN direction control buttons to highlight the "Date Setup" menu option then press the SET button to select the option...

Camera Manual
Page 29
...Press the SET button to open the menus for the current mode. 2) Press the LEFT or RIGHT direction control buttons to scroll and select the Auto Power Off menu. 3) Press the UP or DOWN direction control buttons to scroll through the menu options. 4) Press the SET button to select the next menu... . 1) Press the SET button to open the menus for the current mode. 2) Press the LEFT or RIGHT direction control buttons to scroll and select the Frequency menu. 3) Press the UP or DOWN direction control buttons to scroll through the menu options. 4) Press the SET button to select and save the desired...
...Press the SET button to open the menus for the current mode. 2) Press the LEFT or RIGHT direction control buttons to scroll and select the Auto Power Off menu. 3) Press the UP or DOWN direction control buttons to scroll through the menu options. 4) Press the SET button to select the next menu... . 1) Press the SET button to open the menus for the current mode. 2) Press the LEFT or RIGHT direction control buttons to scroll and select the Frequency menu. 3) Press the UP or DOWN direction control buttons to scroll through the menu options. 4) Press the SET button to select and save the desired...

Camera Manual
Page 30
...Press the SET button to open the menus for the current mode. 2) Press the LEFT or RIGHT direction control buttons to scroll and select the Format Memory Card menu. 3) Press the UP or DOWN direction control buttons to highlight the menu options. 4) To exit without formatting. Select "Yes" ... settings to the Factory Default Settings. 1) Press the SET button to open the menus for the current mode. 2) Press the LEFT or RIGHT direction control buttons to scroll and select the Firmware menu. 3) The "Default Setting" is currently on your camera's memory card. This option will delete...
...Press the SET button to open the menus for the current mode. 2) Press the LEFT or RIGHT direction control buttons to scroll and select the Format Memory Card menu. 3) Press the UP or DOWN direction control buttons to highlight the menu options. 4) To exit without formatting. Select "Yes" ... settings to the Factory Default Settings. 1) Press the SET button to open the menus for the current mode. 2) Press the LEFT or RIGHT direction control buttons to scroll and select the Firmware menu. 3) The "Default Setting" is currently on your camera's memory card. This option will delete...

Camera Manual
Page 32
...images on your digital video recorder‟s memory card until you find the image you can use the direction buttons to Zoom In and magnify the selected photo. Use the UP / DOWN / LEFT / RIGHT direction buttons to open the Playback Mode. Viewing Photos on Your Camera 1) Select your Photo: ...Once in Playback mode, press LEFT or RIGHT direction buttons to scroll through the images on your camera will be in the Thumbnail View. 2) Use the UP / DOWN / LEFT / RIGHT direction buttons to scroll and select the image you wish to view. 3) Press the SET ...
...images on your digital video recorder‟s memory card until you find the image you can use the direction buttons to Zoom In and magnify the selected photo. Use the UP / DOWN / LEFT / RIGHT direction buttons to open the Playback Mode. Viewing Photos on Your Camera 1) Select your Photo: ...Once in Playback mode, press LEFT or RIGHT direction buttons to scroll through the images on your camera will be in the Thumbnail View. 2) Use the UP / DOWN / LEFT / RIGHT direction buttons to scroll and select the image you wish to view. 3) Press the SET ...

Camera Manual
Page 33
... Slide Show, press any button) Right Displays the NEXT image Down ViviLink - Photo Playback Mode Quick Function Buttons Your digital camera has a four-directional pad that appear in the Thumbnail View: press the SET button Opens the menu options for Photos menu Other W/Zoom out SET Opens... Thumbnail View To Navigate in the Thumbnail View: press the UP / DOWN / LEFT / RIGHT direction buttons To select a JPG in your selected menu option Note: To navigate through the Menus, use the Left, Up, Right, and...
... Slide Show, press any button) Right Displays the NEXT image Down ViviLink - Photo Playback Mode Quick Function Buttons Your digital camera has a four-directional pad that appear in the Thumbnail View: press the SET button Opens the menu options for Photos menu Other W/Zoom out SET Opens... Thumbnail View To Navigate in the Thumbnail View: press the UP / DOWN / LEFT / RIGHT direction buttons To select a JPG in your selected menu option Note: To navigate through the Menus, use the Left, Up, Right, and...
Camera Manual
Page 34
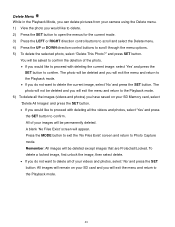
... delete. 2) Press the SET button to open the menus for the current mode. 3) Press the LEFT or RIGHT direction control buttons to scroll and select the Delete menu. 4) Press the UP or DOWN direction control buttons to confirm. All of the photo. If you will exit the menu and return to...
... delete. 2) Press the SET button to open the menus for the current mode. 3) Press the LEFT or RIGHT direction control buttons to scroll and select the Delete menu. 4) Press the UP or DOWN direction control buttons to confirm. All of the photo. If you will exit the menu and return to...