
Camera Manual
Page 2
... 4 Computer System Requirements for Macintosh 5 A Quick Look at your Digital Video Camera 6 Preparing Your Camera for Use 7 Inserting an SD Memory Card 8 DVR Function Control ...10 Install the Vivitar Experience Image Manager Software 35 Connect your camera to the computer 39 Get photos and videos from your camera to your computer 39 Get started! ...41 Transfer media from...
... 4 Computer System Requirements for Macintosh 5 A Quick Look at your Digital Video Camera 6 Preparing Your Camera for Use 7 Inserting an SD Memory Card 8 DVR Function Control ...10 Install the Vivitar Experience Image Manager Software 35 Connect your camera to the computer 39 Get photos and videos from your camera to your computer 39 Get started! ...41 Transfer media from...
Camera Manual
Page 3
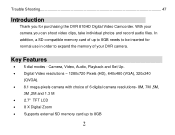
In addition, a SD compatible memory card of up to 8GB 2 Camera, Video, Audio, Playback and Set Up. Digital Video resolutions - 1280x720 Pixels (HD), 640x480 (VGA), 320x240 (QVGA). 8.1 mega-pixels camera with choice of 6 digital camera resolutions- 8M, 7M ,5M, 3M ,2M and 1.3 M ...; 8 X Digital Zoom Supports external SD memory card up to 8GB needs to be inserted for purchasing the DVR 810HD Digital Video Camcorder. With your DVR camera. Key Features 5 dial modes - Trouble Shooting...47 Introduction Thank you for normal use in order to expand...
In addition, a SD compatible memory card of up to 8GB 2 Camera, Video, Audio, Playback and Set Up. Digital Video resolutions - 1280x720 Pixels (HD), 640x480 (VGA), 320x240 (QVGA). 8.1 mega-pixels camera with choice of 6 digital camera resolutions- 8M, 7M ,5M, 3M ,2M and 1.3 M ...; 8 X Digital Zoom Supports external SD memory card up to 8GB needs to be inserted for purchasing the DVR 810HD Digital Video Camcorder. With your DVR camera. Key Features 5 dial modes - Trouble Shooting...47 Introduction Thank you for normal use in order to expand...
Camera Manual
Page 4
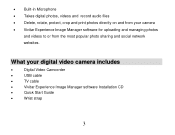
What your camera Vivitar Experience Image Manager software for uploading and managing photos and videos to or from the most popular photo sharing and social network websites. Built-in Microphone Takes digital photos, videos and record audio files Delete, rotate, protect, crop and print photos directly on and from your digital video camera includes Digital Video Camcorder USB cable TV cable Vivitar Experience Image Manager software Installation CD Quick Start Guide Wrist strap 3
What your camera Vivitar Experience Image Manager software for uploading and managing photos and videos to or from the most popular photo sharing and social network websites. Built-in Microphone Takes digital photos, videos and record audio files Delete, rotate, protect, crop and print photos directly on and from your digital video camera includes Digital Video Camcorder USB cable TV cable Vivitar Experience Image Manager software Installation CD Quick Start Guide Wrist strap 3

Camera Manual
Page 9
...the number of up to your computer. Remove the batteries from the camera all photos and videos clips in limited built-in memory will be lost . Limited internal memory is provided in the DVR when you change your batteries. We strongly recommend downloading your photos ...and videos regularly to 8GB (not included) is needed for normal use and should be inserted into your DV camera. Note: On removing the batteries from the DVR camera when not in use for an extended period. All the media...
...the number of up to your computer. Remove the batteries from the camera all photos and videos clips in limited built-in memory will be lost . Limited internal memory is provided in the DVR when you change your batteries. We strongly recommend downloading your photos ...and videos regularly to 8GB (not included) is needed for normal use and should be inserted into your DV camera. Note: On removing the batteries from the DVR camera when not in use for an extended period. All the media...
Camera Manual
Page 12
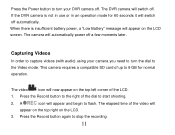
...use or in an operation mode for normal operation. The video icon will now appear on the top left corner of the video will automatically power off . Press the Record button again to the Video mode. If the DVR camera is insufficient battery power, a "Low Battery" message will... switch off a few moments later. This camera requires a compatible SD card of the dial to start shooting. 2. The DVR camera will appear on the LCD. 3. Press the...
...use or in an operation mode for normal operation. The video icon will now appear on the top left corner of the video will automatically power off . Press the Record button again to the Video mode. If the DVR camera is insufficient battery power, a "Low Battery" message will... switch off a few moments later. This camera requires a compatible SD card of the dial to start shooting. 2. The DVR camera will appear on the LCD. 3. Press the...

Camera Manual
Page 13
... the better the quality of the camera is full, a "Disk Full" message will be used for normal use. 6. The recorded file will flash on the LCD screen when you to the PC view them using Quick Time and Windows Media Player. 4. During shooting the video you can view the AVI files... there are explained in AVI format. As the internal memory of the video, however higher quality videos use up to shoot further videos. To enter the Setup options for Video mode press on the OK button on your video. When the internal memory is limited it should be saved in detail below. 12 The...
... the better the quality of the camera is full, a "Disk Full" message will be used for normal use. 6. The recorded file will flash on the LCD screen when you to the PC view them using Quick Time and Windows Media Player. 4. During shooting the video you can view the AVI files... there are explained in AVI format. As the internal memory of the video, however higher quality videos use up to shoot further videos. To enter the Setup options for Video mode press on the OK button on your video. When the internal memory is limited it should be saved in detail below. 12 The...

Camera Manual
Page 18
...Either download the photo to your computer using the Vivitar Experience Image Manager software as described below in camera mode, you attempt to press the Shutter button to the camera mode. 17 Delete last file While in the section "Transfer photos and videos to your computer" and thereafter delete them from... your choice and revert to take up more photos and videos 6. A Delete message appears on the LCD screen...
...Either download the photo to your computer using the Vivitar Experience Image Manager software as described below in camera mode, you attempt to press the Shutter button to the camera mode. 17 Delete last file While in the section "Transfer photos and videos to your computer" and thereafter delete them from... your choice and revert to take up more photos and videos 6. A Delete message appears on the LCD screen...
Camera Manual
Page 28
... 3, select "Unlock one of Lock One/Lock All/Unlock One/Unlock All. 4. delete, rotate, protect, crop or print. Rotate You can protect your photos/videos from accidental deletion. 1. Press the OK button to select the Protect option. 3. Press the Right/Left joystick button to confirm, save and exit. Select a ...still photo (an icon will show on the camera 1. Press the OK button. 2. You now have the option to confirm, save and exit. 27 Press the OK button to edit these photos -
... 3, select "Unlock one of Lock One/Lock All/Unlock One/Unlock All. 4. delete, rotate, protect, crop or print. Rotate You can protect your photos/videos from accidental deletion. 1. Press the OK button to select the Protect option. 3. Press the Right/Left joystick button to confirm, save and exit. Select a ...still photo (an icon will show on the camera 1. Press the OK button. 2. You now have the option to confirm, save and exit. 27 Press the OK button to edit these photos -
Camera Manual
Page 29
...button to delete the currently selected image) or ALL (delete all the unprotected photos and videos that are currently recorded on the memory card at once. 1. Press the Right/Left joystick button to confirm, save your camera to print. 2. Press the OK button. 28 Press the OK button to select the... Delete option. 3. Press the OK button. 2. You can delete unwanted photos and videos at any time to free up memory. Delete You can delete one...
...button to delete the currently selected image) or ALL (delete all the unprotected photos and videos that are currently recorded on the memory card at once. 1. Press the Right/Left joystick button to confirm, save your camera to print. 2. Press the OK button. 28 Press the OK button to select the... Delete option. 3. Press the OK button. 2. You can delete unwanted photos and videos at any time to free up memory. Delete You can delete one...
Camera Manual
Page 32
... to select the Format option. 3. YY/MM/DD; Press the OK button to the LCD screen. Hide. 4. If you selected Hide in both the camera mode and video mode. Press the Up/Down joystick button to select "Yes" or "No". 7. Note: the Date format will be displayed on the LCD screen in...
... to select the Format option. 3. YY/MM/DD; Press the OK button to the LCD screen. Hide. 4. If you selected Hide in both the camera mode and video mode. Press the Up/Down joystick button to select "Yes" or "No". 7. Note: the Date format will be displayed on the LCD screen in...
Camera Manual
Page 33
... Time/Date options by pressing the Right/Left joystick button. 6. Note: the Time format will be displayed on the LCD screen in both the camera mode and video mode. Press the Right/Left joystick button and select the Date/Time Setting option. 3. Press the Right/Left joystick button and select the Time...
... Time/Date options by pressing the Right/Left joystick button. 6. Note: the Time format will be displayed on the LCD screen in both the camera mode and video mode. Press the Right/Left joystick button and select the Date/Time Setting option. 3. Press the Right/Left joystick button and select the Time...
Camera Manual
Page 34
... the Left/Right joystick button to confirm, save and exit. Note: the Date/Time format will be displayed on the LCD screen in both the camera mode and video mode. Press the Right/Left joystick button to select the TV Out option. 33 Press the OK button to select the Confirm option. 8. 7.
... the Left/Right joystick button to confirm, save and exit. Note: the Date/Time format will be displayed on the LCD screen in both the camera mode and video mode. Press the Right/Left joystick button to select the TV Out option. 33 Press the OK button to select the Confirm option. 8. 7.

Camera Manual
Page 38
Please wait while the application is being installed on your language and click "Next" to open the next window. 6. Click the "How to transfer photos and videos from the list and click "Next" to open the next window. 7. Click "Next" to confirm your camera model from my camera to install the application. 8. Select your camera model selection and to my computer" button for instructions. 5. If you have internet access, the "Choose your language" window opens, choose your computer. 37 camera.
Please wait while the application is being installed on your language and click "Next" to open the next window. 6. Click the "How to transfer photos and videos from the list and click "Next" to open the next window. 7. Click "Next" to confirm your camera model from my camera to install the application. 8. Select your camera model selection and to my computer" button for instructions. 5. If you have internet access, the "Choose your language" window opens, choose your computer. 37 camera.

Camera Manual
Page 40
The first time you connect the device to the computer you will cancel the transfer of any files on . 3. Doing so will have to your computer. 2. Do not disconnect the cable during transfer. Connect your camera to be inserted. Turn your camera to wait a few seconds until the computer recognizes the device. Get photos and videos from the Main menu. 39 Select the "Get images" button from your camera to your computer An SD card needs to the computer 1. Use the USB cable that came with your camera to connect your camera on their way to your computer. 1.
The first time you connect the device to the computer you will cancel the transfer of any files on . 3. Doing so will have to your computer. 2. Do not disconnect the cable during transfer. Connect your camera to be inserted. Turn your camera to wait a few seconds until the computer recognizes the device. Get photos and videos from the Main menu. 39 Select the "Get images" button from your camera to your computer An SD card needs to the computer 1. Use the USB cable that came with your camera to connect your camera on their way to your computer. 1.
Camera Manual
Page 42
...Select to remove the media files from one social network to your camera is complete. 9. Select a location on the bottom left showing the number of media files downloading to another. The photo and video files that you can select to the selected folder and albums ready ...Edit images using automatic and manual tools. If your computer. Using the Vivitar Experience Image Manager, you selected are now downloaded to your computer to download photos, videos or both. 4. You can upload and manage photos and videos to albums if desired. 7. A message appears when the download is...
...Select to remove the media files from one social network to your camera is complete. 9. Select a location on the bottom left showing the number of media files downloading to another. The photo and video files that you can select to the selected folder and albums ready ...Edit images using automatic and manual tools. If your computer. Using the Vivitar Experience Image Manager, you selected are now downloaded to your computer to download photos, videos or both. 4. You can upload and manage photos and videos to albums if desired. 7. A message appears when the download is...
Camera Manual
Page 43
...files. 4. Select the media and copy the files from this folder into the Videos/My Videos folder. 6. Transfer media from my camera to your computer. Use the USB cable that came with your camera to connect your camera to use the Vivitar Experience Image Manager open the Help file or click the "Take the Tour" ... Do not disconnect the cable during transfer. Use the USB cable that you copy the images into the Pictures/My Pictures folder and the videos into your computer. 2. Transfer media from my camera to view files" and click OK. 3. We recommend that came with your...
...files. 4. Select the media and copy the files from this folder into the Videos/My Videos folder. 6. Transfer media from my camera to your computer. Use the USB cable that came with your camera to connect your camera to use the Vivitar Experience Image Manager open the Help file or click the "Take the Tour" ... Do not disconnect the cable during transfer. Use the USB cable that you copy the images into the Pictures/My Pictures folder and the videos into your computer. 2. Transfer media from my camera to view files" and click OK. 3. We recommend that came with your...
Camera Manual
Page 44
Do not disconnect the cable during transfer. Products that you copy the images into the Pictures folder and the videos into your computer. Sakar Warranty Card This warranty covers for a period of one year. 43 Optionally, select the files and choose Copy from ...the Edit menu. 5. Your product will cancel the transfer of Your Digital Camera The digital camera is not transferable. Click on the desktop. 3. We recommend that fail to function properly UNDER NORMAL USAGE, due to view the media files. 4....
Do not disconnect the cable during transfer. Products that you copy the images into the Pictures folder and the videos into your computer. Sakar Warranty Card This warranty covers for a period of one year. 43 Optionally, select the files and choose Copy from ...the Edit menu. 5. Your product will cancel the transfer of Your Digital Camera The digital camera is not transferable. Click on the desktop. 3. We recommend that fail to function properly UNDER NORMAL USAGE, due to view the media files. 4....


