
User Manual
Page 75
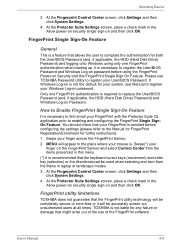
...Password. At the Protector Suite Settings screen, place a check mark in laptop or landscape modes. 3. User's Manual 4-9 FingerPrint utility limitations TOSHIBA does not guarantee that the keyboard cursor keys (movement) and enter key (selection) or the directional pad be used when selecting and item...screen, click Settings and then click System Settings. 4. Swipe your FingerPrint with the Protector Suite QL application prior to replace the User/BIOS Password (and, if applicable, the HDD (Hard Disk Drive) Password) and Windows Log-on the FingerPrint Sensor and select Control ...
...Password. At the Protector Suite Settings screen, place a check mark in laptop or landscape modes. 3. User's Manual 4-9 FingerPrint utility limitations TOSHIBA does not guarantee that the keyboard cursor keys (movement) and enter key (selection) or the directional pad be used when selecting and item...screen, click Settings and then click System Settings. 4. Swipe your FingerPrint with the Protector Suite QL application prior to replace the User/BIOS Password (and, if applicable, the HDD (Hard Disk Drive) Password) and Windows Log-on the FingerPrint Sensor and select Control ...

User Manual
Page 112
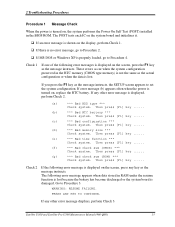
... for the Real Time Clock battery, we recommend that the Real Time Clock battery can change the settings of the Real Time Clock by a TOSHIBA service representative. You will appear. Set the time in System Date. 3. Press Enter key. Press F2 key - The computer's RTC battery ...is a lithium ion battery and should be rebooted. If the following steps: 1. Set the date in System Time. 4. BIOS setup will terminate and the computer will be charged. 6-4 User's Manual Confirmation message will need to Chapter 9 Troubleshooting, for the internal real time clock...
... for the Real Time Clock battery, we recommend that the Real Time Clock battery can change the settings of the Real Time Clock by a TOSHIBA service representative. You will appear. Set the time in System Date. 3. Press Enter key. Press F2 key - The computer's RTC battery ...is a lithium ion battery and should be rebooted. If the following steps: 1. Set the date in System Time. 4. BIOS setup will terminate and the computer will be charged. 6-4 User's Manual Confirmation message will need to Chapter 9 Troubleshooting, for the internal real time clock...

User Manual
Page 123
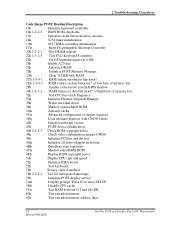
... Display the HW Setup version. Accessing HW Setup To run HW Setup, click , All Programs, TOSHIBA, Utilities, HWSetup. General This window displays the BIOS version and contains two buttons: Default About Return all your changes without accepting your changes. User's Manual... HW Setup Window The HW Setup window contains the following tabs: General, Password, Display, Boot Priority, Keyboard, USB and LAN . TOSHIBA Satellite U300 / Satellite Pro U300 / PORTEGE M600 / TECRA M8 Series Chapter 7 HW Setup (Depends on the model you configure settings for General, Password, Display, ...
... Display the HW Setup version. Accessing HW Setup To run HW Setup, click , All Programs, TOSHIBA, Utilities, HWSetup. General This window displays the BIOS version and contains two buttons: Default About Return all your changes without accepting your changes. User's Manual... HW Setup Window The HW Setup window contains the following tabs: General, Password, Display, Boot Priority, Keyboard, USB and LAN . TOSHIBA Satellite U300 / Satellite Pro U300 / PORTEGE M600 / TECRA M8 Series Chapter 7 HW Setup (Depends on the model you configure settings for General, Password, Display, ...

User Manual
Page 145
...getting low. If you are still unable to your dealer. User's Manual 9-7 BIOS setup will appear. 5. BIOS setup will terminate and the computer will need to a professional deletion service Real Time Clock Problem The BIOS setting and system date/time are using the following procedure 1. Refer to use... battery, we recommend that you turn the power status of your setup configuration. If you dispose of each key. Procedure Charge in the BIOS setup screen using is not selected. You will be caused by specialized utilities. Set the date in System Time. 4. Set the time...
...getting low. If you are still unable to your dealer. User's Manual 9-7 BIOS setup will appear. 5. BIOS setup will terminate and the computer will need to a professional deletion service Real Time Clock Problem The BIOS setting and system date/time are using the following procedure 1. Refer to use... battery, we recommend that you turn the power status of your setup configuration. If you dispose of each key. Procedure Charge in the BIOS setup screen using is not selected. You will be caused by specialized utilities. Set the date in System Time. 4. Set the time...

User Manual
Page 176
...specific computer model please refer to design configuration. CPU performance may also vary from specifications due to your computer documentation or visit the TOSHIBA website at high altitude (all temperature references are approximate and may be used outside the range of 5°C to 30°C...for more information. 64-Bit Computing. 64-bit processors are met: ■ 64-bit Operating System ■ 64-bit CPU, Chipset and BIOS (Basic Input/Output System) ■ 64-bit Device drivers ■ 64-bit applications Certain device drivers and/or applications may automatically shutdown. ...
...specific computer model please refer to design configuration. CPU performance may also vary from specifications due to your computer documentation or visit the TOSHIBA website at high altitude (all temperature references are approximate and may be used outside the range of 5°C to 30°C...for more information. 64-Bit Computing. 64-bit processors are met: ■ 64-bit Operating System ■ 64-bit CPU, Chipset and BIOS (Basic Input/Output System) ■ 64-bit Device drivers ■ 64-bit applications Certain device drivers and/or applications may automatically shutdown. ...

User Manual
Page 179
...: American National Standards Institute APM: advanced power manager ASCII: American Standard Code for reference. Alternate naming is included for Information Interchange BIOS: basic input output system CD-ROM: Compact Disc-Read Only Memory CD-RW: Compact Disc-Read/Write CMOS: complementary metal-oxide...I/O: input/output IrDA: Infrared Data Association IRQ: interrupt request KB: kilobyte LCD: liquid crystal display User's Manual Glossary-1 TOSHIBA Satellite U300 / Satellite Pro U300 / PORTEGE M600 / TECRA M8 Series Glossary The terms in this glossary cover topics related to this manual.
...: American National Standards Institute APM: advanced power manager ASCII: American Standard Code for reference. Alternate naming is included for Information Interchange BIOS: basic input output system CD-ROM: Compact Disc-Read Only Memory CD-RW: Compact Disc-Read/Write CMOS: complementary metal-oxide...I/O: input/output IrDA: Infrared Data Association IRQ: interrupt request KB: kilobyte LCD: liquid crystal display User's Manual Glossary-1 TOSHIBA Satellite U300 / Satellite Pro U300 / PORTEGE M600 / TECRA M8 Series Glossary The terms in this glossary cover topics related to this manual.

User Manual
Page 181
... a value of 1, the next a value of files kept as a single unit; B backup: A duplicate copy of 2, then 4, 8, 16, and so on ), used by most digital computers. BIOS: Basic Input Output System. It is one device to describe the data transmission speed of information used by the computer. board: A circuit board. The program...
... a value of 1, the next a value of files kept as a single unit; B backup: A duplicate copy of 2, then 4, 8, 16, and so on ), used by most digital computers. BIOS: Basic Input Output System. It is one device to describe the data transmission speed of information used by the computer. board: A circuit board. The program...

Maintenance Manual
Page 4
... describes the Satellite U300 and Satellite Pro U300 system unit and each FRU. The manual is divided into the following : ‰ Handling the LCD Module ‰ Board layout ‰ Pin assignments ‰ Keyboard scan/character codes ‰ Key layout ‰ Wiring diagrams ‰ BIOS Rewrite Procedures ‰ EC/KBC Rewrite Procedures ‰ Reliability 4 Satellite U300 and Satellite Pro U300 Maintenance Manual...
... describes the Satellite U300 and Satellite Pro U300 system unit and each FRU. The manual is divided into the following : ‰ Handling the LCD Module ‰ Board layout ‰ Pin assignments ‰ Keyboard scan/character codes ‰ Key layout ‰ Wiring diagrams ‰ BIOS Rewrite Procedures ‰ EC/KBC Rewrite Procedures ‰ Reliability 4 Satellite U300 and Satellite Pro U300 Maintenance Manual...

Maintenance Manual
Page 12
Appendices Appendix A Handling the LCD Module A-1 Appendix B Board Layout B-1 Appendix C Pin Assignments C-1 Appendix D Keyboard Scan/Character Codes D-1 Appendix E Key Layout...E-1 Appendix F Wiring Diagrams F-1 Appendix G BIOS Rewrite Procedures G-1 Appendix H EC/KBC Rewrite Procedures H-1 Appendix I Reliability...I-1 12 Satellite U300 and Satellite Pro U300 Maintenance Manual (960-Q08)
Appendices Appendix A Handling the LCD Module A-1 Appendix B Board Layout B-1 Appendix C Pin Assignments C-1 Appendix D Keyboard Scan/Character Codes D-1 Appendix E Key Layout...E-1 Appendix F Wiring Diagrams F-1 Appendix G BIOS Rewrite Procedures G-1 Appendix H EC/KBC Rewrite Procedures H-1 Appendix I Reliability...I-1 12 Satellite U300 and Satellite Pro U300 Maintenance Manual (960-Q08)

Maintenance Manual
Page 25
Chapter 1 Hardware Overview • 200-pin SO-DIMM • 1.8V operation • PC2 5300 support/PC2 θ BIOS ROM (Flash memory) • 8Mbit θ Chipset (Santa Rosa Platform) This gate array has the following elements and functions. • North Bridge (Intel GM965/GL960) &#... 2.0 − High Definition Audio Controller − 676-pin 31mmx31mm mBGA Package θ Chipset (NAPA Platform) This gate array has the following elements and functions. 8Satellite U300 and Satellite Pro U300Maintenance Manual(960-Q02)
Chapter 1 Hardware Overview • 200-pin SO-DIMM • 1.8V operation • PC2 5300 support/PC2 θ BIOS ROM (Flash memory) • 8Mbit θ Chipset (Santa Rosa Platform) This gate array has the following elements and functions. • North Bridge (Intel GM965/GL960) &#... 2.0 − High Definition Audio Controller − 676-pin 31mmx31mm mBGA Package θ Chipset (NAPA Platform) This gate array has the following elements and functions. 8Satellite U300 and Satellite Pro U300Maintenance Manual(960-Q02)

Maintenance Manual
Page 53
...computer to malfunction. The implement for displaying debug port test result Satellite U300 and Satellite Pro U300 Maintenance Manual (960-Q08) 1 LAN 11. Wireless LAN 12. Also update with the latest BIOS as described in Appendix G "BIOS Rewrite Procedures" After replacing the LCD, update with debug port ...Board 14, Bluetooth The Test Program operations are : 1. Phillips screwdrivers (For replacement procedures) 2. Implements for debugging port check • Toshiba MS-DOS system FD • RS-232C cross cable • Test board with the latest EC/KBC as described in Appendix H "...
...computer to malfunction. The implement for displaying debug port test result Satellite U300 and Satellite Pro U300 Maintenance Manual (960-Q08) 1 LAN 11. Wireless LAN 12. Also update with the latest BIOS as described in Appendix G "BIOS Rewrite Procedures" After replacing the LCD, update with debug port ...Board 14, Bluetooth The Test Program operations are : 1. Phillips screwdrivers (For replacement procedures) 2. Implements for debugging port check • Toshiba MS-DOS system FD • RS-232C cross cable • Test board with the latest EC/KBC as described in Appendix H "...
Maintenance Manual
Page 67
... the RTC memory (CMOS type memory) is not the same as the message instructs. Then press [F1] key ...... (g) *** Bad check sum (ROM) *** Check system. Satellite U300 and Satellite Pro U300 Maintenance Manual (960-Q08) 15 PRESS ANY KEY TO CONTINUE. Then press [F1] key ...... (b) *** Bad RTC battery *** Check system. Then press [F1] key ...... ... (c) *** Bad configuration *** Check system. Then press [F1] key ...... (e) *** Bad time function *** Check system. The following error message appears when data stored in the BIOS ROM. Go to Procedure 3.
... the RTC memory (CMOS type memory) is not the same as the message instructs. Then press [F1] key ...... (g) *** Bad check sum (ROM) *** Check system. Satellite U300 and Satellite Pro U300 Maintenance Manual (960-Q08) 15 PRESS ANY KEY TO CONTINUE. Then press [F1] key ...... (b) *** Bad RTC battery *** Check system. Then press [F1] key ...... ... (c) *** Bad configuration *** Check system. Then press [F1] key ...... (e) *** Bad time function *** Check system. The following error message appears when data stored in the BIOS ROM. Go to Procedure 3.

Maintenance Manual
Page 69
... different. NOTE: The following is shown below. Their actual order as executed during warm boot 13h Initialize PCI Bus Mastering devices Satellite U300 and Satellite Pro U300 Maintenance Manual (960-Q08) 17 2 Troubleshooting Procedures Procedure 2 Debugging Port Check Check the MiniPCI Debug board. The tool for...Initialize the local bus IDE 10h Initialize Power Management 11h Load alternate registers with Wireless LAN card, check LED in the BIOS code. Code Beeps POST Routine Description 02h Verify Real Mode 03h Disable Non-Maskable Interrupt (NMI) 04h Get CPU type...
... different. NOTE: The following is shown below. Their actual order as executed during warm boot 13h Initialize PCI Bus Mastering devices Satellite U300 and Satellite Pro U300 Maintenance Manual (960-Q08) 17 2 Troubleshooting Procedures Procedure 2 Debugging Port Check Check the MiniPCI Debug board. The tool for...Initialize the local bus IDE 10h Initialize Power Management 11h Load alternate registers with Wireless LAN card, check LED in the BIOS code. Code Beeps POST Routine Description 02h Verify Real Mode 03h Disable Non-Maskable Interrupt (NMI) 04h Get CPU type...
Maintenance Manual
Page 70
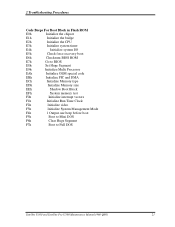
... CPU bus-clock frequency 33h Initialize Phoenix Dispatch Manager 36h Warm start shut down 38h Shadow system BIOS ROM 3Ah Autosize cache 3Ch Advanced configuration of chipset registers 3Dh Load alternate registers with CMOS values 42h...and devices 4Ah Initialize all video adapters in system 4Bh QuietBoot start (optional) 4Ch Shadow video BIOS ROM 4Eh Display BIOS copyright notice 50h Display CPU type and speed 51h Initialize EISA board 52h Test keyboard 54h ...62h Test extended memory address lines 18 Manual(960-Q08) Satellite U300 and Satellite Pro U300 Maintenance
... CPU bus-clock frequency 33h Initialize Phoenix Dispatch Manager 36h Warm start shut down 38h Shadow system BIOS ROM 3Ah Autosize cache 3Ch Advanced configuration of chipset registers 3Dh Load alternate registers with CMOS values 42h...and devices 4Ah Initialize all video adapters in system 4Bh QuietBoot start (optional) 4Ch Shadow video BIOS ROM 4Eh Display BIOS copyright notice 50h Display CPU type and speed 51h Initialize EISA board 52h Test keyboard 54h ...62h Test extended memory address lines 18 Manual(960-Q08) Satellite U300 and Satellite Pro U300 Maintenance

Maintenance Manual
Page 71
... Area Enable Non-Maskable Interrupts (NMIs) Initialize Extended BIOS Data Area Test and initialize PS/2 mouse Initialize floppy controller (optional) Determine number of ATA drives (optional) Initialize hard-disk controllers Initialize local-bus hard-...) 9Eh Enable hardware interrupts 9Fh Determine number of ATA and SCSI drives A0h Set time of day A2h Check key lock A4h Initialize Typematic rate Satellite U300 and Satellite Pro U300 Maintenance Manual (960-Q08) 19
... Area Enable Non-Maskable Interrupts (NMIs) Initialize Extended BIOS Data Area Test and initialize PS/2 mouse Initialize floppy controller (optional) Determine number of ATA drives (optional) Initialize hard-disk controllers Initialize local-bus hard-...) 9Eh Enable hardware interrupts 9Fh Determine number of ATA and SCSI drives A0h Set time of day A2h Check key lock A4h Initialize Typematic rate Satellite U300 and Satellite Pro U300 Maintenance Manual (960-Q08) 19
Maintenance Manual
Page 73
... chipset E1h Initialize the bridge E2h Initialize the CPU E3h Initialize system timer E4h Initialize system I/O E5h Check force recovery boot E6h Checksum BIOS ROM E7h Go to BIOS E8h Set Huge Segment E9h Initialize Multi Processor EAh Initialize OEM special code EBh Initialize PIC and DMA ECh Initialize Memory type EDh... F3h Initialize System Management Mode F4h 1 Output one beep before boot F5h Boot to Mini DOS F6h Clear Huge Segment F7h Boot to Full DOS Satellite U300 and Satellite Pro U300 Maintenance Manual (960-Q08) 21
... chipset E1h Initialize the bridge E2h Initialize the CPU E3h Initialize system timer E4h Initialize system I/O E5h Check force recovery boot E6h Checksum BIOS ROM E7h Go to BIOS E8h Set Huge Segment E9h Initialize Multi Processor EAh Initialize OEM special code EBh Initialize PIC and DMA ECh Initialize Memory type EDh... F3h Initialize System Management Mode F4h 1 Output one beep before boot F5h Boot to Mini DOS F6h Clear Huge Segment F7h Boot to Full DOS Satellite U300 and Satellite Pro U300 Maintenance Manual (960-Q08) 21

Maintenance Manual
Page 74
... Test Program Execution Check Execute the following the steps described in Chapter 4, Replacement Procedures and replace system board with a new one. 22 Manual(960-Q08) Satellite U300 and Satellite Pro U300 Maintenance Keyboard test 4. Display test 5. Hard Disk test 9. CPU Temperature test 10. Procedure 4 Replacement Check System board may be faulty. VGA Memory test...
... Test Program Execution Check Execute the following the steps described in Chapter 4, Replacement Procedures and replace system board with a new one. 22 Manual(960-Q08) Satellite U300 and Satellite Pro U300 Maintenance Keyboard test 4. Display test 5. Hard Disk test 9. CPU Temperature test 10. Procedure 4 Replacement Check System board may be faulty. VGA Memory test...

Maintenance Manual
Page 81
...this message will disappear.) Check 2 If either of the MS-DOS, transfer the system to the 2.5" HDD. Insert system disk in the BIOS ROM. If the following message appears on , the system performs the Initial Reliability Test (IRT) installed in drive Press any key when ready ... Refer to the MS-DOS Manual for disassembling.). or Non-System disk or disk error Replace and press any key when ready ..... Satellite U300 and Satellite Pro U300 Maintenance Manual (960-Q08) 29 If it is displayed on the screen. 2 Troubleshooting Procedures Procedure 2 Message Check When the power ...
...this message will disappear.) Check 2 If either of the MS-DOS, transfer the system to the 2.5" HDD. Insert system disk in the BIOS ROM. If the following message appears on , the system performs the Initial Reliability Test (IRT) installed in drive Press any key when ready ... Refer to the MS-DOS Manual for disassembling.). or Non-System disk or disk error Replace and press any key when ready ..... Satellite U300 and Satellite Pro U300 Maintenance Manual (960-Q08) 29 If it is displayed on the screen. 2 Troubleshooting Procedures Procedure 2 Message Check When the power ...

Maintenance Manual
Page 168
... CONFIGURATION : * - MAC ADDRESS : XXXXXXXXXXXX * - 0 ASYNC ADAPTER * - 1 HDD DRIVE(S):XXXXXXXXXXXXXXXXXXXXXXXXXX FW Rev.:XXXXXXXX CUR LBA:XXXXXXXX ORG LBA:XXXXXXXX * - BIOS VER = VX.XX KBC VER = XXXX * - Test Program for Field. 3.19 System Configuration Select 05 from the Diagnostics Menu and press Enter to the Diagnostics Menu. 64 Satellite U300 and Satellite Pro U300 Tests and Diagnostics Manual
... CONFIGURATION : * - MAC ADDRESS : XXXXXXXXXXXX * - 0 ASYNC ADAPTER * - 1 HDD DRIVE(S):XXXXXXXXXXXXXXXXXXXXXXXXXX FW Rev.:XXXXXXXX CUR LBA:XXXXXXXX ORG LBA:XXXXXXXX * - BIOS VER = VX.XX KBC VER = XXXX * - Test Program for Field. 3.19 System Configuration Select 05 from the Diagnostics Menu and press Enter to the Diagnostics Menu. 64 Satellite U300 and Satellite Pro U300 Tests and Diagnostics Manual

Maintenance Manual
Page 219
...with a new system board, execute the subtest01 Initial configuration in Appendix H "EC/KBC Rewrite Procedures". Also update with the latest BIOS as described in section 3.3 "Setting of the hardware configuration". Do not touch the printed circuit face. 2. Disconnect the power cable...screws securing the system board and remove the system board. (See Figure 4-26) • M2.0×5.0 BIND screw x3 44Satellite U300 and Satellite Pro U300 Maintenance Manual (960-Q08) Remove the following describes the procedure for removing the system board. 1. When handling the system board, always...
...with a new system board, execute the subtest01 Initial configuration in Appendix H "EC/KBC Rewrite Procedures". Also update with the latest BIOS as described in section 3.3 "Setting of the hardware configuration". Do not touch the printed circuit face. 2. Disconnect the power cable...screws securing the system board and remove the system board. (See Figure 4-26) • M2.0×5.0 BIND screw x3 44Satellite U300 and Satellite Pro U300 Maintenance Manual (960-Q08) Remove the following describes the procedure for removing the system board. 1. When handling the system board, always...


